Got the car out of storage, took it home, and changed the oil. No issues.
Consumables
(2) 4 Quart 20W-50 Castrol Oil
Bosch oil filter (on hand)
Got the car out of storage, took it home, and changed the oil. No issues.
Consumables
(2) 4 Quart 20W-50 Castrol Oil
Bosch oil filter (on hand)
One night, I discovered that my radiator fans weren’t running, and watched my temperature gauge slowly climb. I pulled over, and shut off the engine.
I got the car home after traffic died down. I started all the basic fan troubleshooting and I couldn’t get the fans to run. I disconnected the fans, removed the battery, and wired the battery directly to the fans with some scrap 14 gauge wire, and the needed molex connector. Fans spun up.

So I went back to the circuit breaker. I’ve been following this diagram with the cooling fan breaker on the left. I shorted the right breaker for a moment, and the fans spun up. So I finally figured out that a previous owner installed the fan breaker in the wrong position.
I had a hunch it was the breaker all along, and I bought a spare 40amp breaker earlier in the week. I installed the new one, and it seems to be working correctly.
Costs:
Molex Connectors: $2.59 at Frys
Bussman 40 amp Circuit Breaker: $2.99 at Autozone
My new favorite cleaner:

No streaks, and shinier than Windex.
Costs:
Magic Stainless Steel: $4.49 plus tax @ Menards
I didn’t get any work done on my car this year. I mainly observed and helped others when I could.
Welded torsion bar:
Custom speakers:

Some of the cars in the parking lot. My car on the far right:

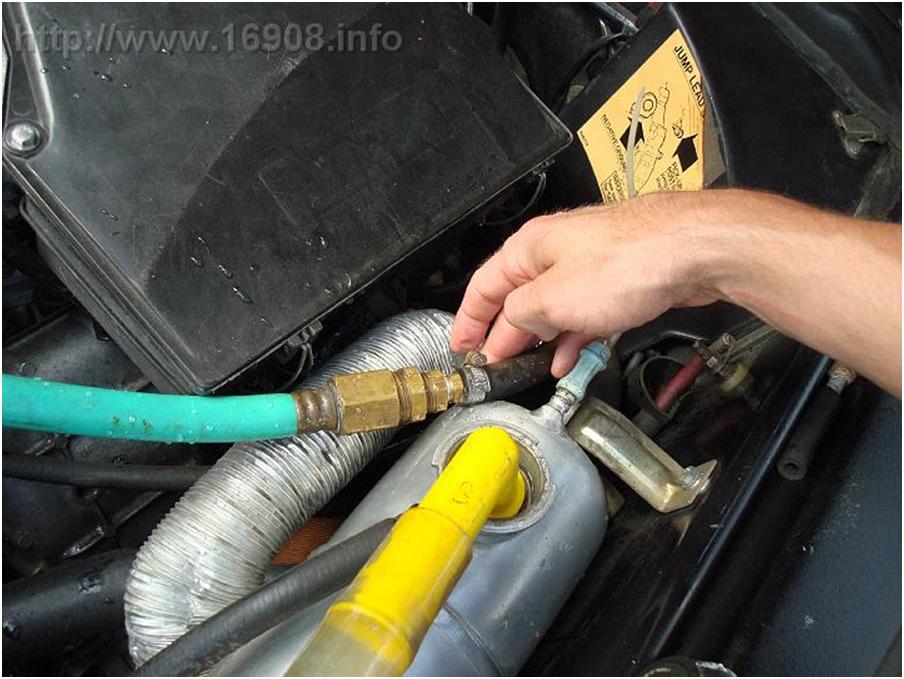
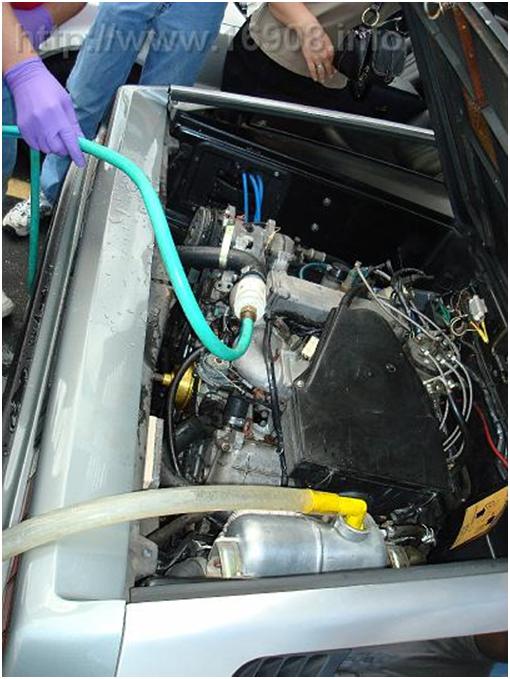
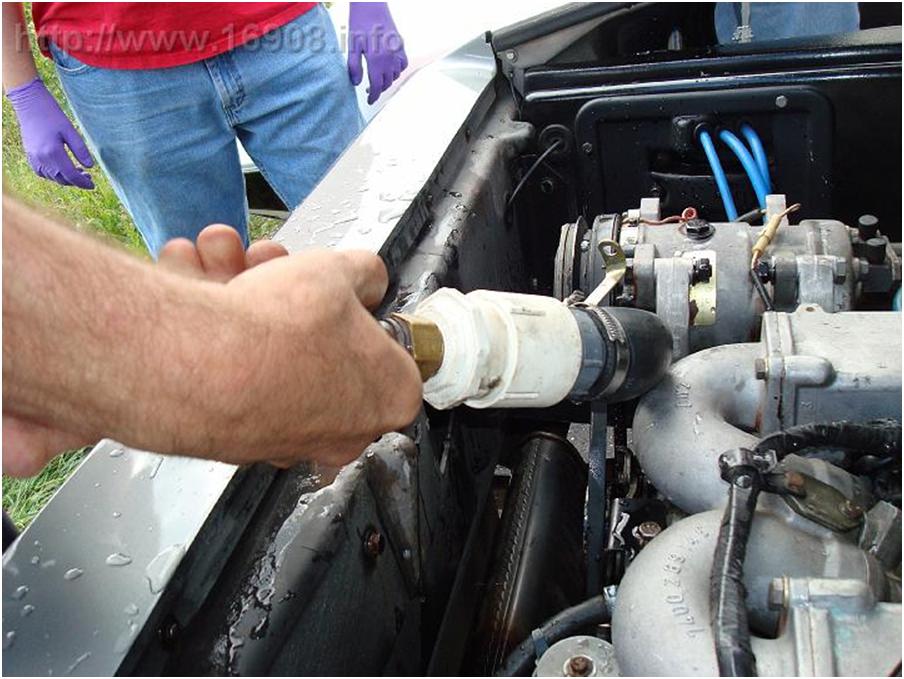
Coolant flush:


 \
\

The stock side mirrors in the DeLorean are flat, where modern day mirrors are convex. Convex safety mirrors help to reduce dangers caused by your blind spot when passing and changing lanes on the road.
Someone in my online forum got the company Multivex to give us group pricing if we ordered enough. I threw my money in. A few weeks later they arrived: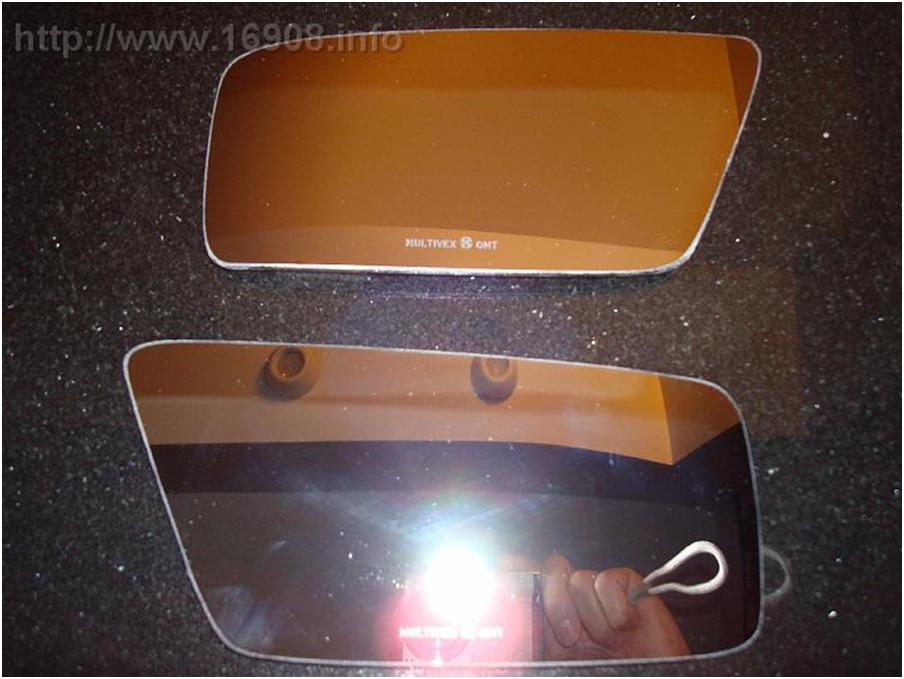
They are mounted to the existing mirrors with some strong double stick foam tape.
Before:

After:
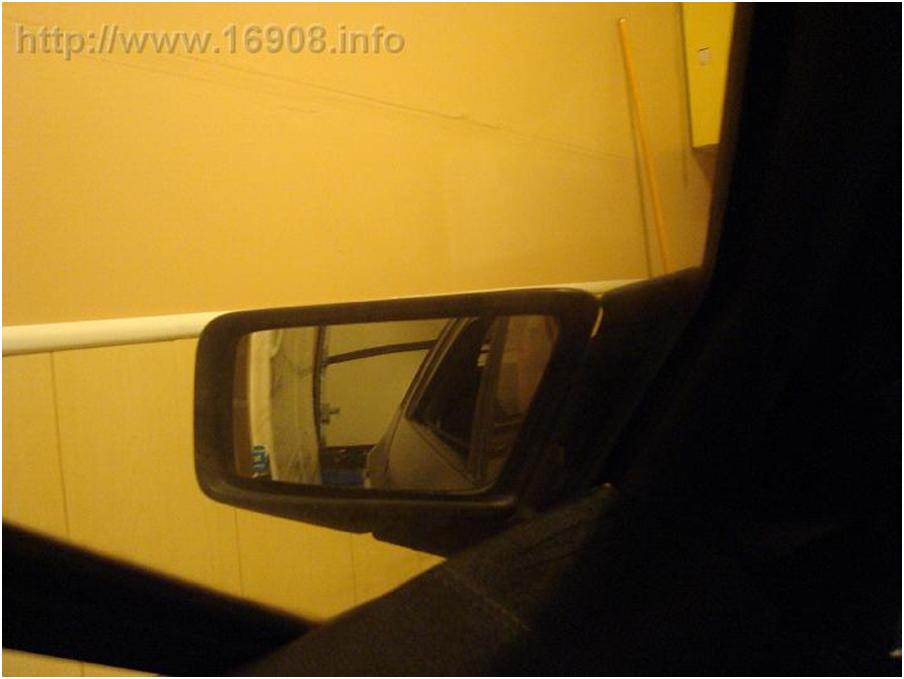
Before I could only see the garage door, and a small portion of the wall. Now I can see a lot more of the wall.
Costs:
Multivex Mirrors: $74.00 (after group discount, includes shipping)
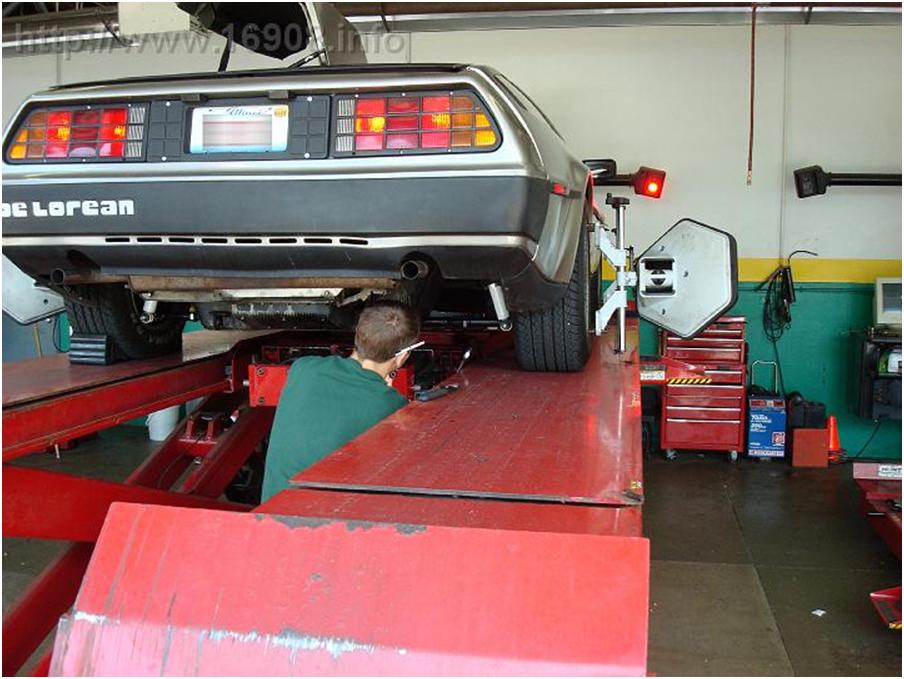
With the new rear adjustable lower links, I could see the camber was way off on the rear tires. I already knew the alignment was off from my last visit to Just Tires. I scheduled another day off, and took my car back. With the new links, I knew I’d get everything straight. I brought along my offset wrench and my 11/16ths torque adapter for those pesky trailing arm bolts (pesky because the auto transmission is in the way).
Same manager, same technician. They let me hang out and watch everything. I told the tech about how I replaced the lower links myself, and the TABs. I let him know the torque specs for the TABs. When he went to loosen the TABs, he said “Oh, this is a 12 point head…” I let him know that my wrench would probably work best, so he used it. He ended up removing 2 shims on each TAB. When it came time to torque the TAB, he said he probably had a torque adapter he could use. Then he couldn’t find one, so he used mine.
Adjusting the lower links:
A really nice 1970s Chevelle showed up for an alignment. The owner and I talked for awhile about our cars. He said this shop was recommended to him.
I’m very pleased. My invoice shows I got a discount on labor!
Supplies Used:
19mm Offset Wrench
11/16ths Torque Adapter
Workshop Manual Section K (Rear Suspension)
Costs
4 Wheel Alignment: $60.00 @ Just Tires – Wheaton, IL (After $39.95 Labor Discount)
http://www.july4thcarshow.com/
Woodridge Police Department and the Chicagoland Chapter GSCA present
THE 15th ANNUAL GORILLA DAYS CAR SHOW
Friday, JULY 4, 2008 – NOON until 4 P.M.
|
Wilton Industries |
Directions: · Turn right at 1st driveway before the McDonalds |
This is within walking distance of my house. I’ll be there with VIN 16908 as long as it doesn’t rain!
The stock Trailing Arm Bolts (or TABs) are prone to bending, and eventually breaking over time. The solution is to replace them with Toby TABs made from Inconel 718 from DeLorean Parts Northwest. Here’s some of the history behind their development.
This is a nickle-based super-alloy. “Inconel 718 also has a very high fracture toughness, which means that it is very difficult to initiate and propagate a crack. It’s virtually corrosion proof, non-magnetic, and is used in the aerospace industry whenever a failure is absolutely not acceptable (engine mounts, landing gear, and wing attachments, to name a few).”
DMCNews.com has some information (with pictures) about TABs here.
Let’s get started. Supplies used:
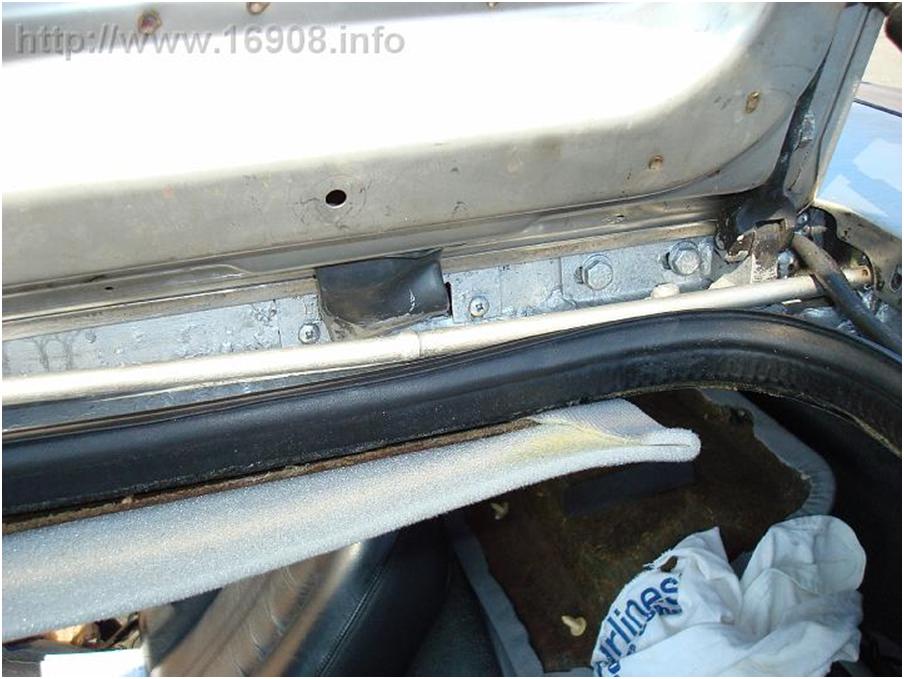
This process of replacing the bolts is relatively easy if you have a manual transmission. I took the following picture from under a lift. Here’s what that area of the frame looks like on a manual car: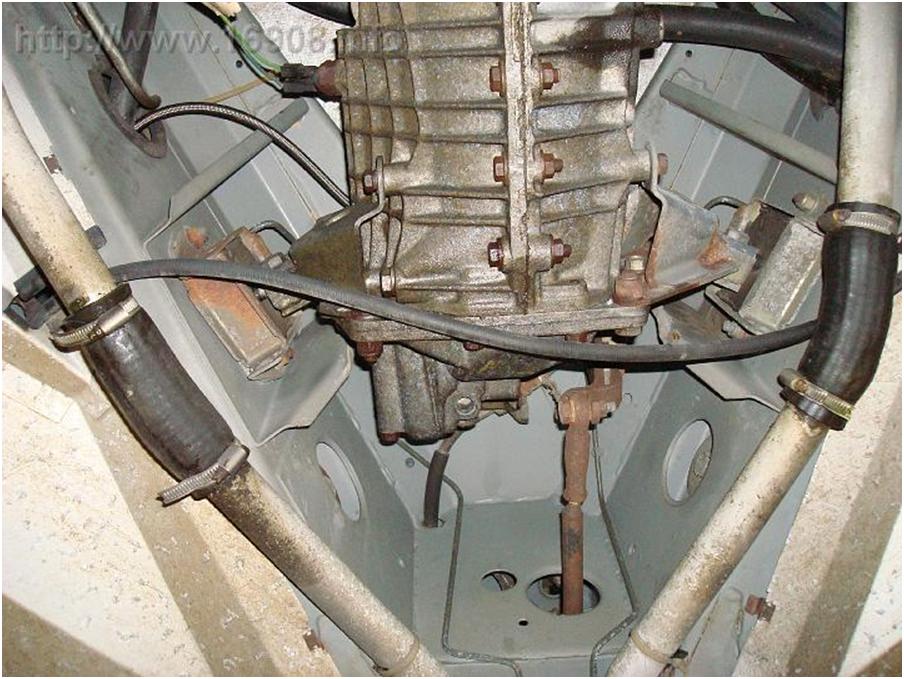
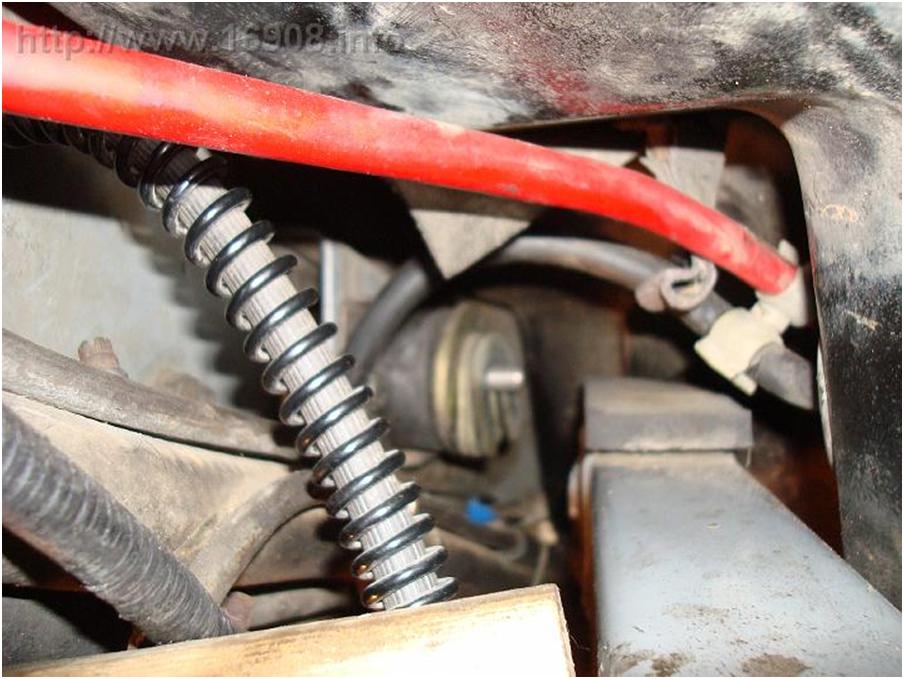
Nice and clean, eh? Alright, here’s the best picture I could get of the same area on my car: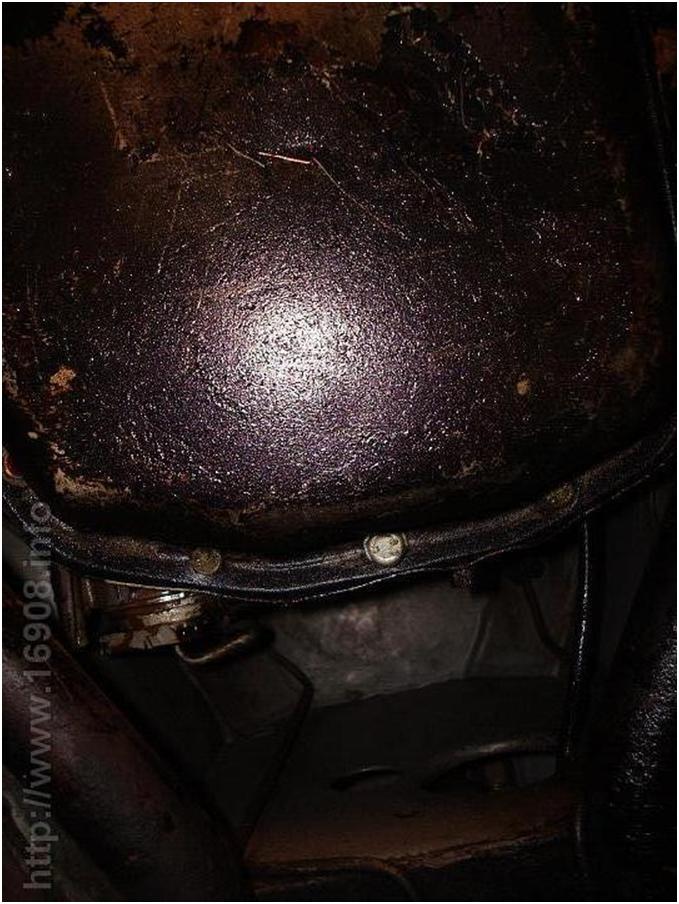
You can see the big ol’ honkin’ automatic transmission almost touches the coolant pipes, and you don’t have access to the nice holes in the frame where the heads of the bolts are located. Argh. Alright, after reading probably every TAB thread on the DML and DMCTalk, I’ve figured out:
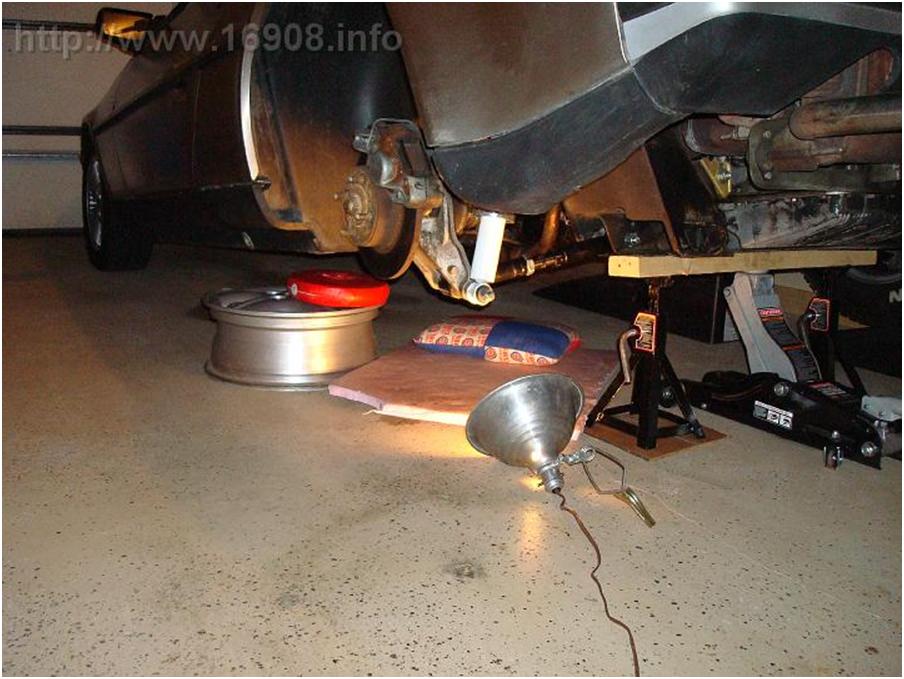
I don’t have a lift, or a mechanics pit. I have a single car garage, with barely enough room to work. I don’t have a creeper. I can’t get the car higher than 15 inches at the frame with my jack. Maybe worst of all, I don’t have anyone to help me with this job.
Here I go. Jack up the car using the proper procedures, put it on jack stands, and leave the jack in place. Choked the wheels with new wheel chokes. I also used a ramp and 10 lb weights on the driver’s side under the underbody, and an alloy wheel and 10 lb weights on the passenger side under the underbody. There’s about a half inch gap between the underbody and the weights. If the car should fall, this assorted stuff will support it. It gets in the way a lot, but I’m not taking chances… I’m very afraid of the car falling on me. Also notice my foam insulation that I lay on.

I got a set of metric offset wrenches from AutoZone for this next part: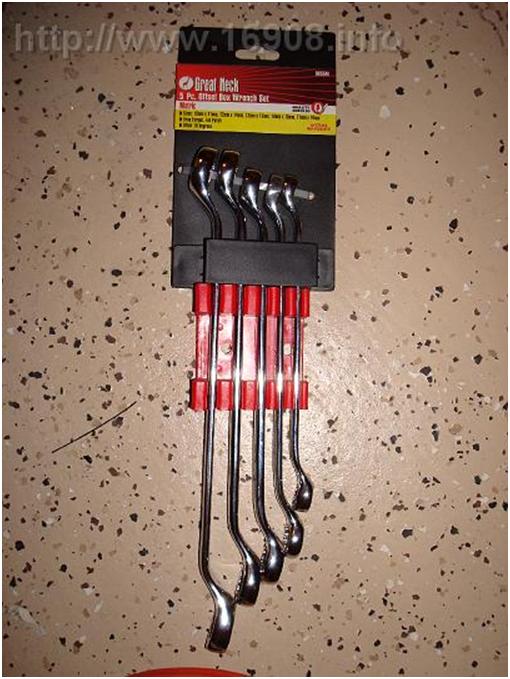
I used the offset wrench to hold the head of the bolt, while removing the nut. I struggled to remove the bolt from the trailing arm. Finally I used a flat screwdriver to push on the threads of the bolt. Once it was out of the trailing arm, I pushed the bolt back into position, with the trailing arm below the bolt. I started removing the plate that holds the bushing in place:
After I struggled with the reinforcing plate bolts for a few hours, I finally got it off! The bolt is free! Here’s what all this stuff looks like: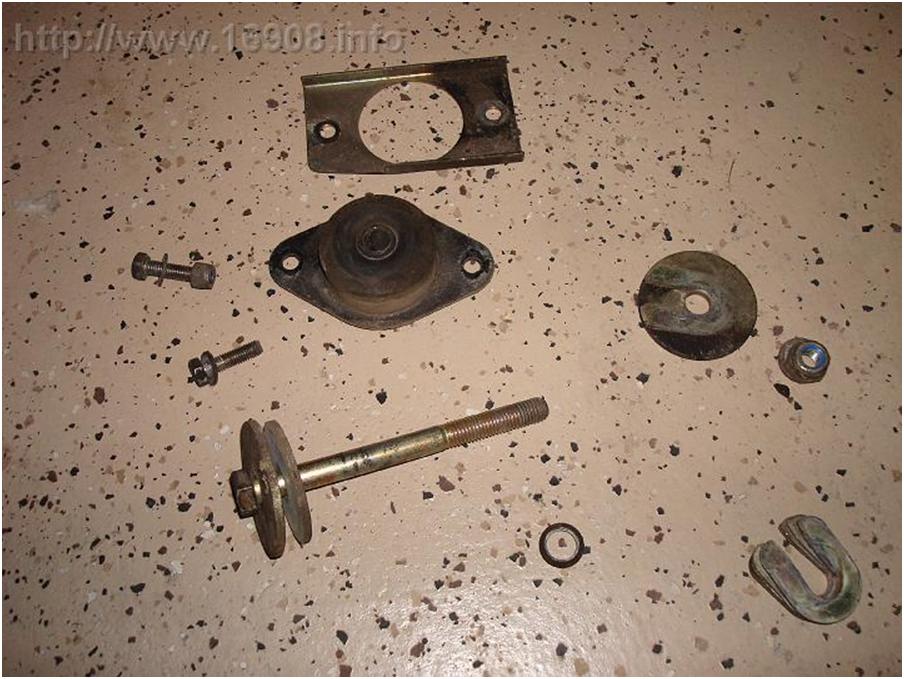
I lost a jam nut, but found it a few days later. Which brings me to:
Helpful Tip #1: Tape the ends of the recessed are of the frame. The jam nuts will fall and roll out unless you’ve got something to catch them. The tape will catch them.
Here’s the moment of truth. Take a close look! All my effort was not in vain! The stock TAB is bent!!!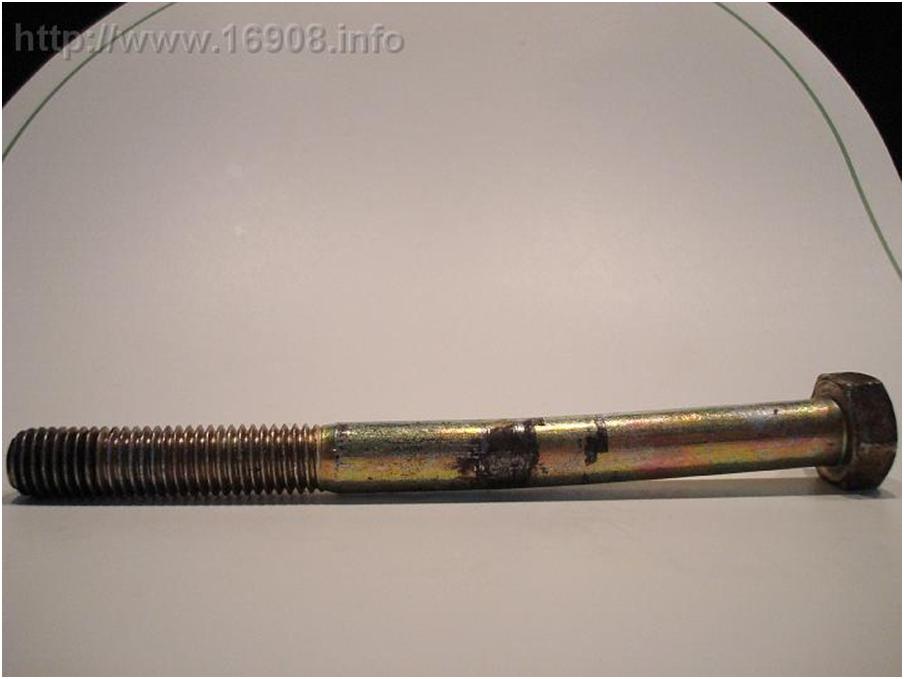
I cleaned the parts, used some silicone lubricant to “treat” the bushing, and some anti-seize on the bolt. Here are all the pieces cleaned, ready for assembly: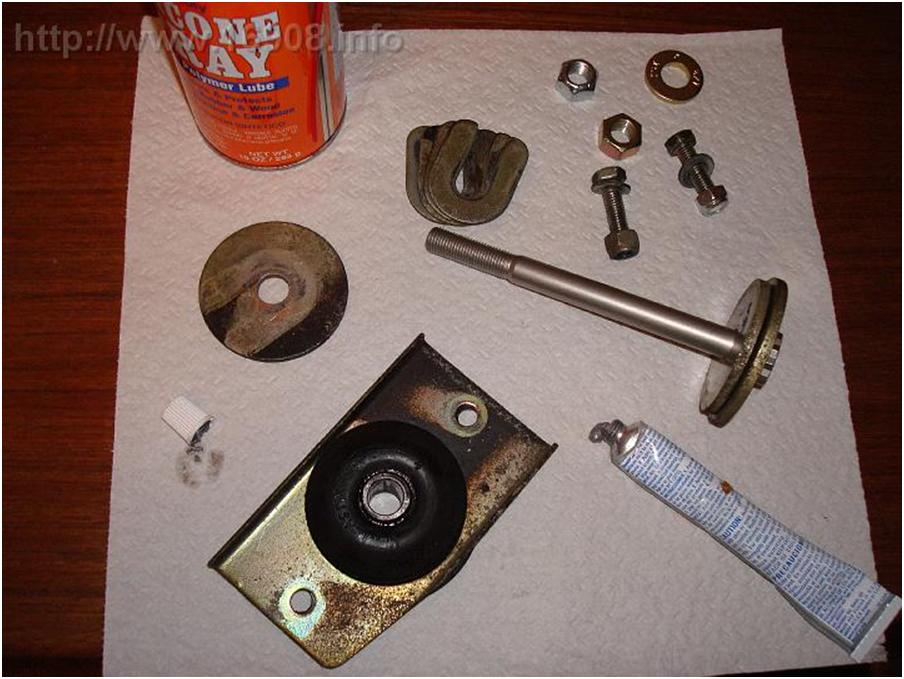
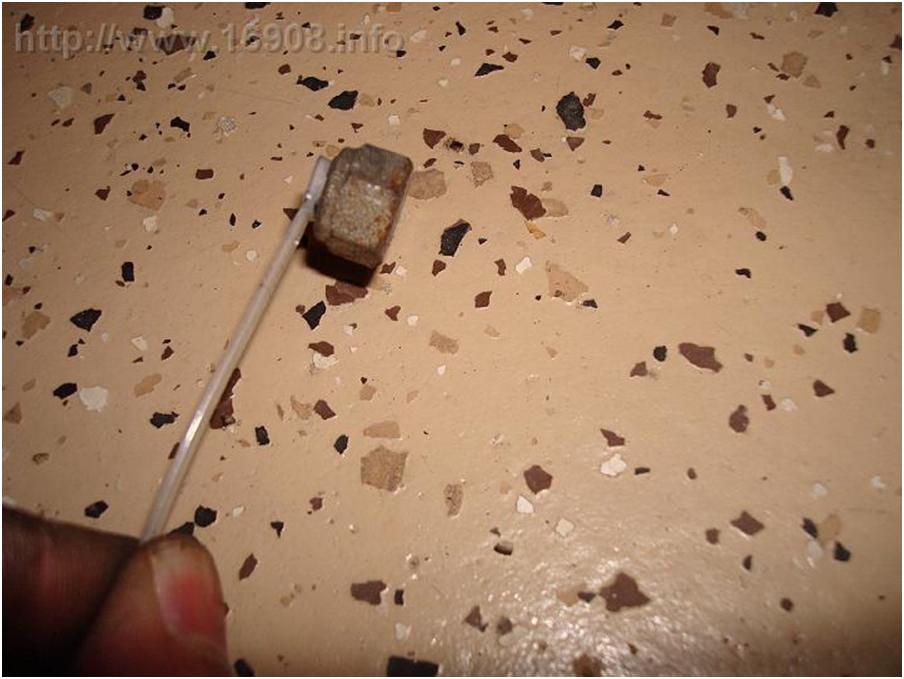
Now, I thought of a way I could hold the jam nuts in place, in such a difficult, small area.
Helpful Tip #2: Hammer the end of a small wire tie into the lock nut: The wire tie is small enough, and flexible enough to fit into the recessed area of the frame. Once the bolt catches the nut, rip the wire tie out.
Helpful Tip #3: Don’t use a closed end combination wrench on the 13mm nuts. You won’t be able to get the wrench off once the bolt is in. Use an open end combination wrench.
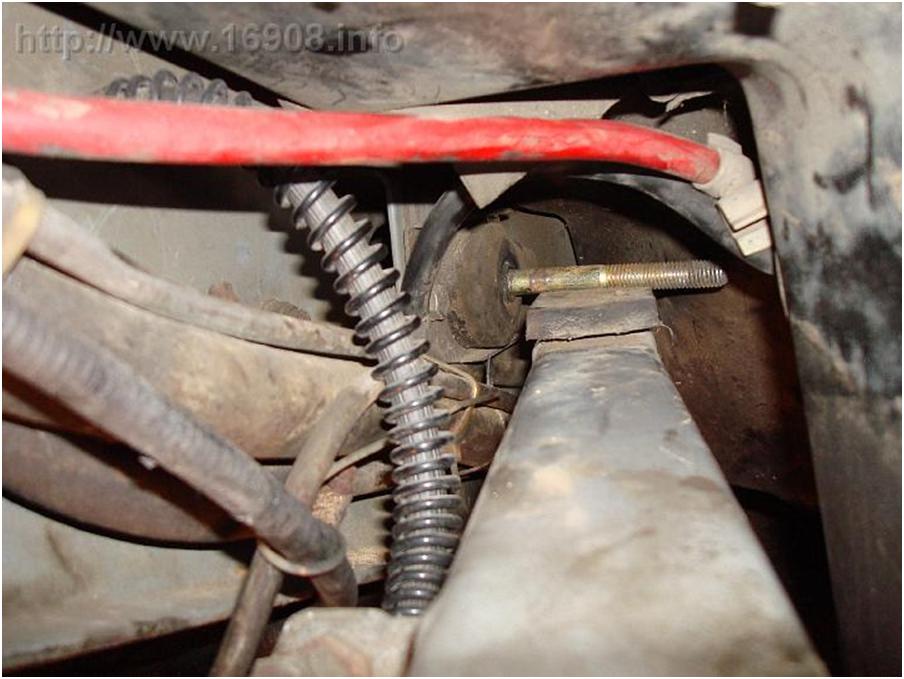
Once I got the retaining plate mounted, I struggled to reinsert the bolt into the trailing arm. The mess of cables and hoses on the driver’s side makes everything more difficult:
I realized the trailing arm was in a position that made this task impossible. So I figured out…
Helpful Tip #4: Jack up the hub carrier about ¼ to ½ inch for bolt removal and reinsertion.
Once the trailing arm was positioned better, the bolt slid in easily: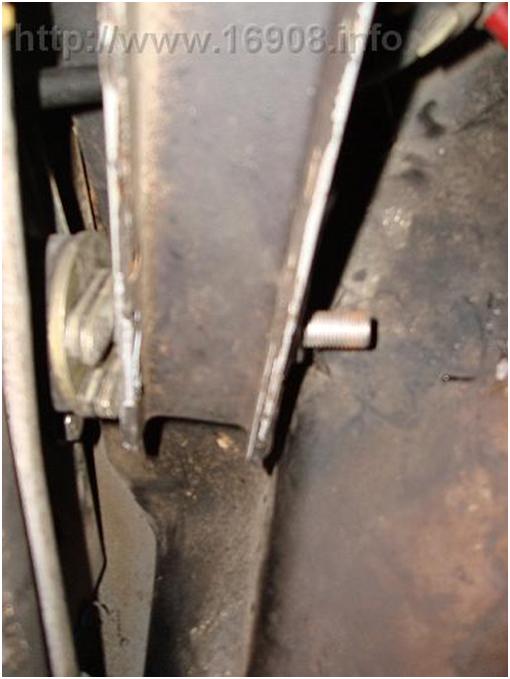
The threaded ends on Toby TABs are tapered down to 18mm. The space is too tight to fit a ratchet and socket. I found an 11/16ths is a good match for 18mm, so I purchased an 11/16ths torque adapter specifically for this job: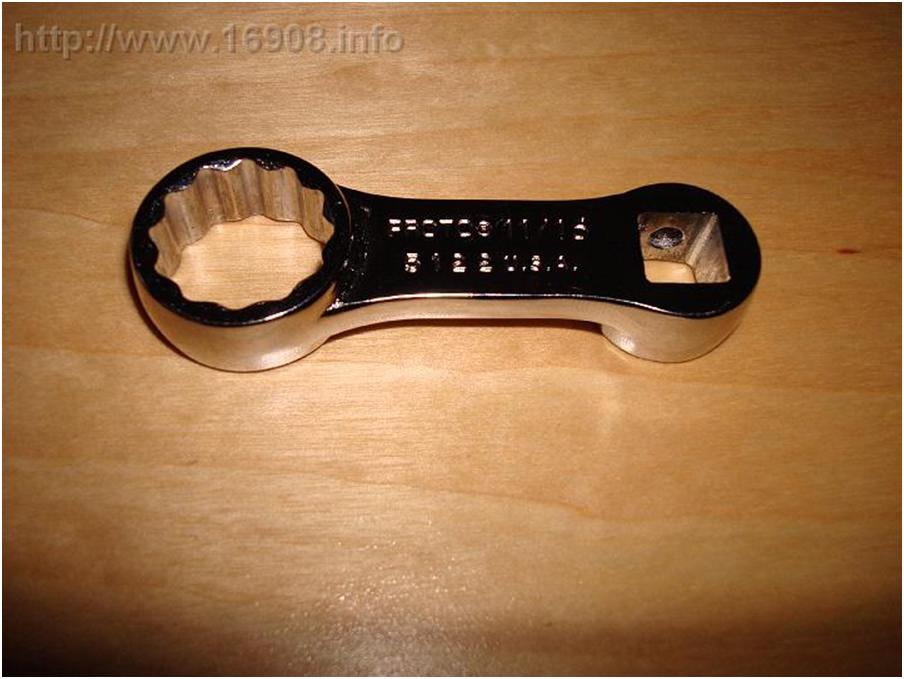
I used it with a ratchet to snug up the bolt
Helpful Tip #5: Use a 18mm Ratcheting Combination Wrench for this job: 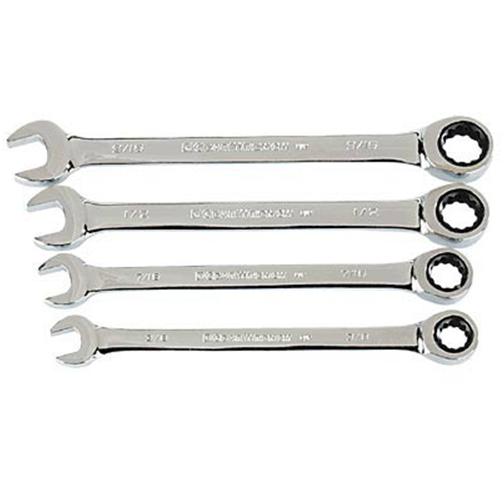
I should have bought one, but I made due with the constant turning of the torque adapter. My arms are tired…
Holding the head of the bolt with the offset 19mm wrench:
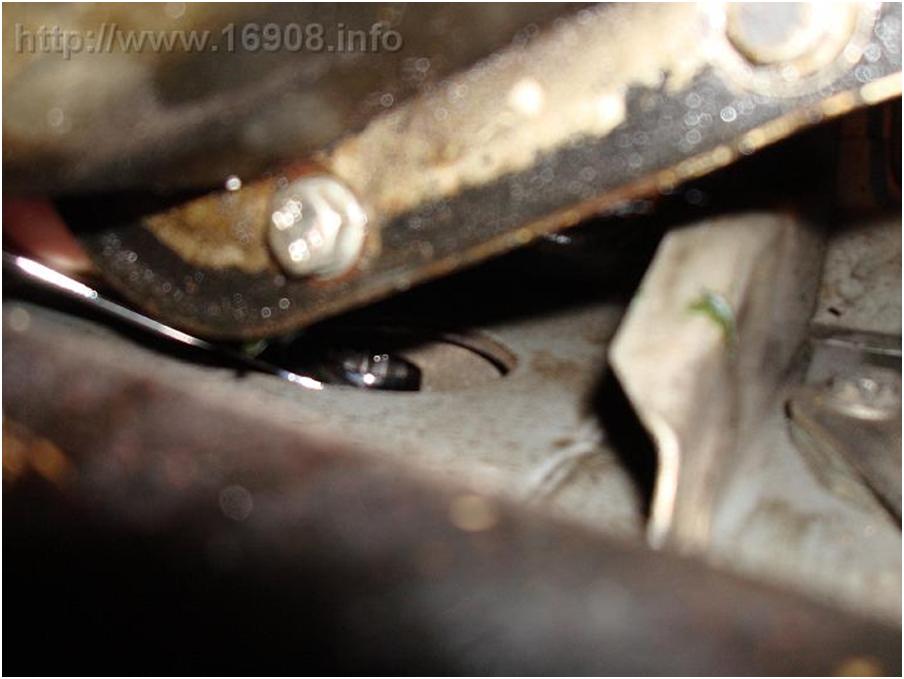
Tightening the nut with the ratchet and torque adapter: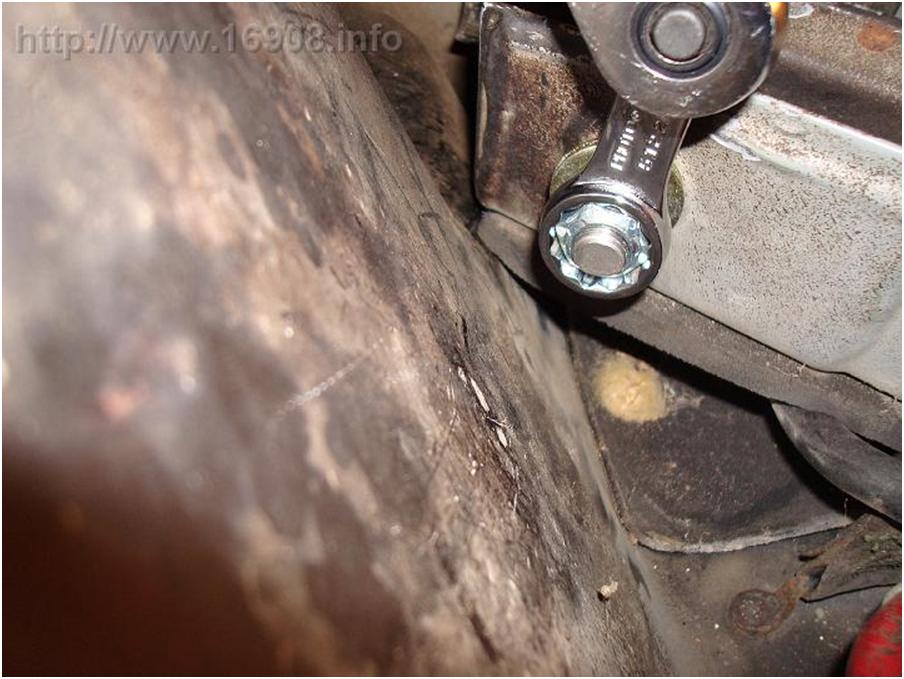
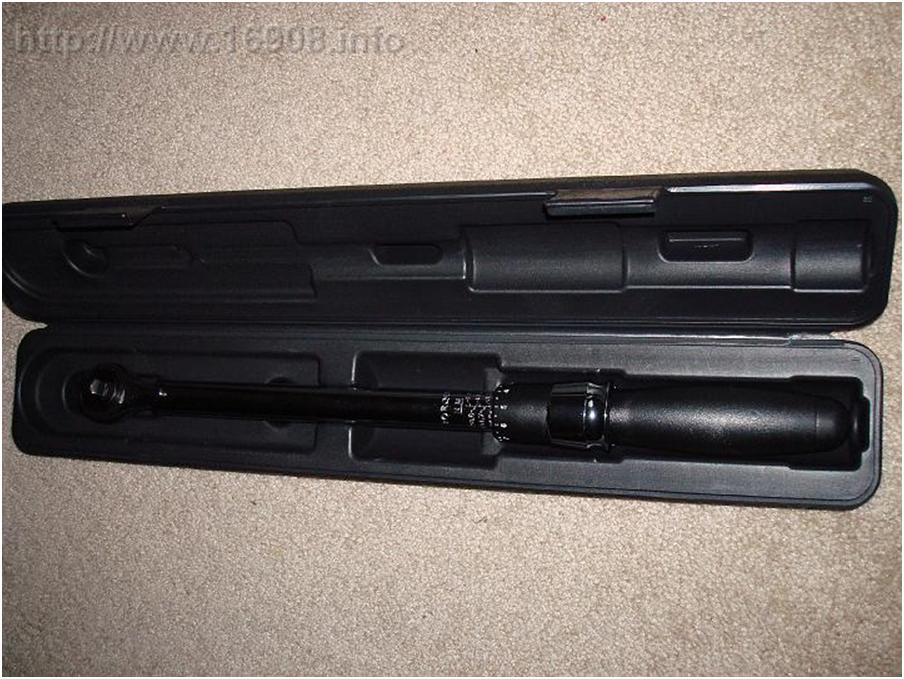
You need to torque the bolts with the weight of the car on the suspension. Supposedly the best results are attained on a level surface. As I said, I don’t have a lift, or pit, so I’ll settle for ramps. Once the nut was snug, I reattached the wheel, lowered the car, and backed it up my ramps. I torque the nut to 53 FT/Lbs with my new 3/8 drive torque wrench:
I used the torque adapter positioned perpendicular to the wrench (so to not affect the torque setting). The wrench is a little over 16 inches long, so it was short enough to work with under the car. The passenger side is now done!
Onto the dreaded driver’s side trailing arm….
It’s different for the driver’s side process, because you have to detach the trailing arm from the hub carrier to maneuver the bolt out and back in. I wanted to prove this wasn’t necessary, but I found it is…
Supporting the hub carrier for bolt removal (got brave, and used my low profile jack):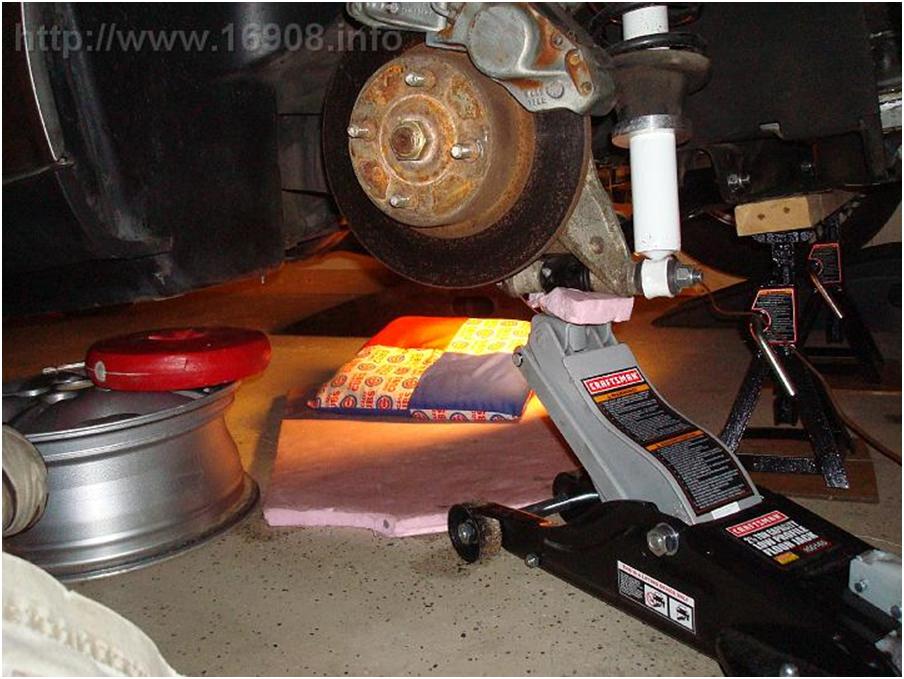
Removing the trailing arm from the hub. First time separated since assembly in Ireland?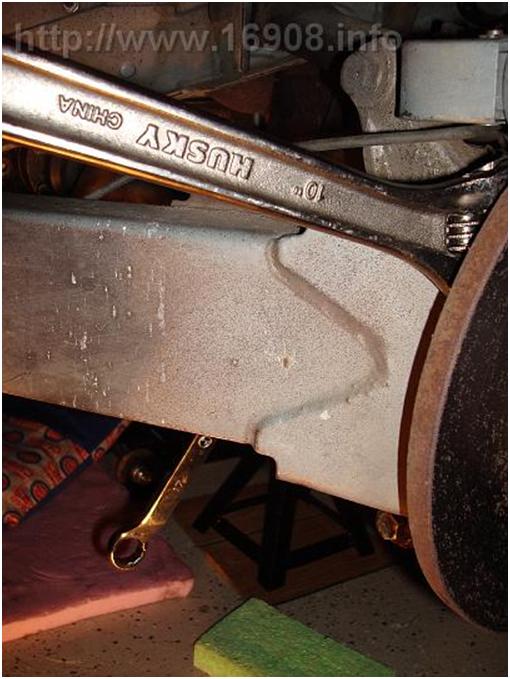
I made sure to be careful with the hard brake line. It will flex, but make sure it doesn’t cause a bend in one location. I was worried the trailing arm would have the weight of a steel beam, and come crashing down. I was relieved to find it’s not very heavy. To get the bolt out, I had to pull the arm away from the hub carrier, and then lower it below the carrier. I put my low profile jack back in place. I borrowed a scissor jack from another car to support the trailing arm, and lower it slowly: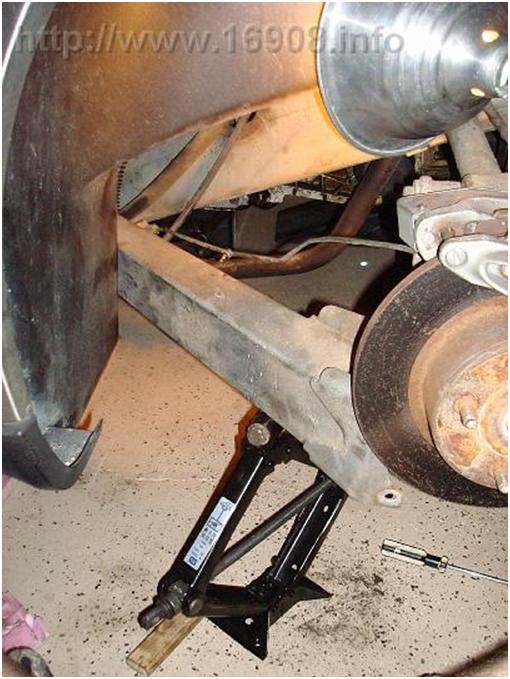
I got the bolt out! The bolt wasn’t as bent as the passenger side bolts, but still slightly bent.
Some cable towards the narrow end of the trailing arm will support the arm: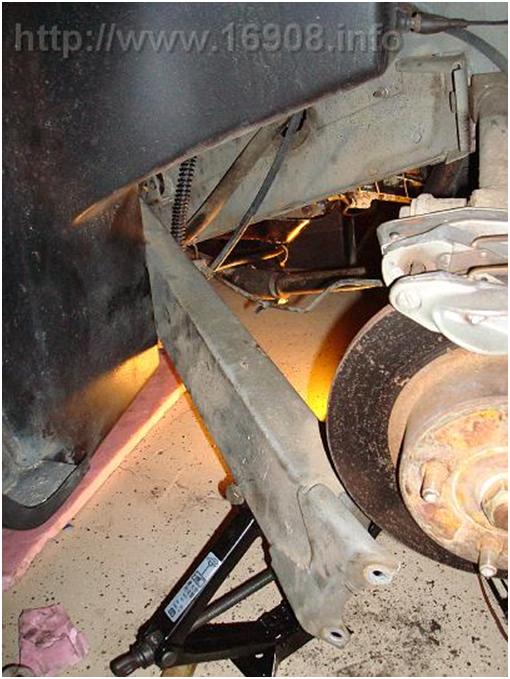
Now I put the new bolt in, started a few threads on each bushing plate bolt, leaving it all loose. I then pulled the hub carrier back, and put the trailing arm back in position. Bolt the trailing arm back up to the hub carrier, and snug up the bushing plate bolts. Finally, snug up the TAB nut.
One last picture before final torqueing: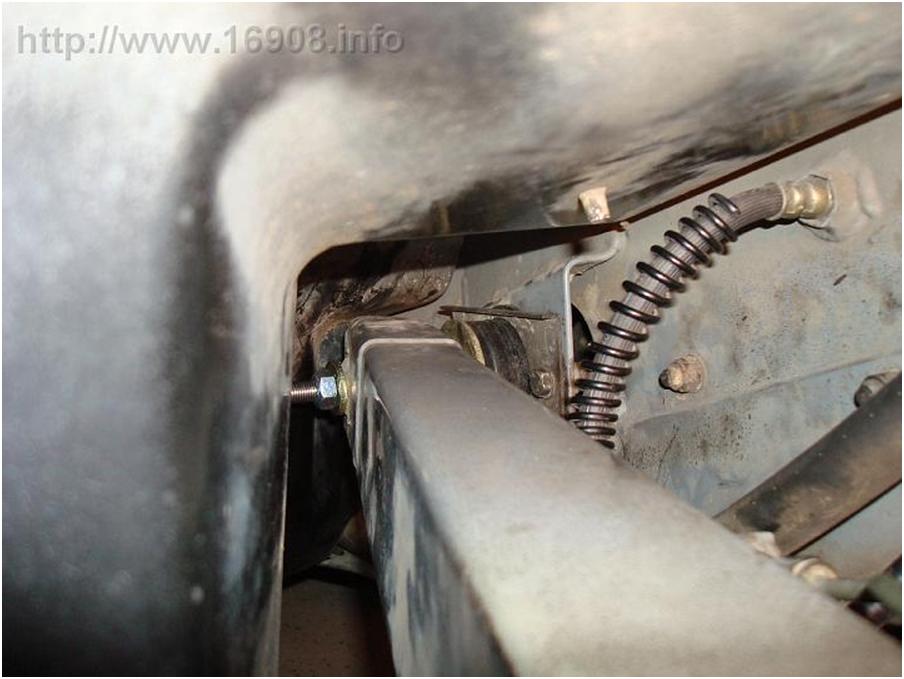
Beautiful, eh?
I reattached the wheel, lowered the car, backed up my ramps, torque the nut to 53 FT/Lbs, and the job was done! I don’t want to do this job again anytime soon…
Time elapsed: 10 days. Mainly because I didn’t know what I was doing. There was a lot of trial and error, and scheduling conflicts. I almost gave up right away, figuring I’d have DMC (Midwest) do this job for me. But I persevered, and continued to accomplish one task at a time. I learned a lot, and I’m pretty damn proud I did this all by myself. I could probably get the job done in a day or two knowing what I know now.
Since I had such a hard time figuring this all out, I felt brave and made two videos. The first is on the bolts themselves, and the second is on bolt replacement with the automatic transmission. Hopefully I didn’t make any mistakes, but please point them out if I did.
I’m gonna go degrease my hands for the umpteenth time
Costs:
K1000DP – Toby TAB Custom Trailing Arm Bolt Kit from DeLorean Parts Northwest – $74.95 plus $4.60 shipping
Proto 5122 Torque Adapter 11/16′ 3/8′ Drive: $15.75 plus $4.98 shipping at Drillspot.com
13mm Combination Wrench: $4.88 plus tax at Menards
Double Box End Offset Wrench Set: 15.99 plus tax at AutoZone.
Husky 3/8 Drive Torque Wrench: $68.96 plus tax @ The Home Depot
I decided against attending DeLorean Car Show (DCS) ’06, even though it was within a few miles of me – a decision I still regret. I wasn’t an owner yet, and I didn’t know if I’d fit in there.
I originally planned to attend DCS ’08, either by driving the car, or flying out. I was registered at the hotel, but conflicts arose, and I opted to stay home. The price of gas is a lot to stomach right now, and I never got around to replacing my trailing arm bolts.
Here’s an article I found about DCS ’08. In case you didn’t know, the man in the article who started DCS, and organizes it every two years also sold me my car.
http://www.eveningsun.com/ci_9539163
I will be attending DCS West ’09 in Las Vegas! I’m definitely flying out for that event, and leaving the D safe at home.
My battery strap was missing the buckle to connect the two straps.
PJ Grady sells a kit for $48.50. I didn’t even investigate NOS. I decided to modify a battery box strap for use in my car. FYI, here’s how to use the stock strap.
I removed the strap mounts from the body. They are bolted to the underbody with 10mm bolts, with the nuts in front of the rear right wheel, and under the car.
I bought this strap kit from Menards. It is one continuous strap meant to wrap around a battery box. 
I cut the strap into two pieces. My mom sewed the ends together, to attach them to the mounts. Thanks mom! New straps mounted, old straps cut off:
Oops. I looped the strap on the wrong side of the mount. Oh well, not perfect, but it works: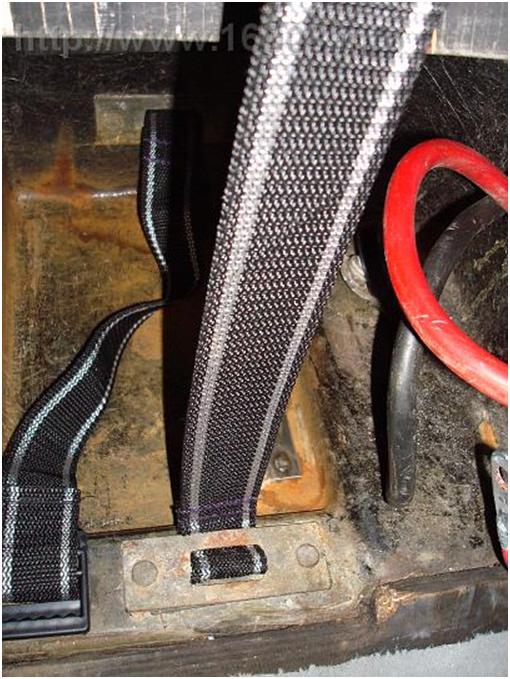
All done:
Costs:
NOCO Battery Box Strap Kit, Part No. HM001CS: $2.99 @ Menards
Sewing: Free!