Old Radiator Sold!

I replaced my radiator last year with a newer improved all-aluminum model. My old plastic-tanked radiator was still functional. I found someone online looking for a radiator, and they were interested in mine.

Just before shipping:


Costs/Profit:

Radiator

$75.00

Paypal Fee

($2.48)

UPS Shipping

($35.19)

Profit:

$37.33


Not too much profit. I need to find a different shipping method.
The new owner said the radiator is installed and working.

Winter Projects!

Last picture before winter maintenance:

Adding some Dynamat. Looks like just about 20lbs.

Stripping the interior:

So that’s why my airflow is so off:

Probably not a good idea to store parts on the hood:

Nasty looking, deteriorating foam


Garbage. I weighed it at some point, but forgot what it was.

Replaceing my headlight switch fuse:

Interior Parts store in my basement:

I noticed some red marks on the Dynamat. It turns out, I was making them. Dynamat is sharp!

Dirty, rusted ground. Time to split a nut:

My pump has been buzzing, and my boot cover has been leaking. So I bought new ones:

Under the computer…

My computer has been missing this bracket on the transmission, and the part is unavailable. I finally got one! I don’t know if I’ve ever been so happy to buy a piece of metal. Thank you, Rob!

Leaky Brake Master Cylinder? I found fluid on it, and corrosion on the booster:

Another project! Replace the leaking Brake Master Cylinder:

Dash Mat

Even with a perfectly working R12 Air Conditioning system, the drive to Lexington in June was very hot. The black dashboard throws off a lot of heat on a sunny day. I decided to buy a dash mat. After a quick search on dmctalk.com, I found the best fitting, and best priced dash cover is from Dash Designs. They sell through eBay, search “Dash Designs Delorean.” I ordered the Grey Carpet cover on 7/26 and it showed up 8/12:


It comes with some Velcro strips to secure it to the dash board. I haven’t decided if I’m going to use them, or go another route. It fits pretty good:

The grey on black isn’t the best combination, but my interior is already mixed. Besides, I only plan to use the dashcover for warm, sunny drives.


Costs:

Dash Designs DeLorean Dashcover – $34.99 (no tax or shipping!)

Driver’s Side Axle Rebuild

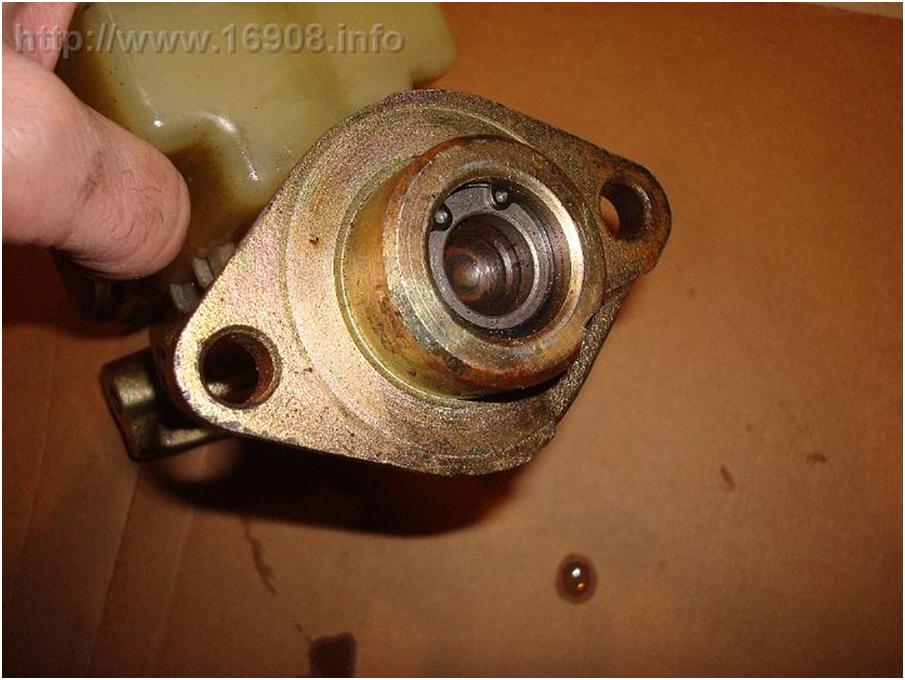
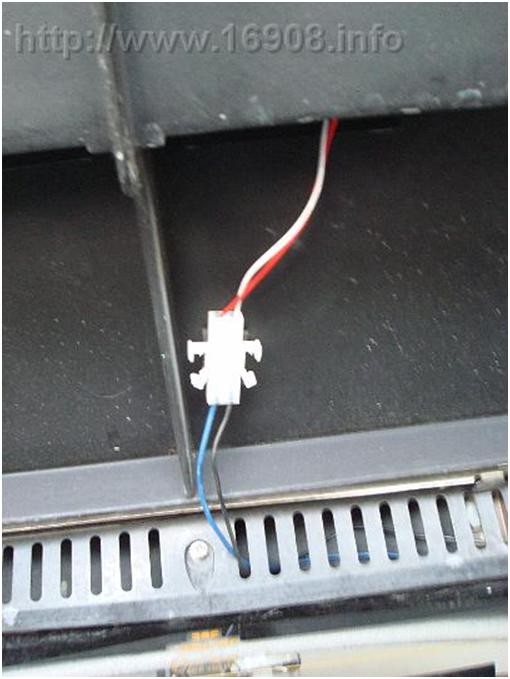
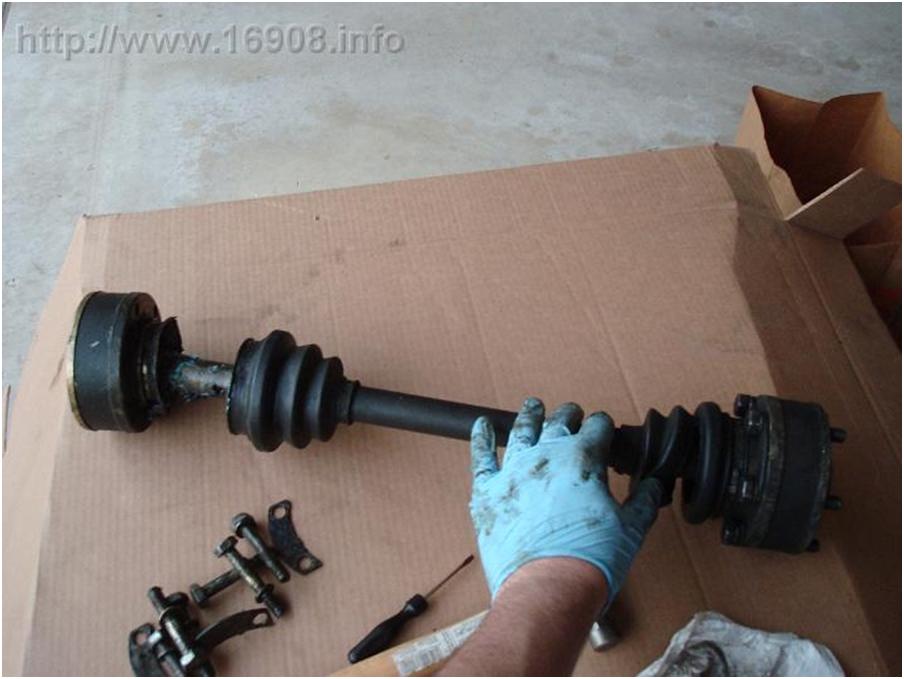
I took two days off work before DCS 2010 to relax. On Tuesday, June 15th, while reinstalling my trailing arm shields, I discovered one of the driver’s side axle boots came off and threw grease everywhere. In 2007, I had the previous owner replace my axles after one of the boots came off. Too bad he made the same mistake again – he secured the boots with zip ties! Also, the boot on the other side of the axle was torn. This is very messy work, and with the clock ticking until DCS (we leave Thursday, June 17th), I didn’t worry about taking many pictures. The damage:

I decided to buy some grease, two boot clamps (they were cheap), and borrow the CV boot clamp tool from Autozone, and put the boot back on. I’d leave the other torn boot alone.

I successfully shoved CV grease into the boot, and re-clamped it.
Success!
Except I started reading on the internet about how different CV greases shouldn’t be mixed, which could eventually cause failure of the joint.
Failure!
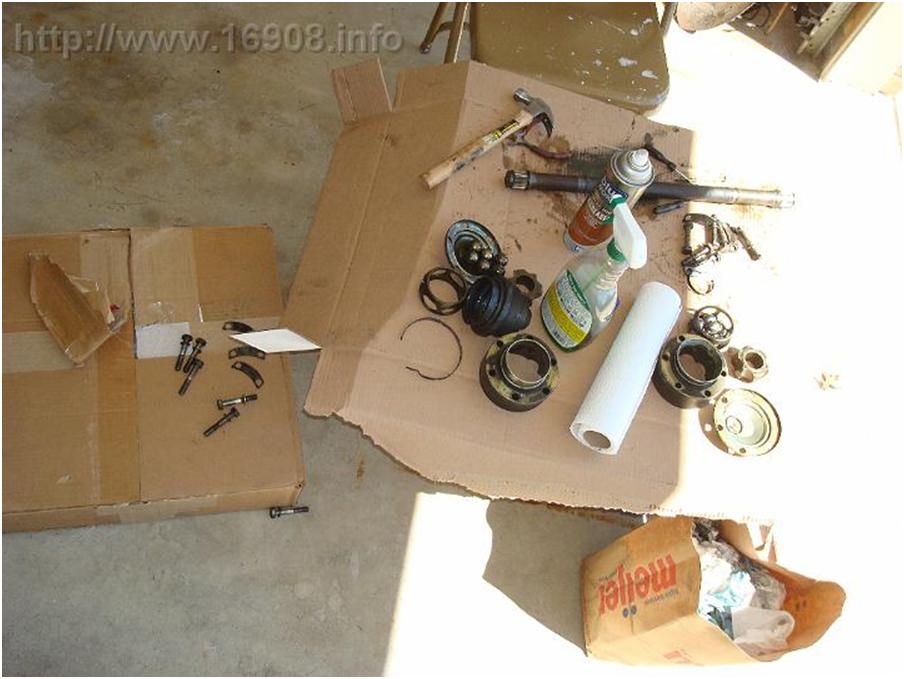
With only one full day left before DCS, I decided to rebuilt both CV joints properly. I removed the axle on Tuesday night, and began degreasing and cleaning everything. I ended up destroying one of the new clamps, and grease that I had bought earlier in the day.

Nitrile gloves, a few rolls of paper towels, and a sheet of cardboard under your work area are essential for this job.

On Wednesday morning, I drove to DMC Midwest, and purchased two CV boot kits. Special thanks to the staff for helping me purchase parts, while they were preparing to leave for DCS. I raced back home, and reassembled the joints:

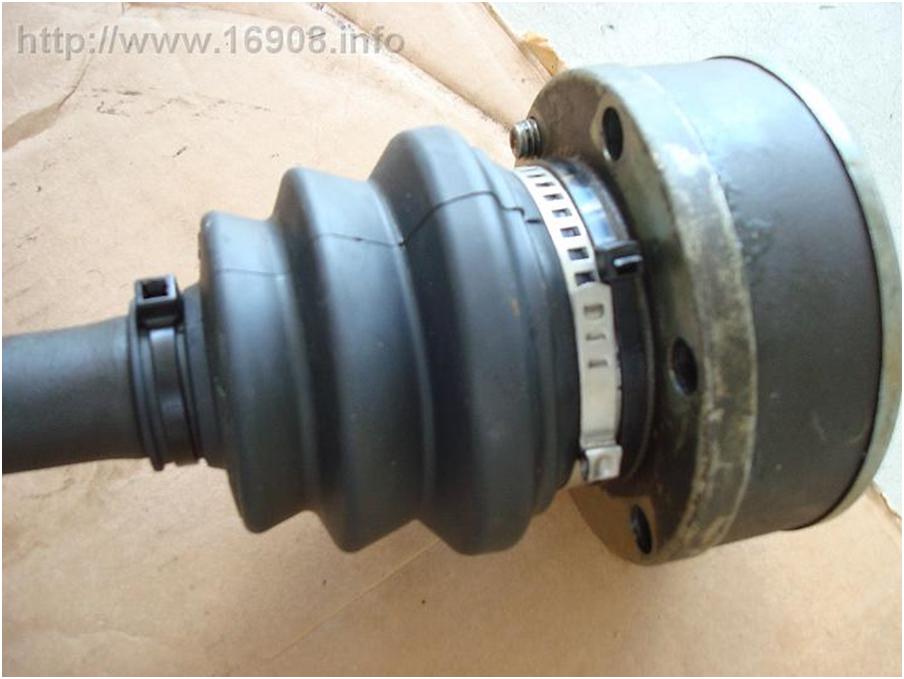
The smaller clamps in the kit are too big, and zip ties are acceptable substitutes. Packed with grease, and clamped together correctly:

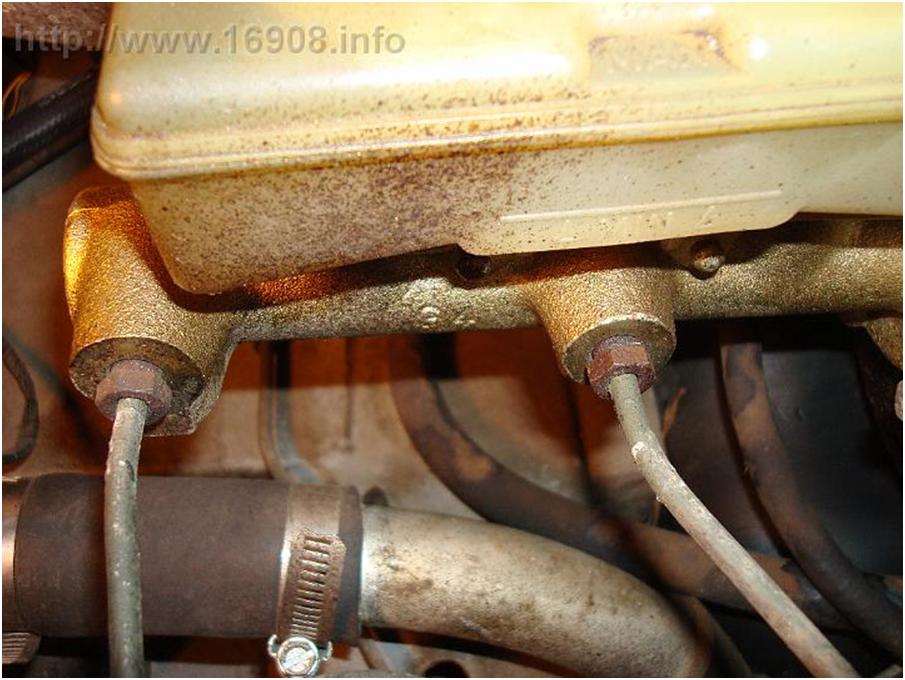
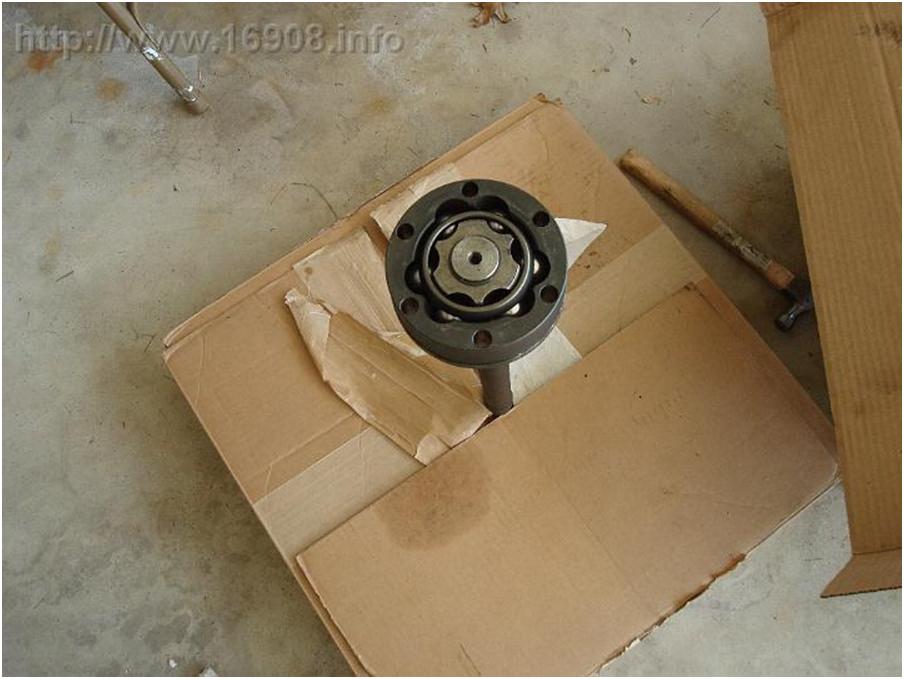
My first picture in this blog post shows a strange flare on the axle. I’m not sure why there is a flare, but I’m blaming the previous owner. The flare prevented me from using sockets on the bolts, so I pounded the flare out. I still couldn’t attach a clamp properly, and ended up ruining the supplied clamp. I had just one more extra clamp from NAPA (glad I bought two!), and ended up using a zip tie as a spacer:

Done! I reinstalled the axle, and drove several miles to test out the car. So far so good. So much for two days of rest. We leave for DCS tomorrow morning.

Part

Vendor

Cost

Tax

CV Grease

O’Reily Auto Parts

3.69

.30

(2) CV Boot Clamps

NAPA

4.91

(2) Axle Boot Kit

DMC MIdwest

20.00

1.55

CV Boot Clamp Tool

AutoZone

15.00

1.20

CV Boot Clamp Tool Refund

AutoZone

-15.00

-1.20

Blue Threadlocker

Ace Hardware

4.49


Seat Bottom Repair

Both of my seat bottoms split. This made the seats sink, and feel really uncomfortable.


I tried putting wood and foam underneath them, but then adjusting the position of the seats was complicated.


Also, new seat covers were installed a few years ago by the previous owner, however they were installed too loose. Crooked passenger seat:

Loose, sunk-in driver’s seat, which began to bunch up:


I finally broke down and took the seats to an auto upholstery shop. They rebuilt the seat bottoms with some canvas-like material. They also tightened and straightened the seat covers. Straightened passenger seat:

When I picked up the seats from the upholstery place, one of the metal links wasn’t attached to the seat bottom. The hole was cut in the canvas, but it was never attached. I had them go in and fix it. They couldn’t find the right plastic pieces, so they used washer and a cotter pin. New seat bottom:


After some cleaning and treatment with Leatherique, the seats have never looked better:


Costs

Upholstery Work: $300

Third Brake Light

I finally got around to installing a third brake light. I previously bought a corvette brake light meant to be attached to the top of the louvers. I couldn’t bring myself to drill into the louvers, and didn’t want to paint everything to match, so resold the light on eBay. I wanted a light that mounted perpendicular to the top louver, in front of the center brace. I finally settled on a 20 LED Red light bar from JC Whitney. I followed these instructions outlined in a How-To at DMCtalk. Here’s what I started with:


Pictured:

20 LED Brake Light
Automotive fuse holder
Automotive fuse kit
Electrical connectors
Blue Wire (leftover from the door launchers installation)
Black Wire (pulled from some cannibalized electronics)
Black Plastic VHS Case
Ratcheting Wire Crimpers
Utility Knife
Wire Strippers
Double sided Foam Tape

Not Pictured:
1″ Wood Chisel
Duct Tape
Electrical Tape

Here I go. I needed a bracket to hold the light bar in place. I found a VHS case would be black, light weight, rust free, and easy to work with. I used my knife, and chisel to create two brackets for the light bar:


I notched one bracket for the wiring:


I had some Molex connectors that I previously bought when troubleshooting my radiator fans. I want to be able to disconnect the light if I ever remove the louvers, so I’m using one on the light:


Using a coat hanger to feed my wires through the stainless. The coat hanger was just long enough:


Here I’ve tapped into the brake lights, with a 5 amp fuse in between . If there’s a short on my third brake light, the fuse will blow, leaving the other brake lights unharmed. And what’s a project without a little duct tape:


Grounded:


Testing, it works!


A foam taped bracket:


More foam tape:


Installed!


One downside to my wiring is the molex connector I used doesn’t fit through the “rear screen upper finisher.” Foam tape to hold the connector to the louver:


Barely visible:


Crude Photoshop job on my license plate:


I tried to photograph that I can’t even see the light in my rear-view mirror:


Costs:
20 LED Light Bar from JC Whitney: $25.99, Shipping: $8.99, Tax: $1.82
Bussman Fuse holder from Menards: $1.23
Fuse kit from Menards: $11.99

Spare Tire Maintenance

I decided my 30 year old rock-hard spare tire had to be replaced. I found it’s impossible to find a new spare online, so I decided to visit a salvage yard. Sure enough, I found the T125/70D15 tire was a common size on several junked cars. I found the newest car I could find, with the spare (a wrecked 2004 Hyundai). The manufactured date on the tire says 2003, and the rubber had never been used. I didn’t bother measuring to see if the 4 bolt pattern was the same as the Delorean’s. The cashier said $12, and I felt great about my purchase.

Old tire:

Old tire, new tire:

I jacked up the car, and removed a rear wheel to see if my new hub would clear the brake caliper. It didn’t. And the 4 bolt pattern wasn’t correct. That’s ok, the Delorean’s aluminum rim looks nicer.

So I visited a tire shop, and asked them to transfer the newer tire to the D rim. They said they didn’t have the tools to do it. They also said new spares can’t be bought, because the automobile Industry has 100% of the market. Yup, I confirmed that.

So I visited another tire shop, and they said they transfer it. They even disposed of the no-longer-needed steel rim.

New(er) tire, old rim:

My spare, with a can of fix a flat, a plastic tire bag, and some tie down straps. Things I hope to never use.

Costs:

Aurora Auto Parts Salvage Yard Admission Fee

2.00

(2003) Kumho T125/70D15 Spare Tire

10.00

EPA

1.00

Tax

0.77

Discount Tire Mount

4.50

Dismount

9.00

Tire Disposal Fee

3.00

Valve

2.99

Tax

0.51

Total

$33.77

Broken Seat Bottoms

I pulled out the passenger seat, and saw the rubbery material had broken. Sure enough, I pulled the driver’s side, and saw the same thing had happened. In fact, my driver’s seat was collapsing, helping create folds in the leather.

Passenger:

Driver:

Next year during the off season, I might send the seats to an auto upholsterer. For now, I’m using some scrap 1X8 boards, and some 2 inch foam left over from recovering some dining room chairs:

Feels a lot better all ready.

Fixed Threads

In 2008, I stripped the threads on the steering column. I had held the steering wheel on with some hose clamps, but it was still loose:


I bought a Tap and Die set from Harbor Freight (Cheap tools made in China, but hopefully I’ll rarely use them, and they will last awhile).


I finally re-threaded the M14-2.0 threads:


Got a new stainless nut at Ace Hardware. My steering wheel feels solid again!

Costs:

Metric Tap and Die Set: 64.99 (sale) plus 5.36 Tax @ Harbor Freight
M14x2.0 stainless nut: $3? @ Ace Hardware

New Headlight Switch

Thursday night, I went to drive the D, and the headlight switch broke. I know the OEM switches were prone to breaking, and the supply of OEM switches was gone. DMCH had new switches made featuring an auto-off feature found on modern cars, and a LED light inside the switch. I placed the order Friday morning with DMC Midwest. To my surprise, it showed up Saturday afternoon!

I found the directions easy to read. I also found there might be some wires spliced into my headlight wires, and there wasn’t enough length to pull the wires through the console. So I pulled the wires out from behind the console, into the footwell, and cut the wires as close to the connector as possible:


The switch probably could be repaired, but I opted for a new one. Here’s my old switch and connector after removal:


After installing the new connector, installation was easy. You can see my old switch was worn, so the new one adds a little aesthetic value.


Costs:

Headlight Switch – $57.95 – DMC Midwest
Shipping – $10.93 – FedEx
Tax: $4.49