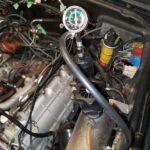
At my car club’s 2022 Fall Tech Session, I discovered there was a coolant leak somewhere in my engine’s “valley of death” or VOD. I was able to get some pictures underneath the intake manifold with a friend’s digital borescope:

I’ve always noticed some corrosion around the water pump hoses, likely due to coolant leaks. It’s recommended to remove the intake manifold every 10 years or so to inspect and clean the engine valley, but in my 15 years of ownership, I had never done it. I also planned to take care of a few other tasks, like replacing the last remaining original fuel hoses and some coolant hoses. I decided it was finally time to get it all done.
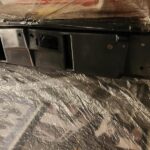
November 18th, 2022: I printed out a VOD How-To guide. I started carefully tagging, photographing, and removing everything.


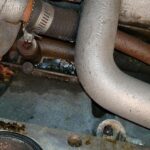

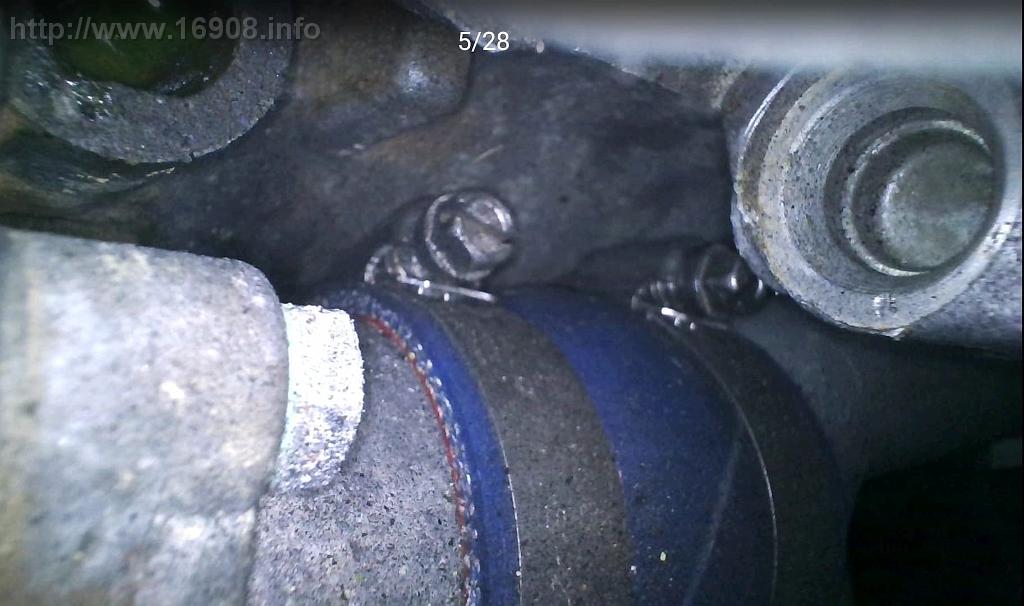
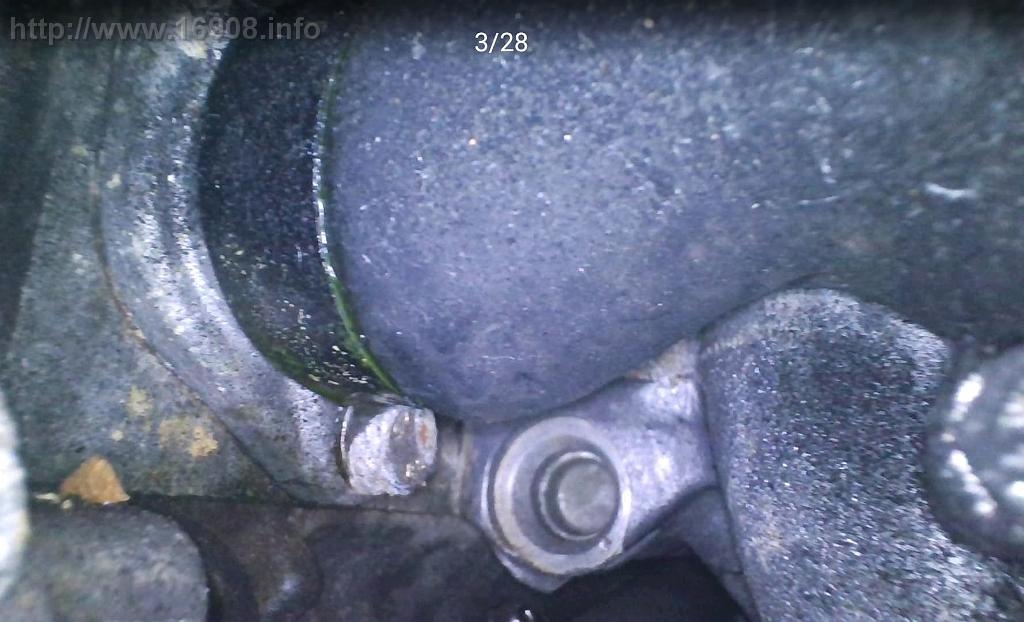
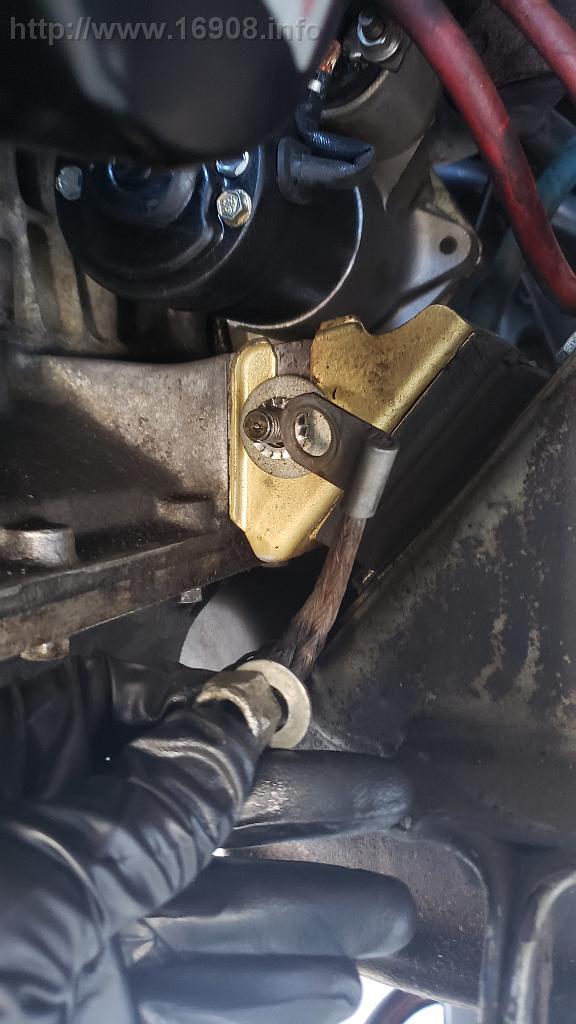
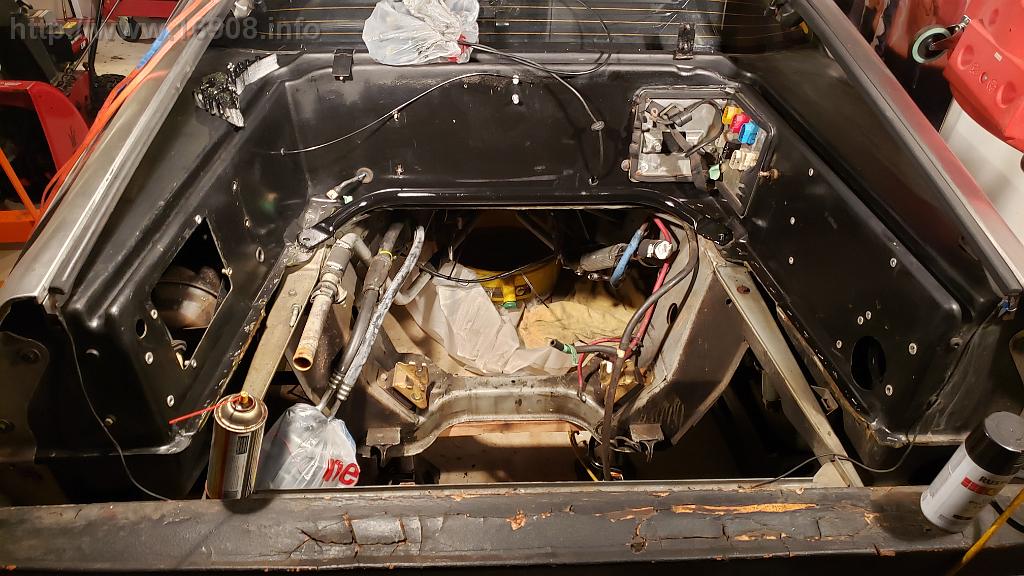
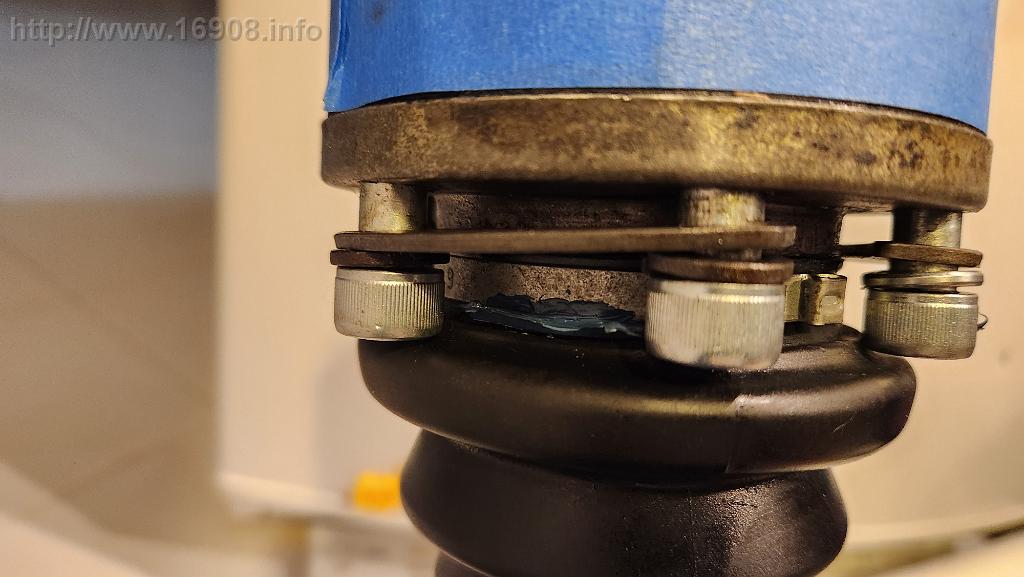
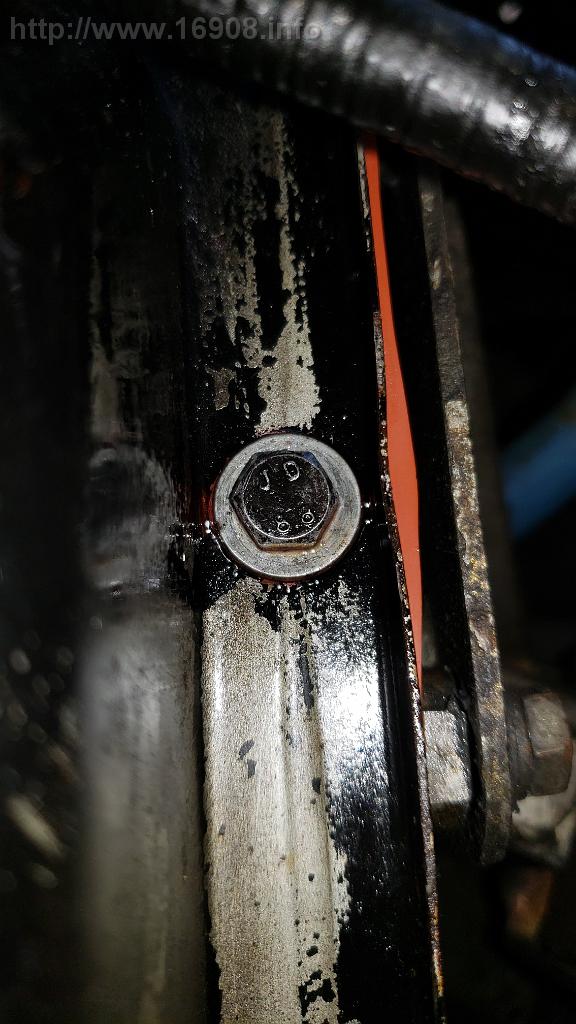
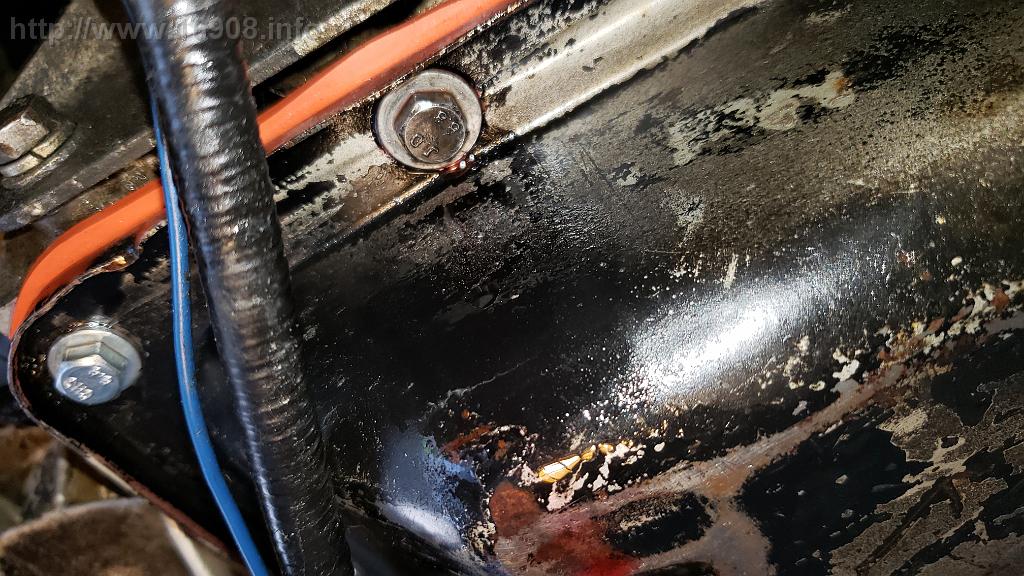
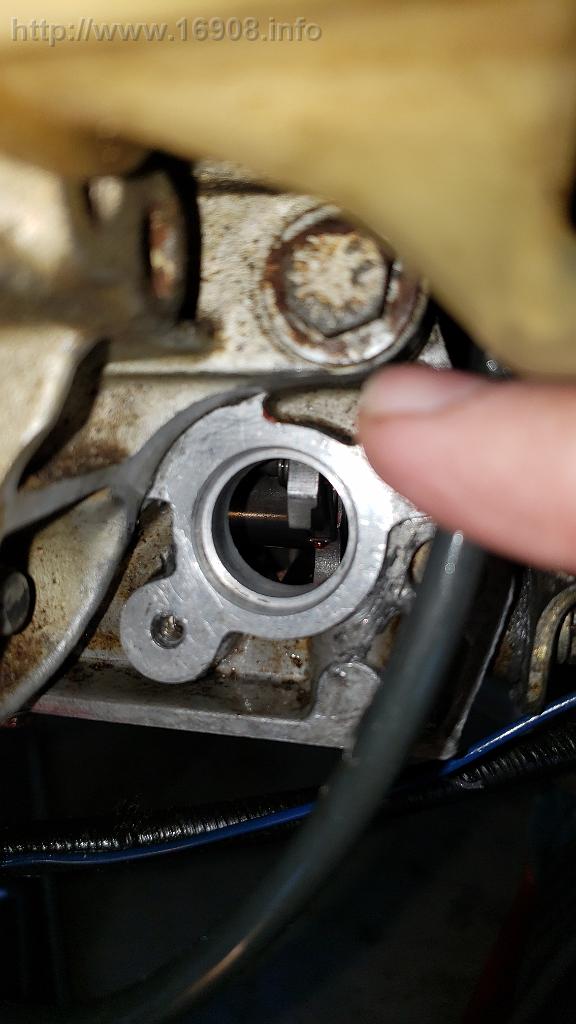
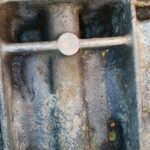
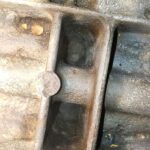
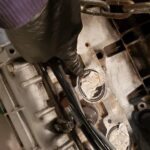
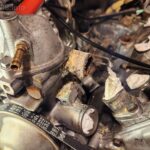
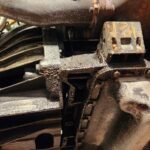
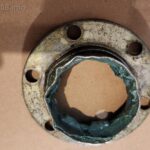
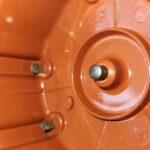
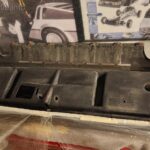
November 25th: Once I accessed the valley, I saw a bolt in one of the cavities. The cavity was also filled with oil and had what looked like epoxy around it:


It looked like a previous owner had attempted to repair a hole in the engine valley by tapping it and plugging it with a bolt. It’s possible they also used epoxy to fill the surrounding area, but I’m not exactly sure. Whatever they did, it seemed like my engine was now suffering from “block rot,” and their repair was beginning to fail.
The PRV engine valley has earned the nickname “valley of death” because this area is known to corrode through into the crankcase. Coolant leaks can pool in the valley and, over time, become acidic, which eats away at the aluminum. Some engine castings may also have inherent flaws that contribute to the problem. Once holes form in the valley, permanent repairs are difficult. Most engines end up being replaced, although some owners have had success welding plates over the damaged areas. Epoxy is not recommended—it’s hard to properly clean the aluminum for good adhesion, and differences in thermal expansion typically cause the epoxy to separate over time.
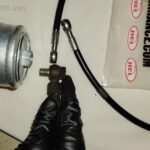
November 27th: I pressure tested the coolant system to be sure there wasn’t any coolant leaks or head gasket leaks causing coolant to leak into the valley.

I started evaluating my options:
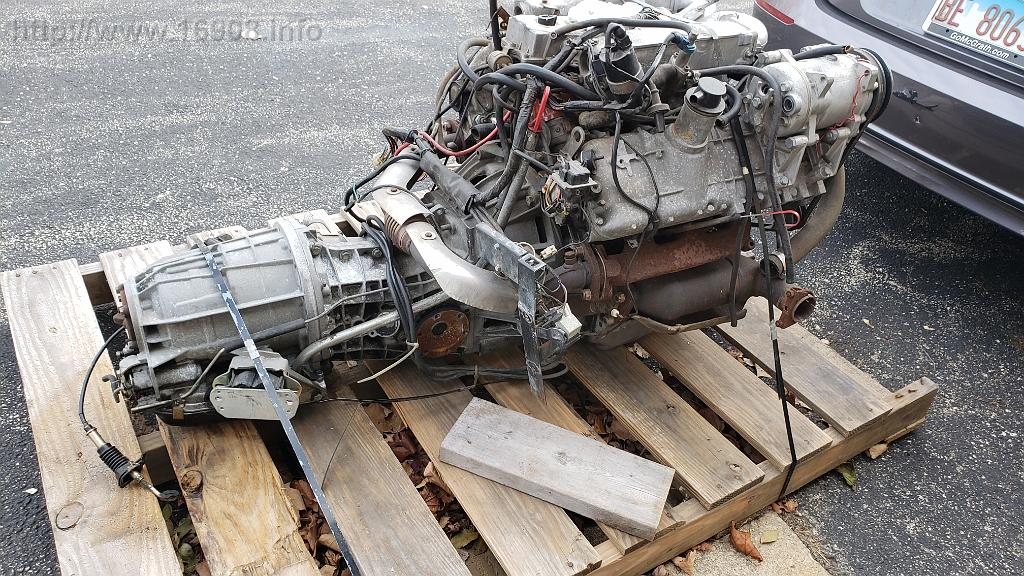
Option 1: Buy a replacement engine—and possibly a transmission as well. I found a good engine at DeLorean Midwest, along with an automatic transmission, both with fewer miles than my current setup. Since my existing transmission leaks fluid badly, this could be a good opportunity to address that problem too. The price was reasonable, and I could potentially disassemble my current engine and sell some of the parts to recoup costs. Additionally, I might be able to use the lower engine casting for my stalled 3.0L engine project. Overall, the replacement engine could resolve several issues at once.

Option 2: Revive my 3.0L EFI engine project, which has been sitting in my garage for over a decade. After purchasing it, I removed some accessories, the timing cover, and the valve covers. To prevent distortion over time, I took it off the engine stand and placed it on a 2×4 frame with casters. Unfortunately, I never tested the compression—something I should have done before disassembly. Moving forward, I’d need to learn about electronic fuel injection and source many components to replace the original K-Jet mechanical system.
Option 3:
Convert the car to electric. I’ve always wanted an electric vehicle, and I’ve seen a few electric DeLoreans in person—they were impressive. This route would eliminate issues like coolant, oil, and transmission leaks entirely. It would also allow for a much more powerful motor, potentially more than doubling the PRV’s original 130 horsepower. However, this option would require significant re-engineering, which is a bit overwhelming, and it could take several years to complete.
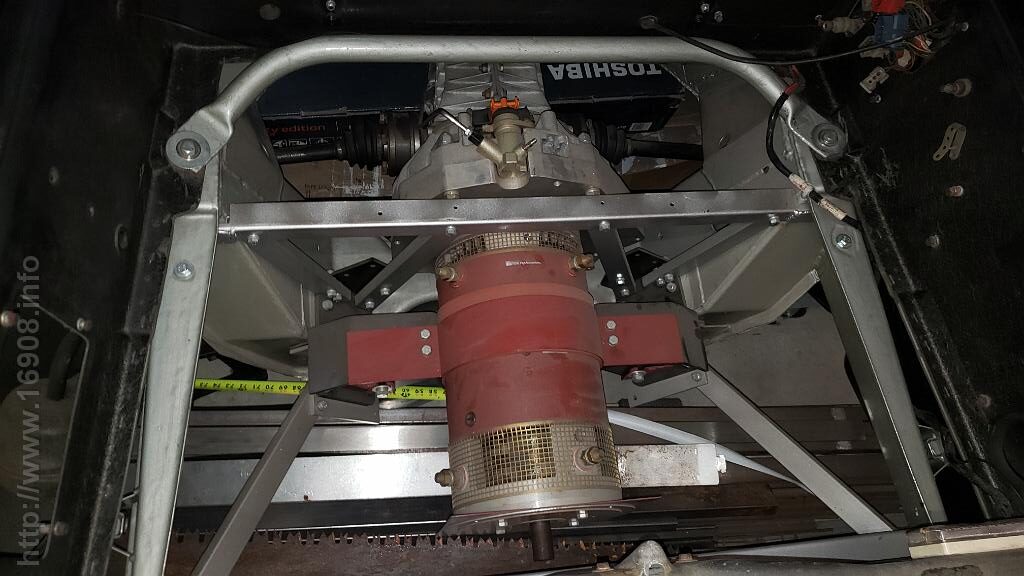
I’ve closely followed all the electric DeLorean conversions on the forums and watched every episode of Project Lightning. I even started learning CAD software to design custom parts, made a preliminary budget, and began pricing components. I also visited a friend to check out his in-progress electric DeLorean build for inspiration:
I read through a book on building electric cars. After evaluating many types of motors, I chose a used tesla small front drive unit which I hoped to mount forward of the rear axles, and finally making the Delorean “mid-engine.”
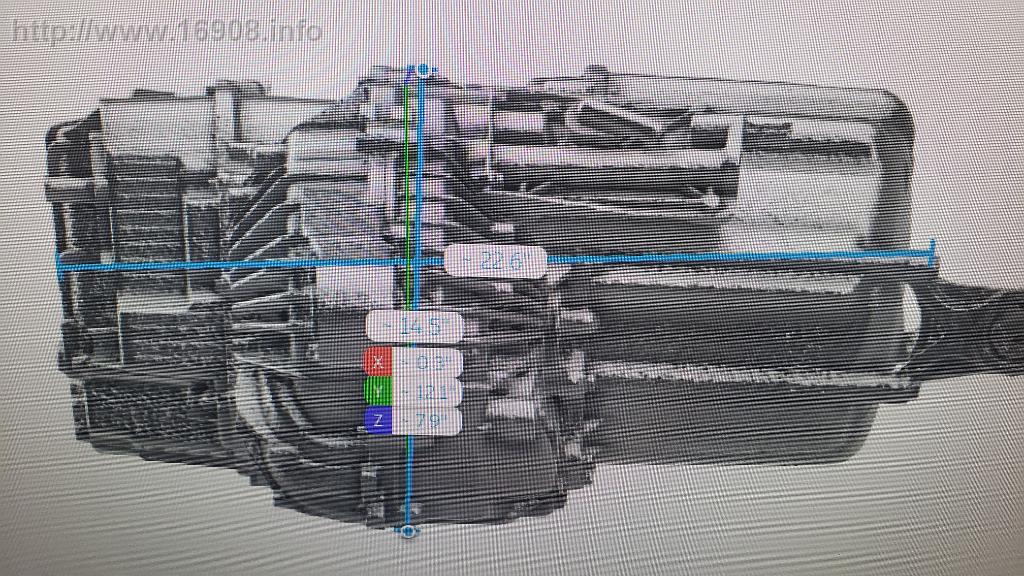
I found Porsche axle adapters that would allow the stock DeLorean axles to connect to the electric drive unit. I researched battery options, and began sourcing a controller, cables, and other essential electrical components. I even built a cardboard mock-up of the drive unit, and after extensive measuring, realized it wouldn’t fit in the location I had planned. I also discovered that Tesla drive units are more complex than expected, particularly due to their liquid cooling requirements for thermal management.
With each step, the conversion became increasingly complicated. After investing many hours into research, I ultimately decided to abandon this option.
Option 4: Weld plates over the deep cavities. This could be the cheapest and fastest solution, potentially lasting a few thousand miles and giving me time to plan a more permanent fix later. I reached out to several welders and found one nearby with extensive experience in the automotive industry and a strong background in welding cast aluminum.
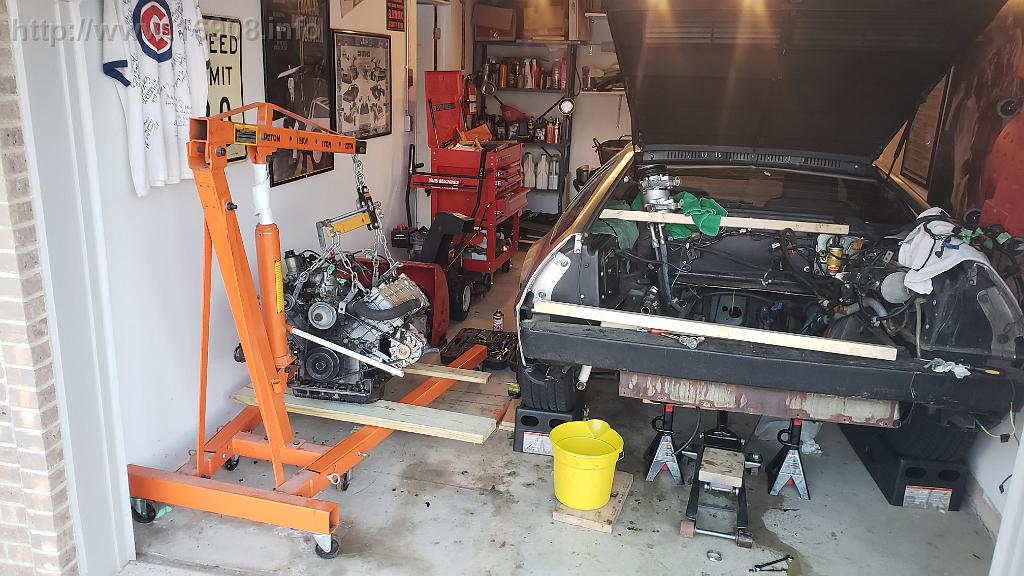
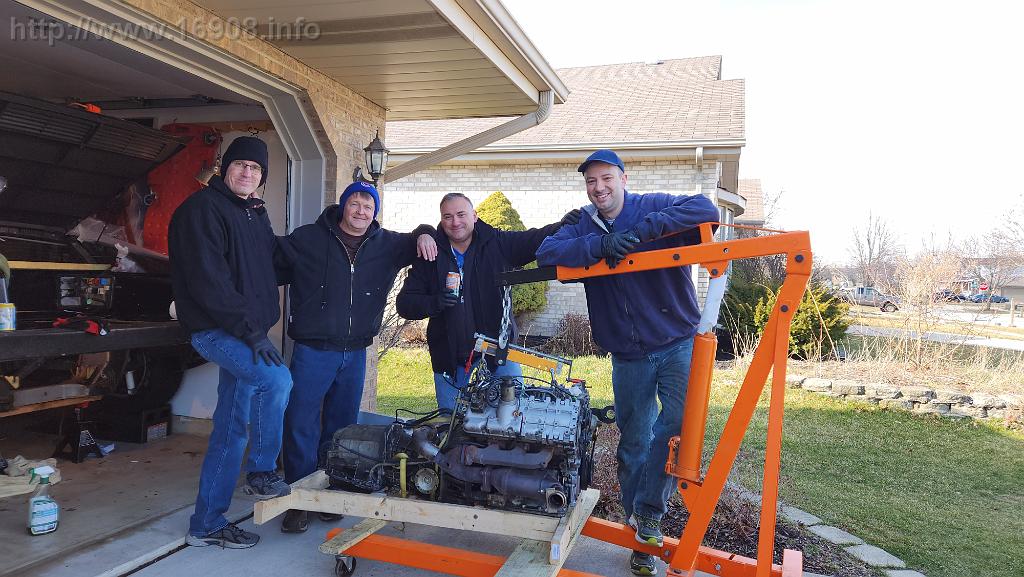
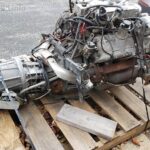
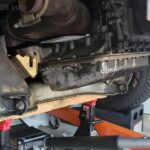
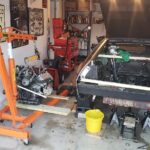
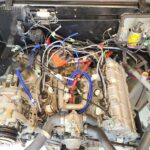
January: I ultimately chose Option 4 as a short-term solution, with the possibility of revisiting the other options later. At this point, I had two choices: transport the non-running car to the welder and back, or remove the engine and take just that. Pulling the engine seemed like the easier and more practical option, especially since it would give me the chance to address a few other issues at the same time. I already had an engine hoist, so I decided to go ahead and remove the engine.
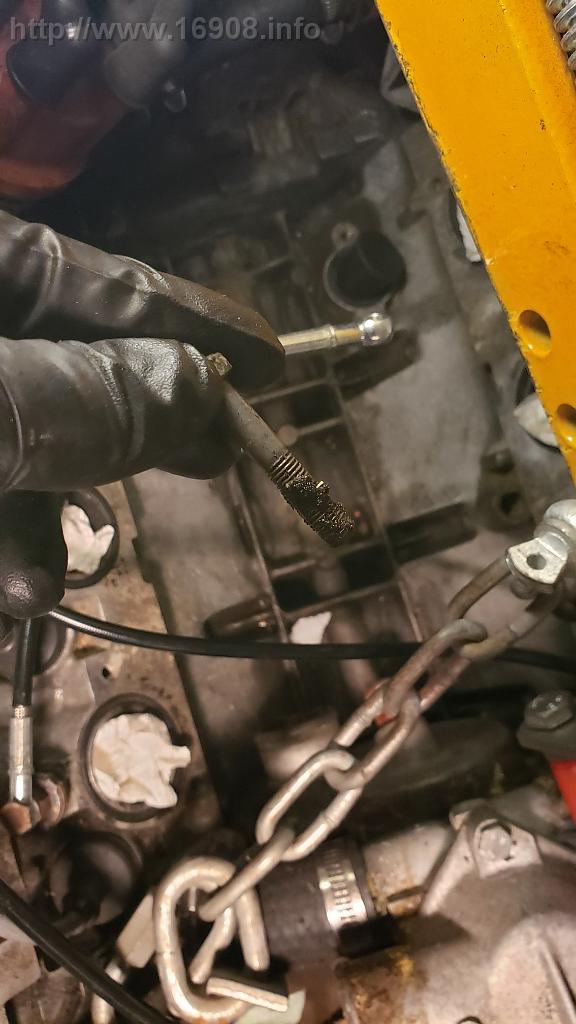
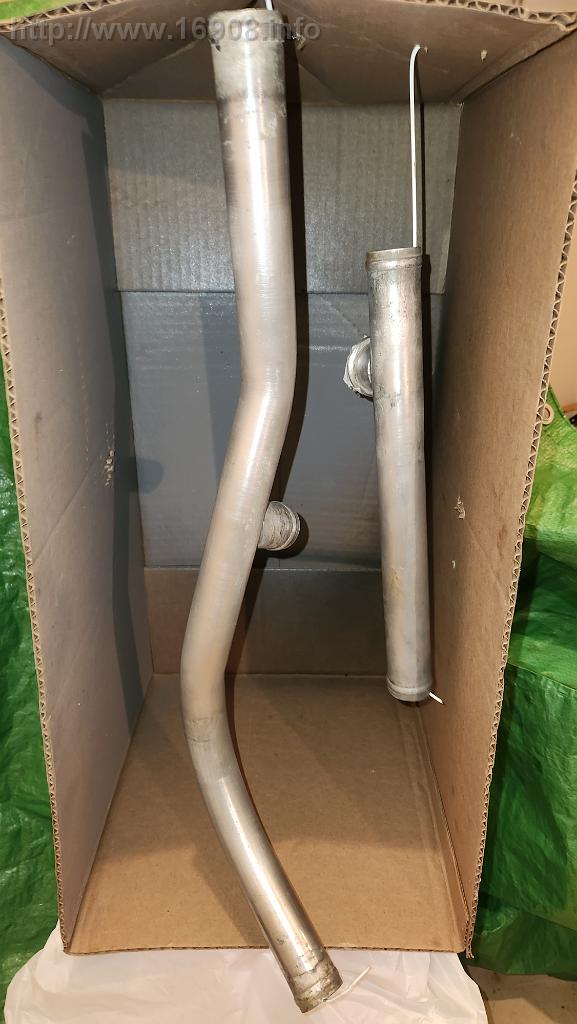
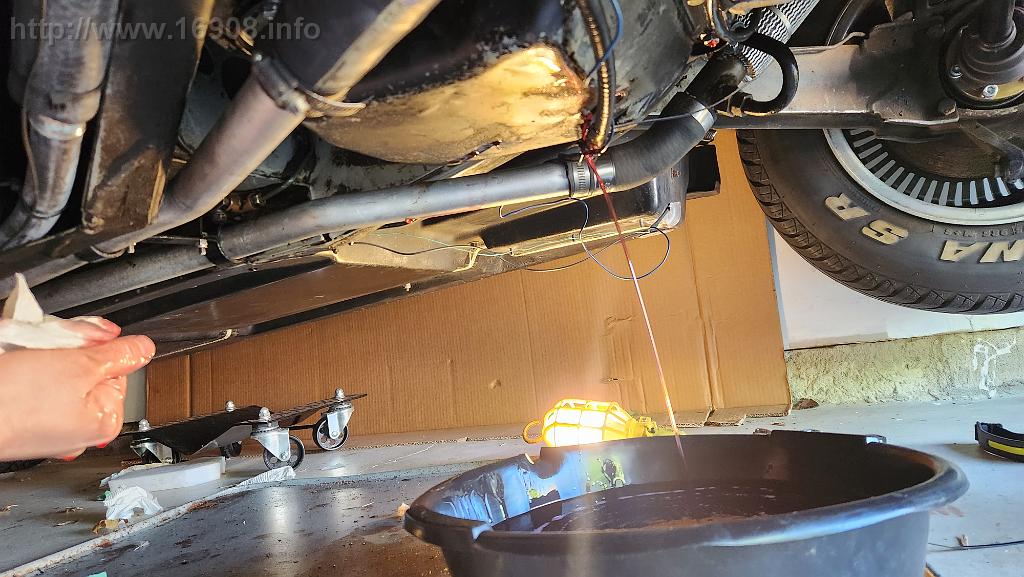
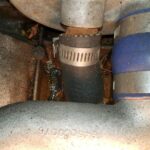
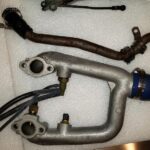
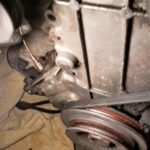
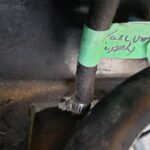
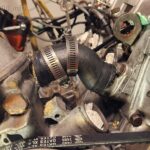
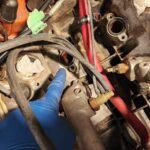
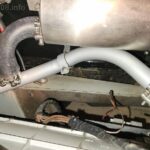
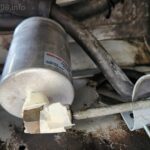
January 15th: I removed the Y pipe. The bolts are notoriously difficult to remove, and sometimes break, but the bolts came right out, probably because a previous owner had done maintenance in the engine before I bought the car. I also found out lots of coolant remains in the pipe even after draining the coolant at the radiator:


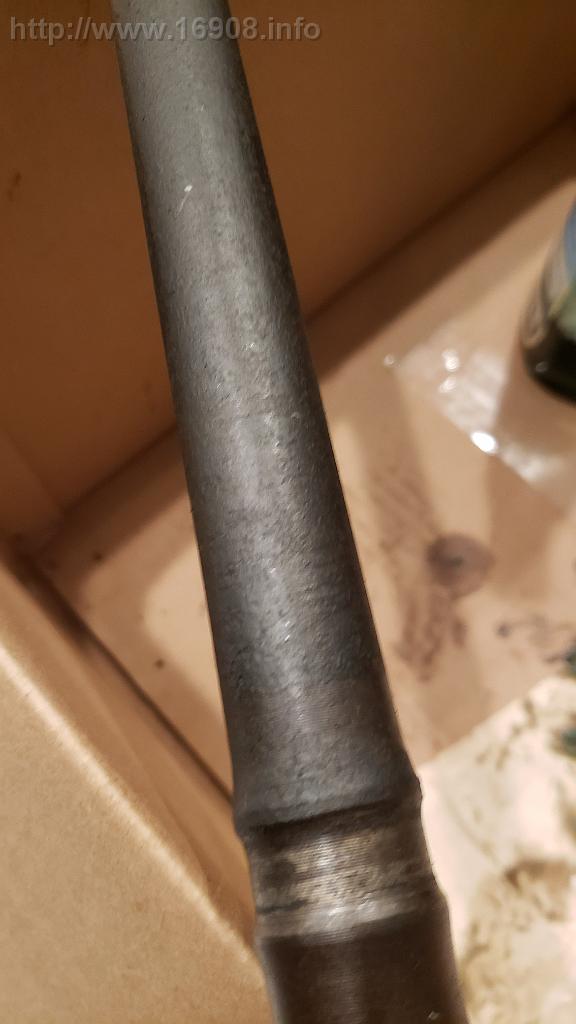
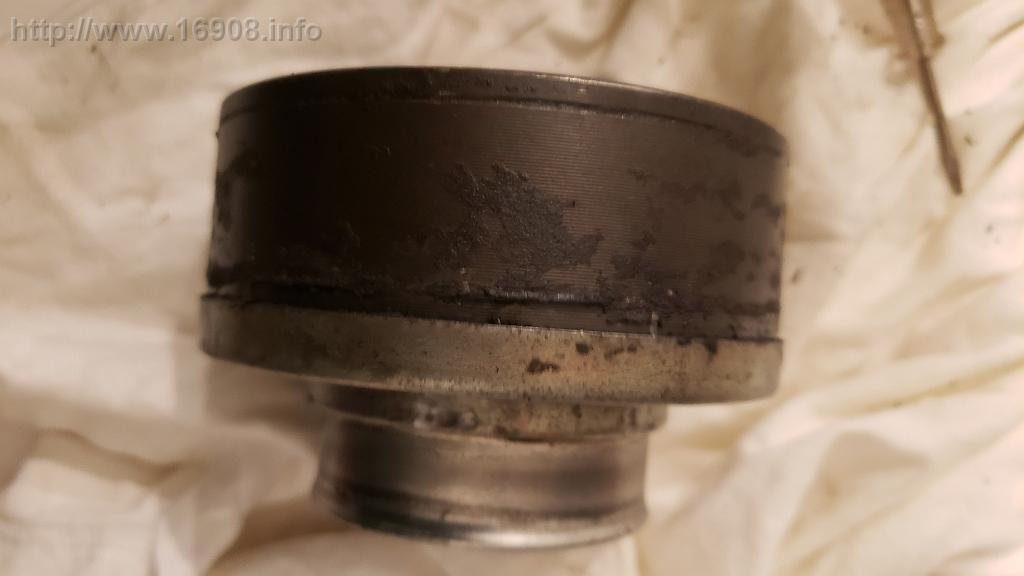
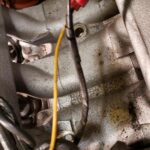
January 16th: I removed the heater pipe, which I plan to eliminate with a long hose to the pipes on the frame. The heater pipe appears to have original 40-year-old hoses on it, another justification for going into the VOD:

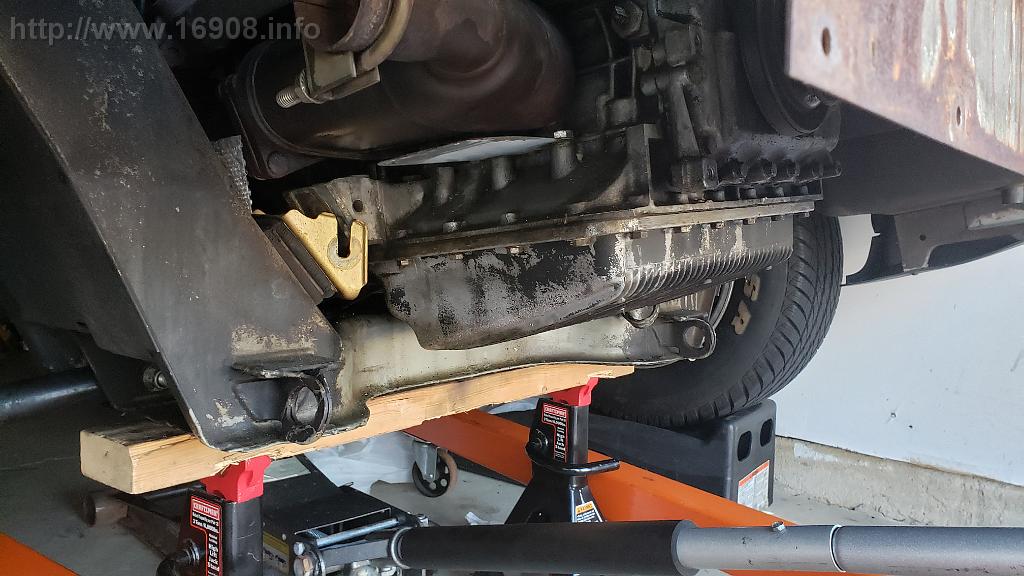
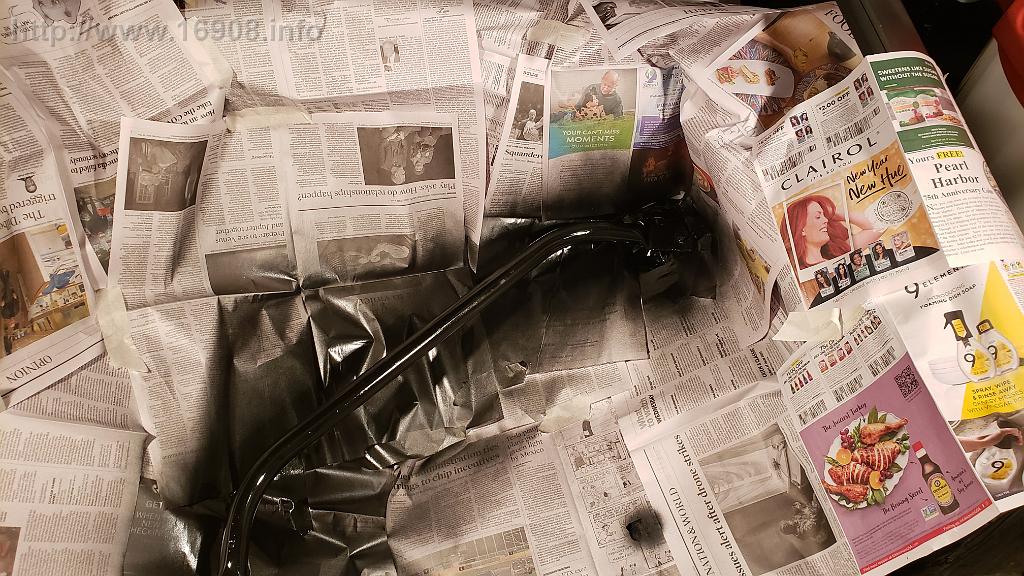
January 21st: I got some 1″ x 3′ aluminum stock and cut some pieces to (hopefully) be welded over the holes. I wasn’t sure if the aluminum stock would work, and neither was the welder, but I wanted to be as prepared as possible.


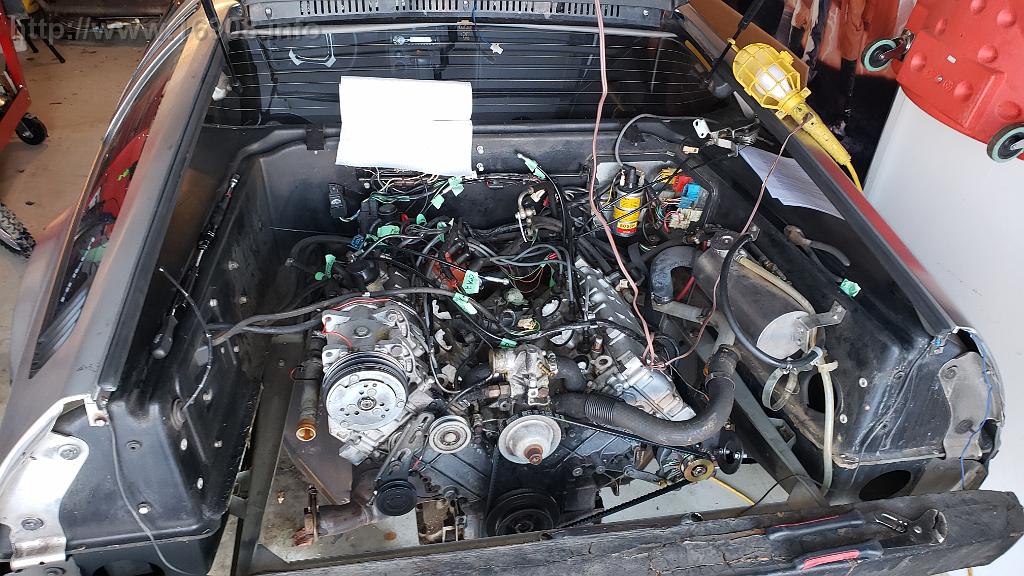
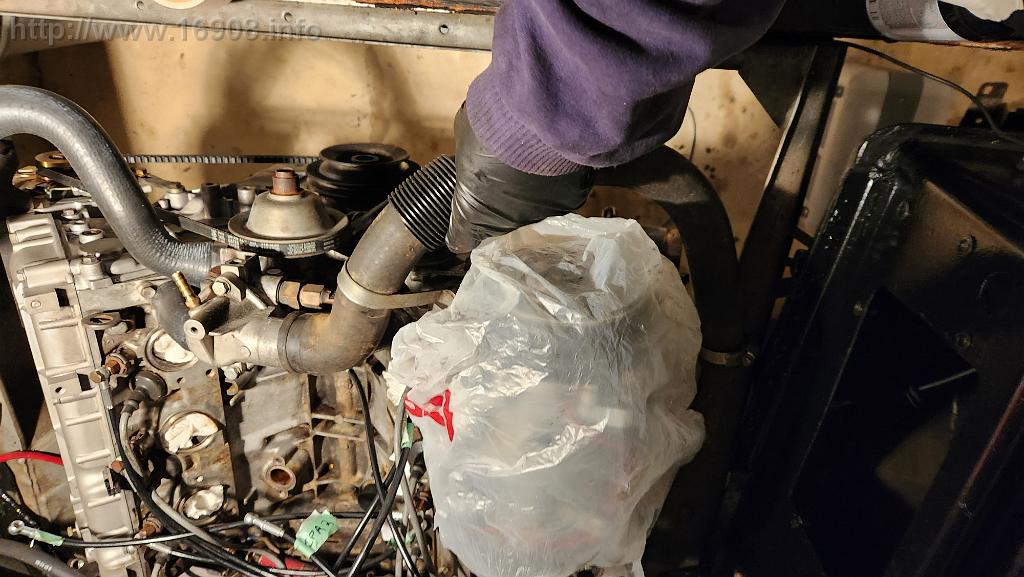
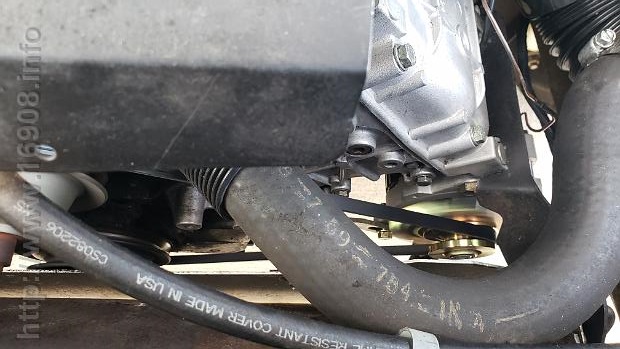
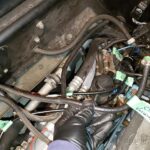
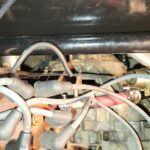
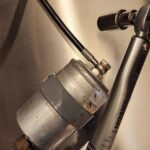
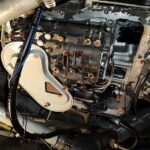
February 2nd: Fascia removed, muffler removed, engine cover removed, water pump bleeder disconnected, water pump hoses disconnected, AC belt removed:
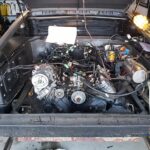
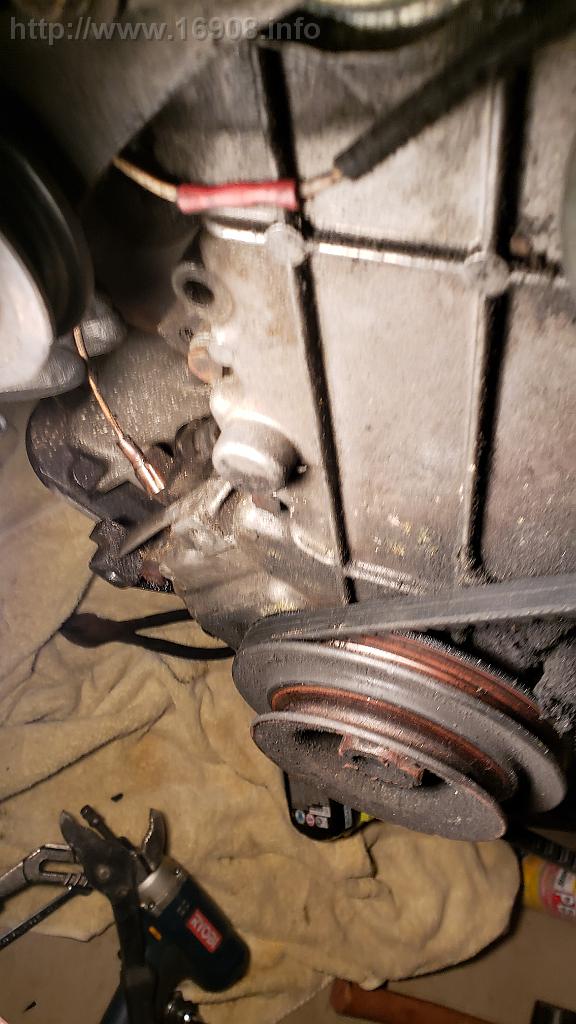
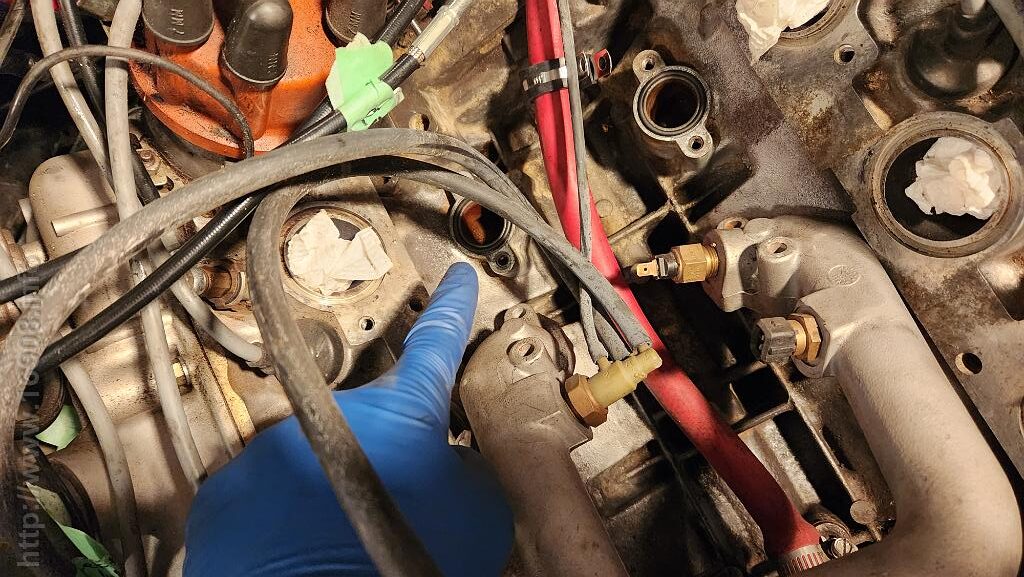
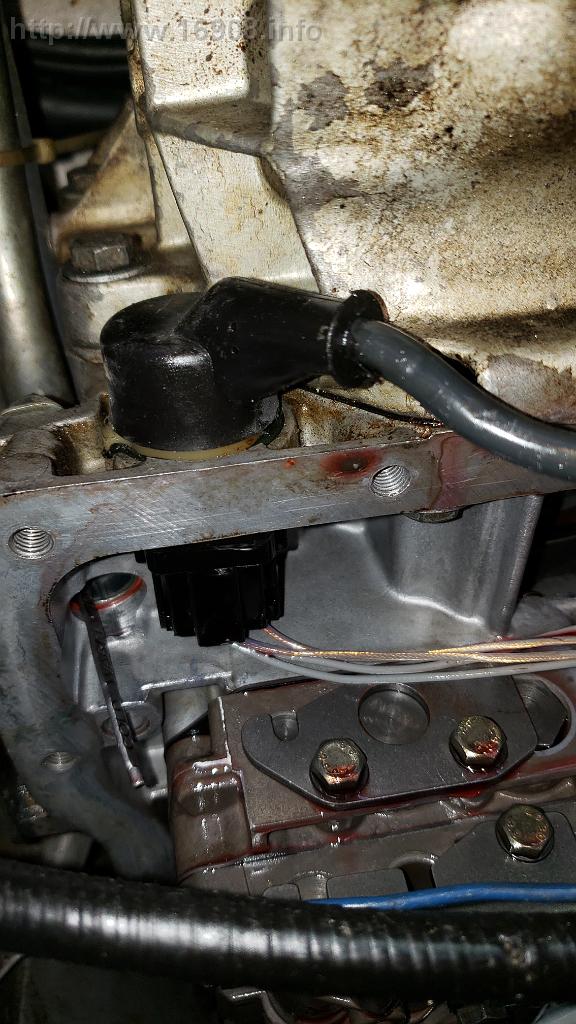
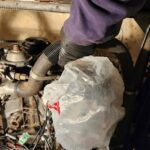
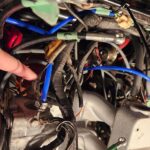
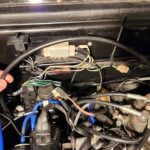
February 3rd: AC compressor unbolted, alternator disconnected, starter disconnected, oil pressure sensor disconnected… or tore the wire from the terminal… I’ll fix that later. Other sensors disconnected, wire harness moved out of the way, vacuum on heater valve disconnected, penetrating oil on the block drains.

February 4th:
-Disconnected Oxygen sensor
-Disconnected Heater valve
-Drained driver’s side coolant block drain (Couldn’t budge the other side, leaving it for now)
-Drained trans fluid
-Removed the frequency valve from the valve cover
-Axles removed

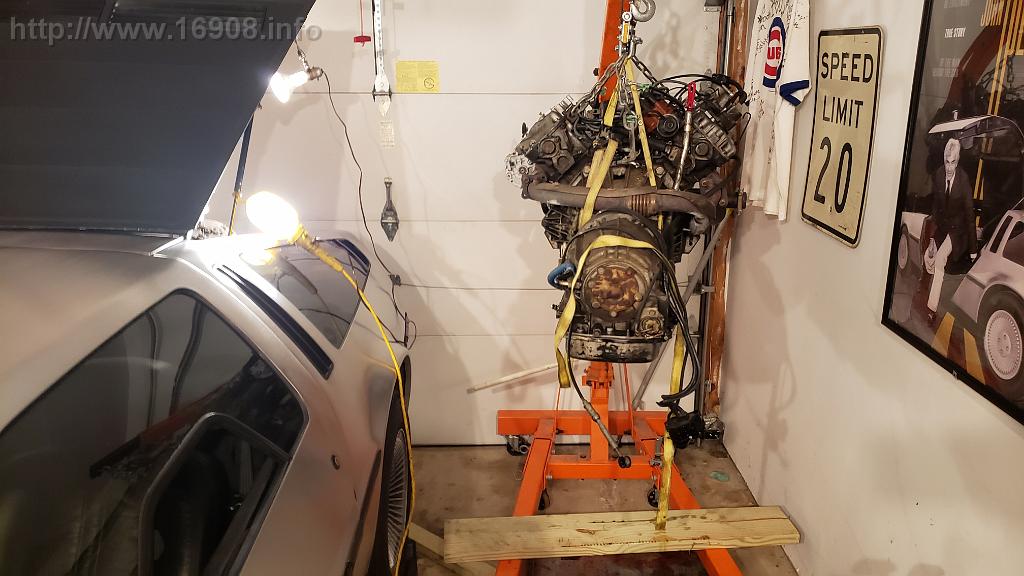
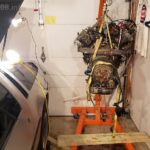
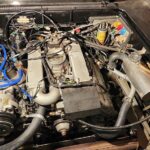
February 5th: Engine Pull!


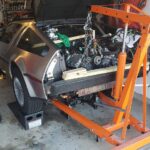


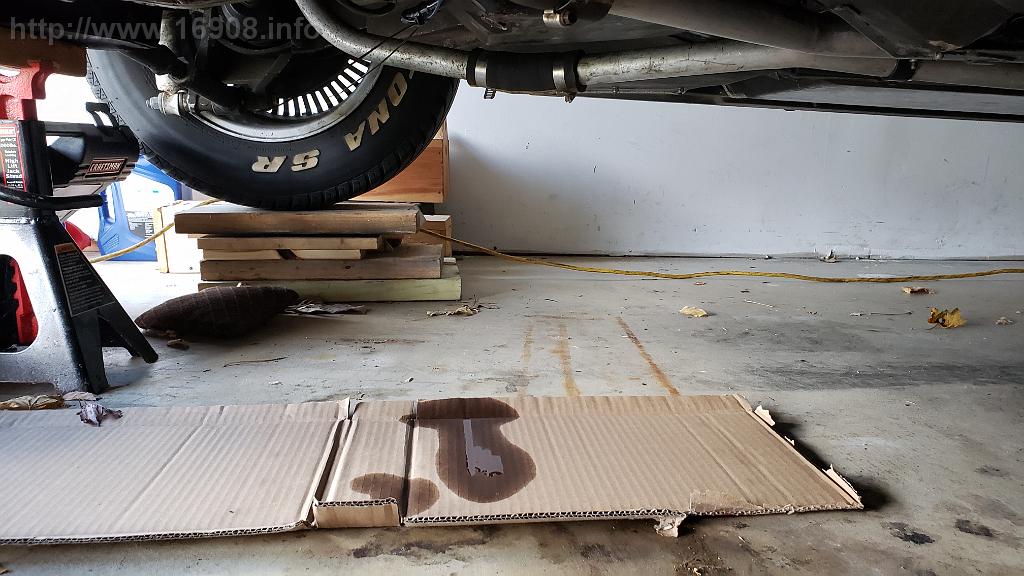
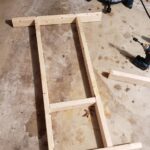
February 10th: I built a frame out of 2X4s to cradle the engine and transmission during transport. I decided not to separate the engine and transmission, due to complexity and time. My plan is to rent a truck, hoist the powertrain into the truck bed, and deliver it to the welder who would lift it out. I could get the truck back in under 90 minutes, which would only cost me around $75. I would need to rent the truck again in two days to bring the engine back to my garage.
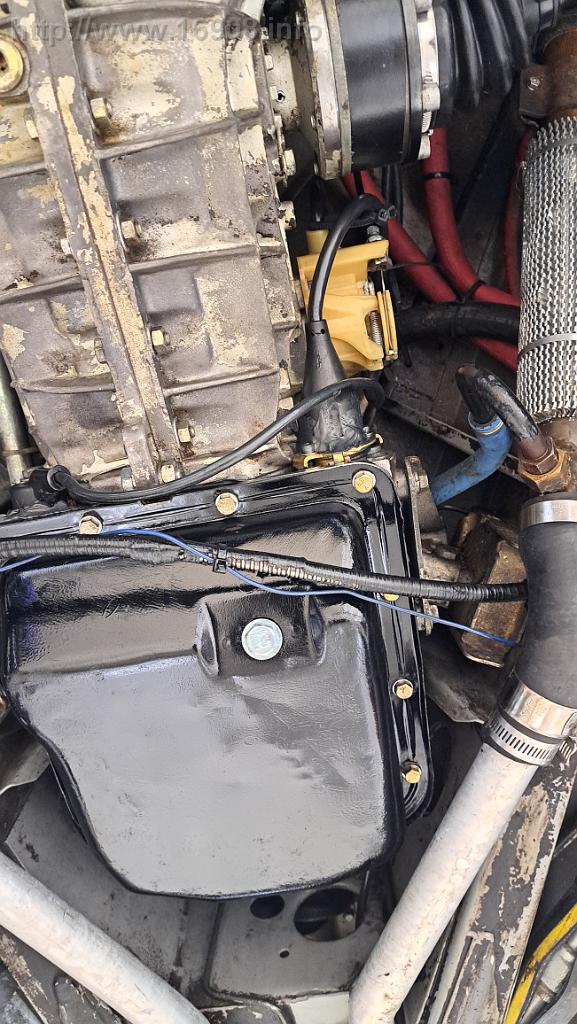
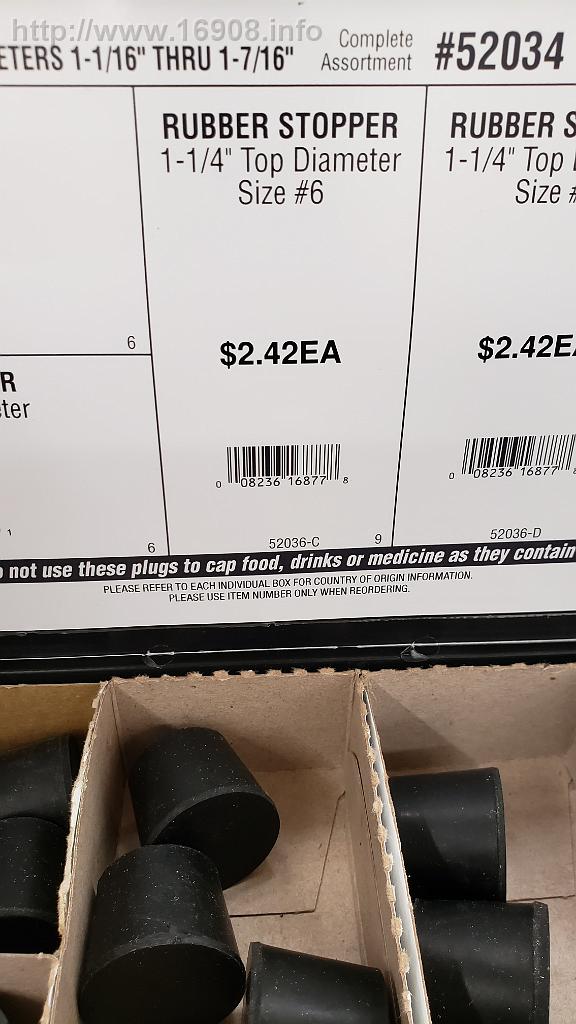
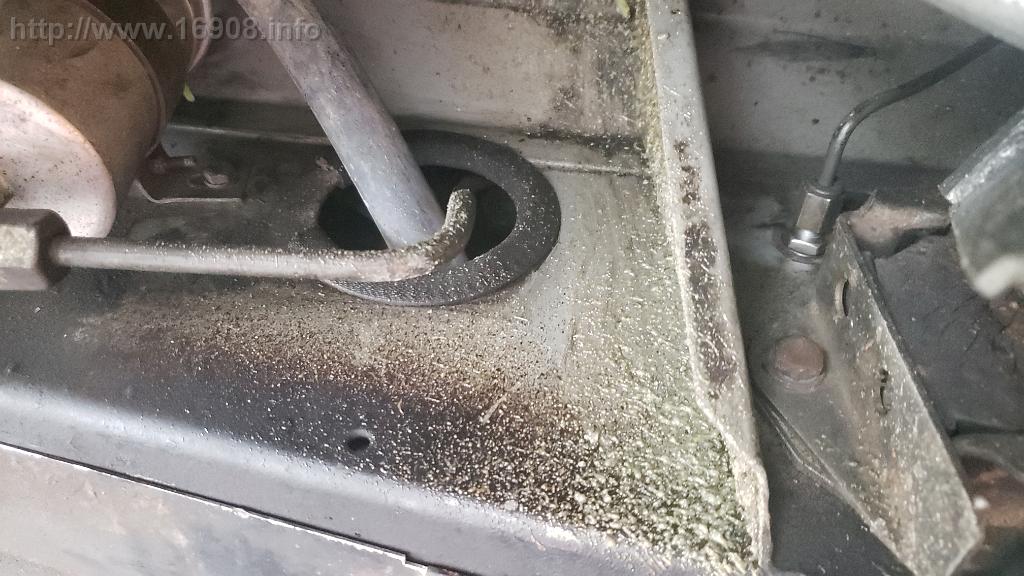
I could never drain the passenger side coolant drain, so I bought a rubber stopper to plug the hole where the Y pipe connects, and prevent coolant from sloshing out:


February 12th: I left the bolt in place to prevent dirt and coolant from entering the crankcase. While preparing to send the engine to the welder, I decided to thoroughly clean the valley and remove the bolt. It appeared the bolt was plugging a hole in the valley, but I discovered it was only lodged into some thick dirt, oil, and coolant. This looks like a lost Y pipe bolt from a careless mechanic, not a bolt plugging a hole!


I canceled the appointment with the welder and started preparing to clean and paint everything in the engine compartment.
March 4th: I took more parts off the car! I removed:
• The coolant tank, brackets, and a coolant pipe
• the wiring harness
• carbon canister cover, carbon canister, vacuum tank
• heater hoses from the engine to the pipes on the frame. Hoses look original
• dismounted one side of the sway bar. The other passenger side bolt spins. Hmm…
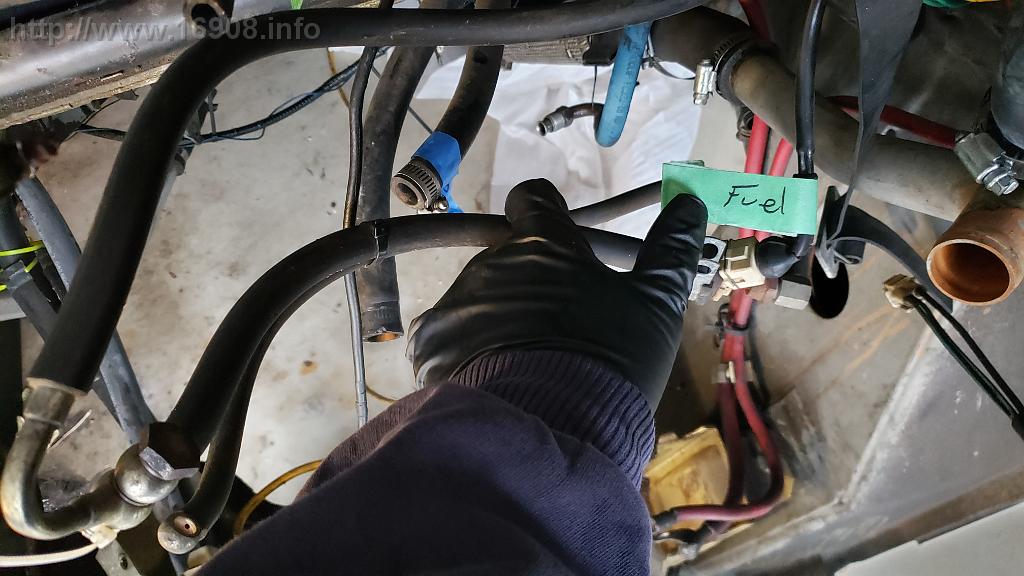
• original fuel hoses on the passenger side


I’m working on
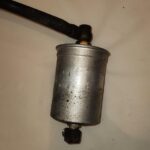
• Removing the fuel filter, and fuel hose leading to it. I have a replacement filter
• Prepping the sway bar for painting. Lots of rust on it. I wire brushed it, then used emery cloth.
• Cleaning off the fiberglass and prepping it for paint.
March 6th:
– Sway bar painted gloss black
– Unmounted and wrestled off the fuel filter. Had to buy a 19mm line wrench. Got a face full of debris and splashed with gas working under the car.


There are not many more parts I can take off in the engine compartment. I hope to start putting some back on!
March 12th: Removed…
-Y pipe seals
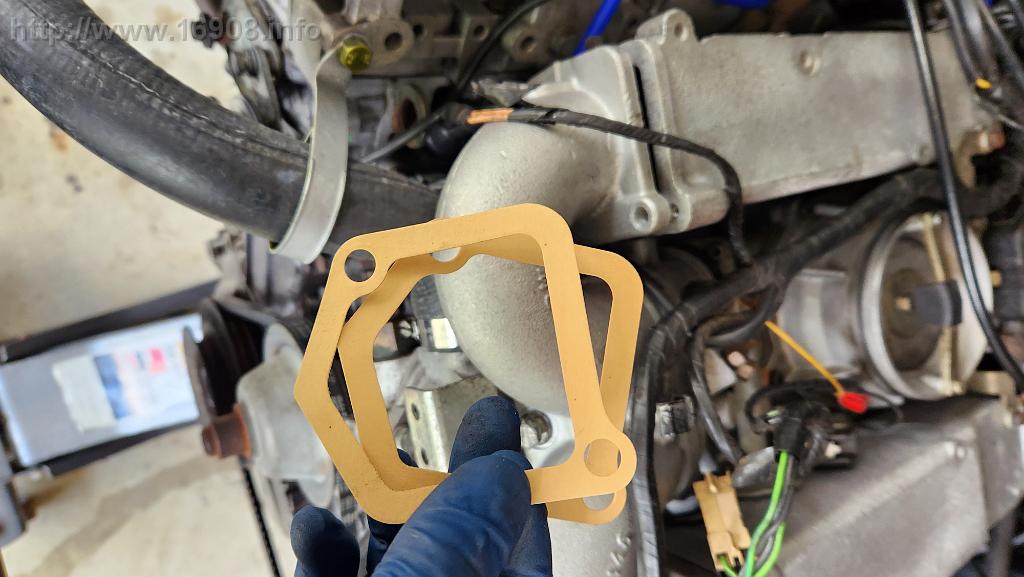
-Intake to head seals
-Transmission pan
-Transmission governor connections
-Heater hoses from head to hot water valve
I hope to get the transmission sealed back up this week.
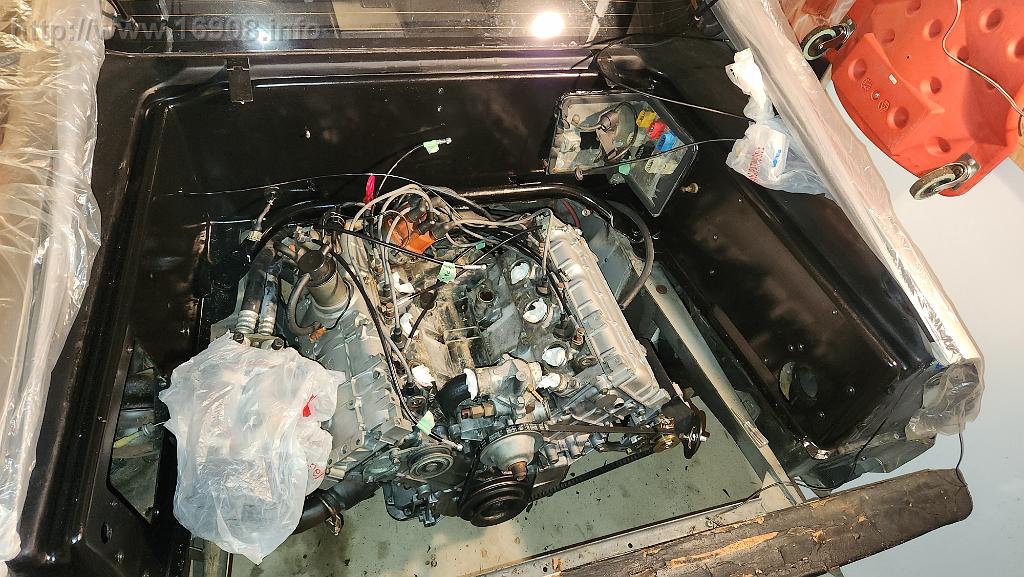
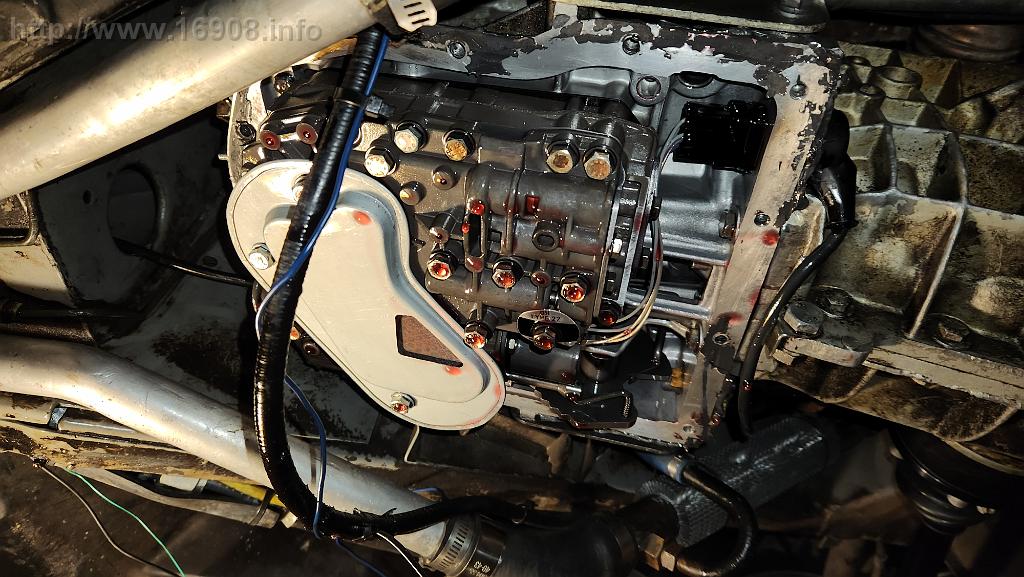
March 19th: I spent several hours cleaning belt shavings, CV joint grease, and corroded coolant off the engine. It looks better.


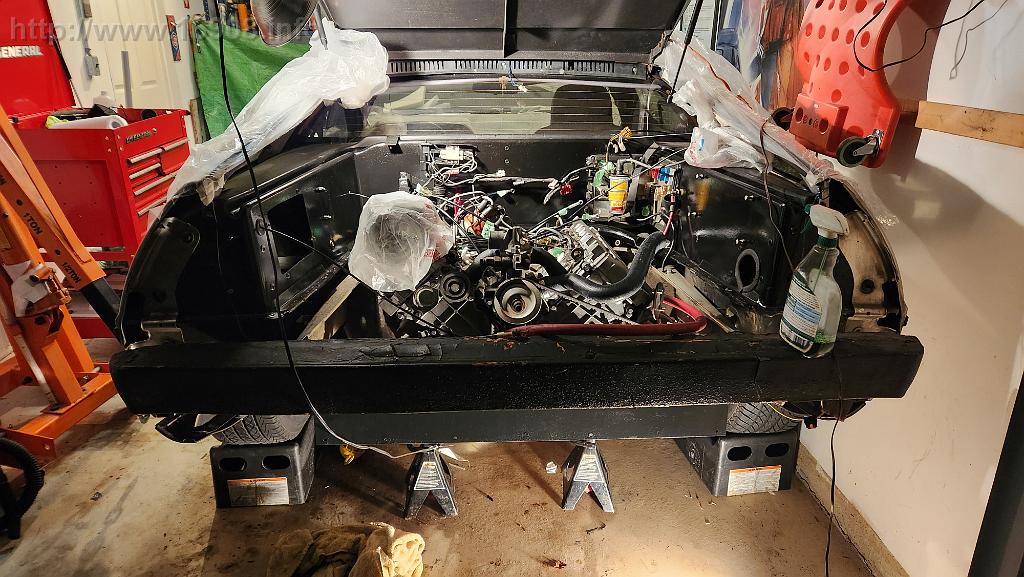
March 21st: I painted the engine bay with SEM Trim Gloss Black. Before:

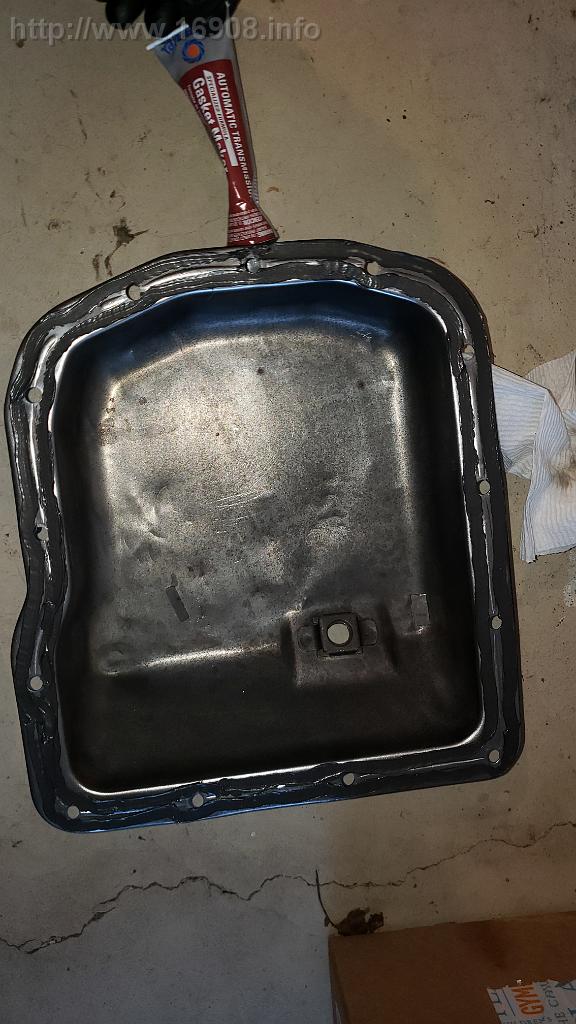
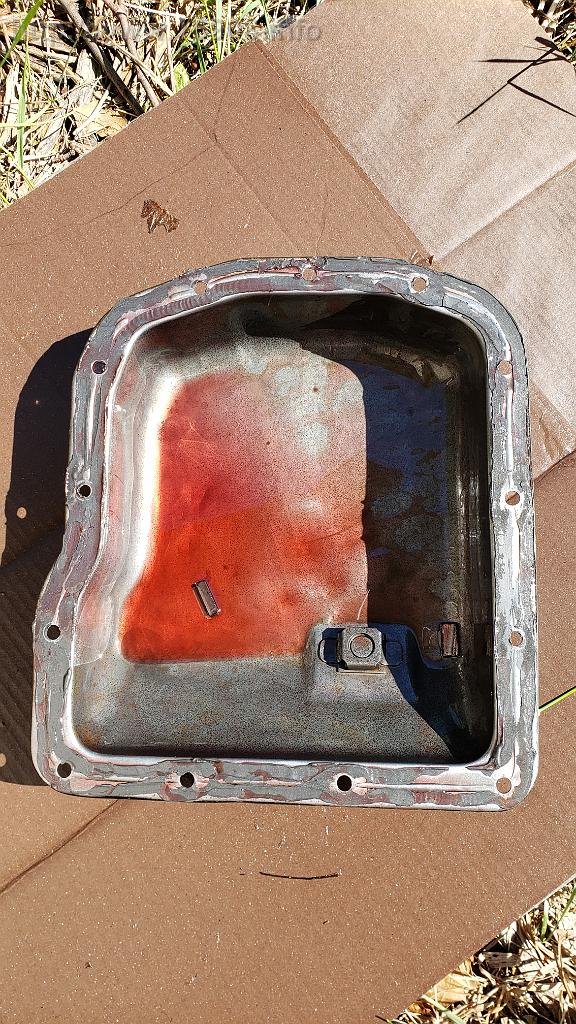
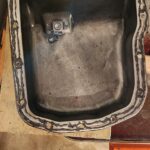
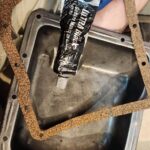
March 23rd: I cleaned off the transmission pan and hoisted the powertrain up so I could work underneath it… carefully… to avoid dropping it on myself. I re-sealed all the governor connections and dipstick tube with extra Permatex black gasket maker around the casing. I used the same Permatex gasket maker on the pan, which should hold well. I opted not to use a gasket. I followed the directions on letting it sit for several minutes, then torquing it to spec. Finally, I smeared Permatex around the outside of the pan. This is 3rd or 4th time I’ve re-sealed this transmission pan, and I am determined it will be the last…
Looks like an oil leak somewhere on my engine!
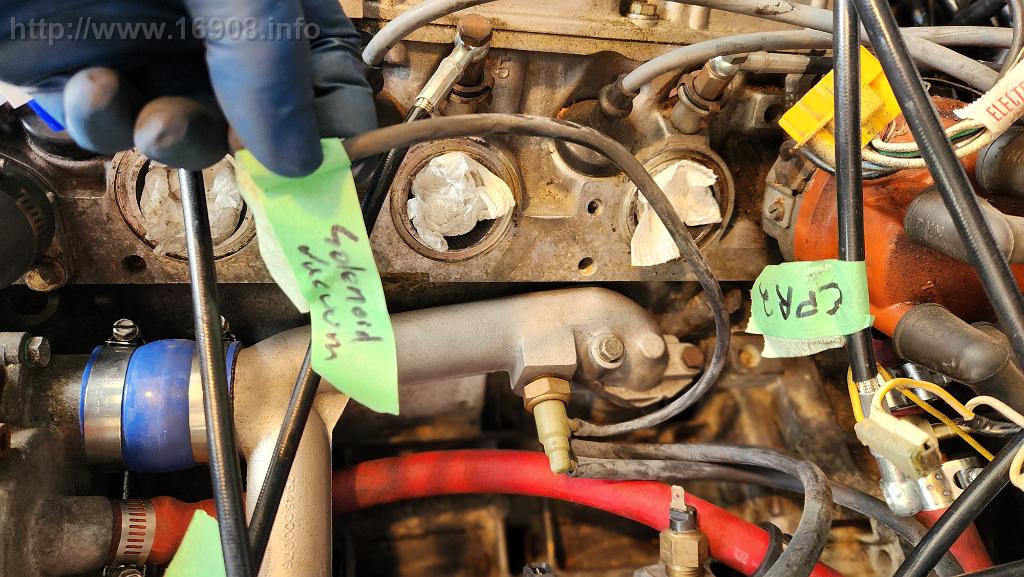
The frequency valve hoses will remain stock for now:

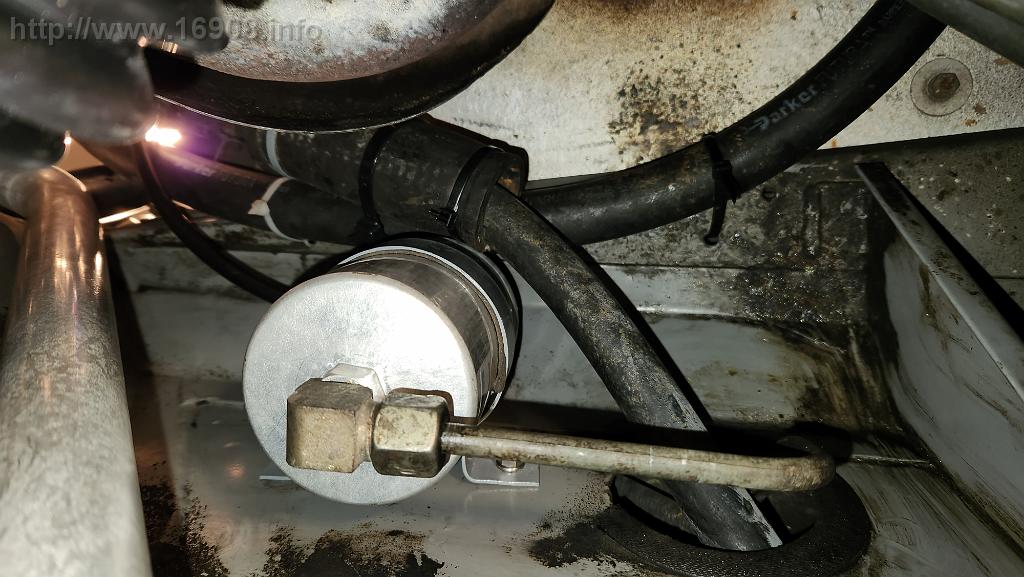
March 25th: Fuel filter bracket painted, new filter, mounted with new stainless hardware. One of the first parts to get reinstalled!


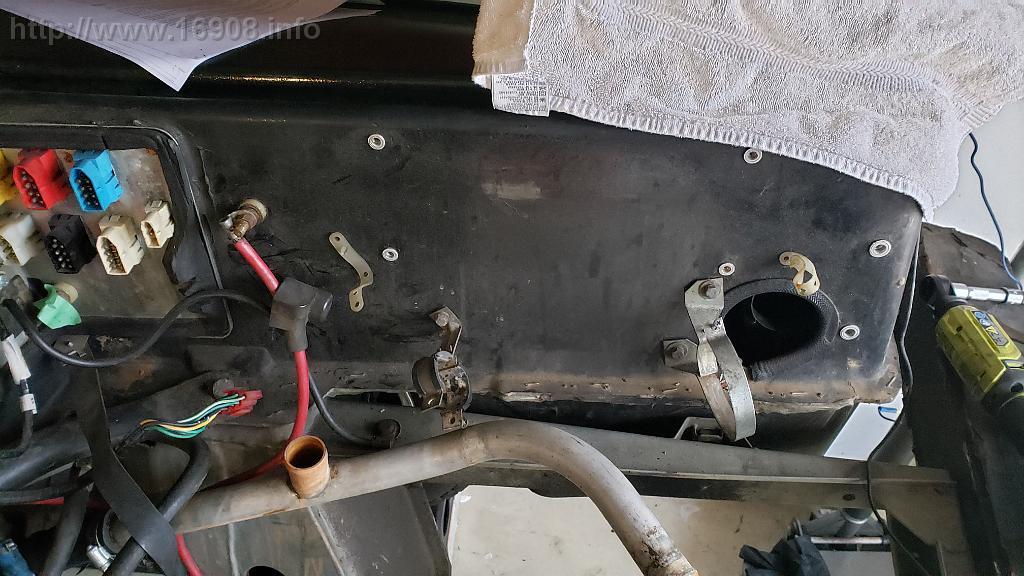
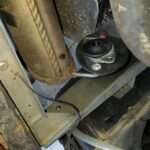
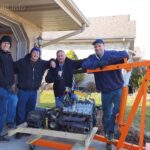
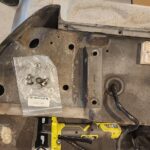
I invited some local Delorean owners over to help me reinstall the engine. While examining the void in the shock towers of the frame, we found the epoxy had pealed off the steel! I didn’t have a good way to remedy this, so I grabbed a can of Rustoleum Smoke Gray spray paint, and sprayed into the void, trying to coat the bare steel.


After a lot of repositioning, and maneuvering, we finally got the engine in the cradle, and the transmission bolted in place!

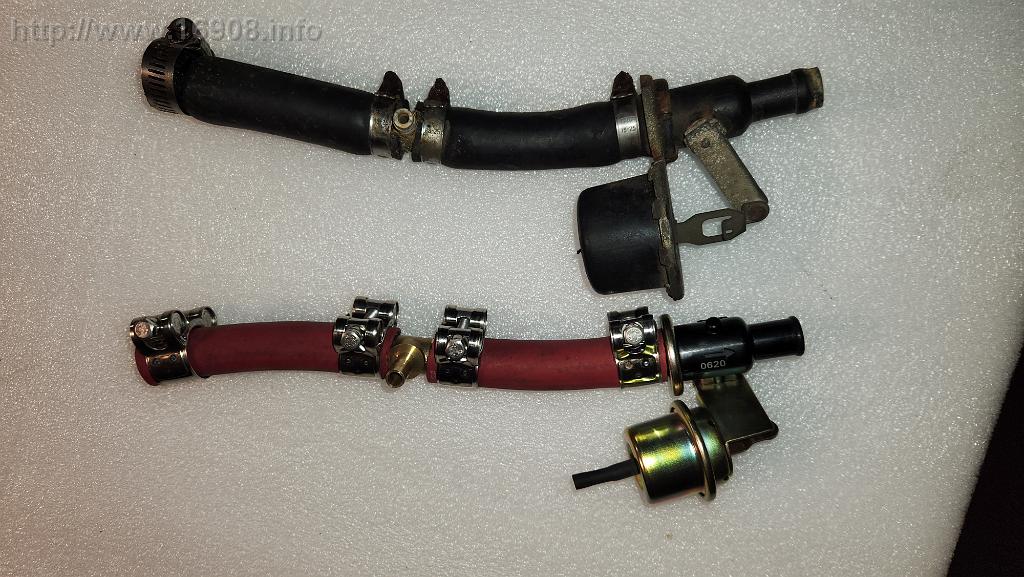
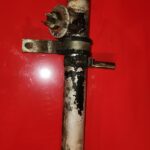
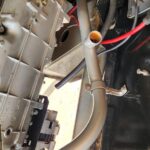
March 27th: I decided to replace the old heater hoses, control valve, the corroded clamps and tee needed for bleeding air out of the system.
-New red gates hoses! With the maze of black hoses and wires, the red coolant hose is a nice contrast.
-New brass tee from 88Miles
-New valve from Delorean Midwest
-New stainless peromi t-bar clamps:


April 1st:
-Suspended transmission governor wiring
-Connected trans fluid hoses to heat exchanger
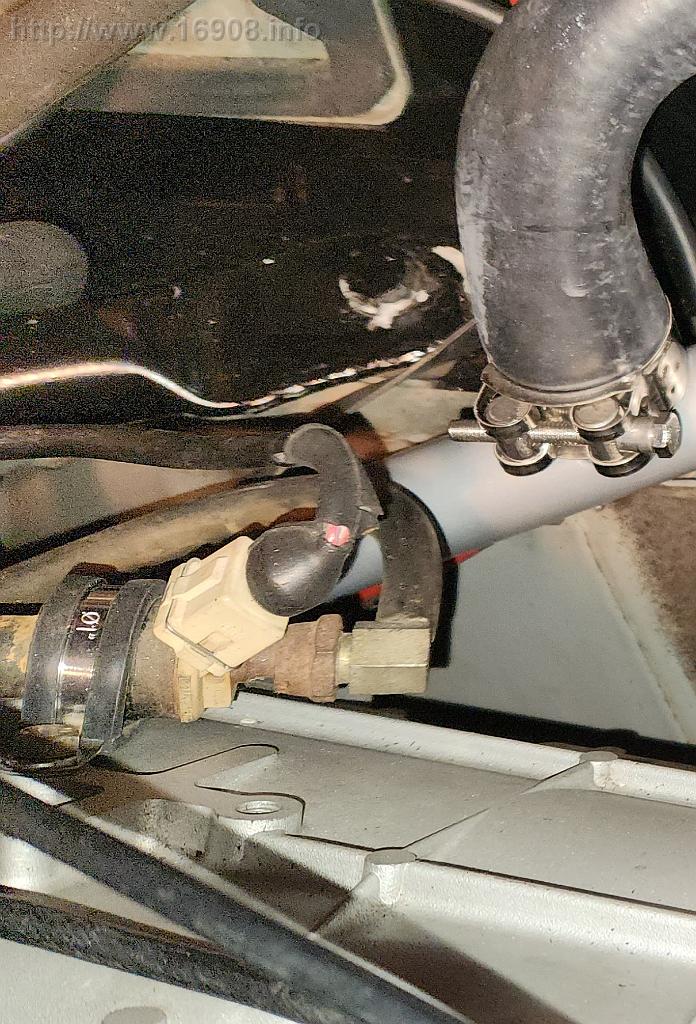
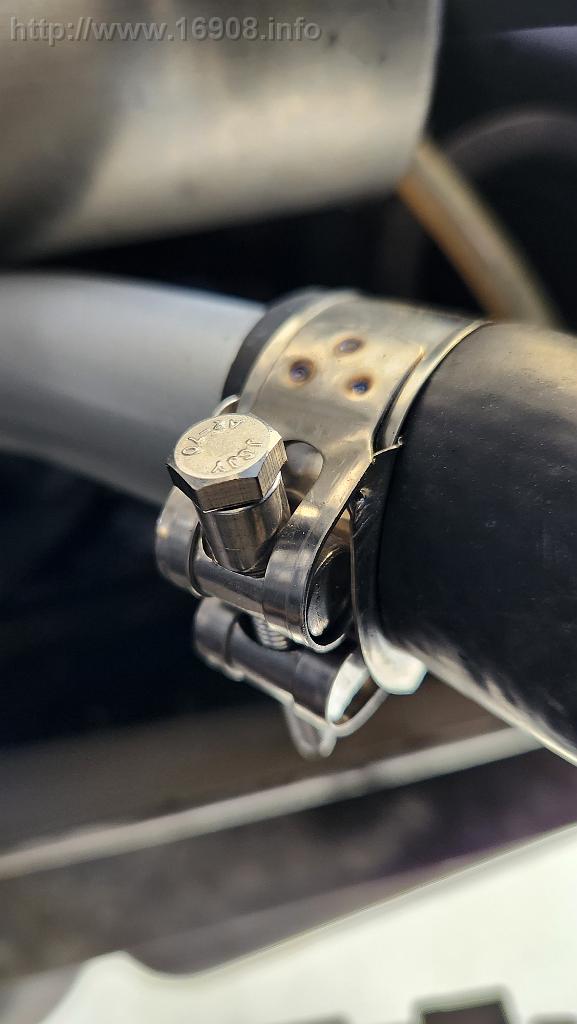
-Installed new heater hose to eliminate the heater pipe, along with 3 hose clamps!
-Installed a cushioned hose clamp to secure the heater hose at the Y pipe bolt.
-Fascia mounting plate painted
-Painted various brackets
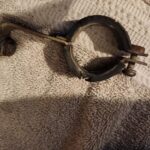


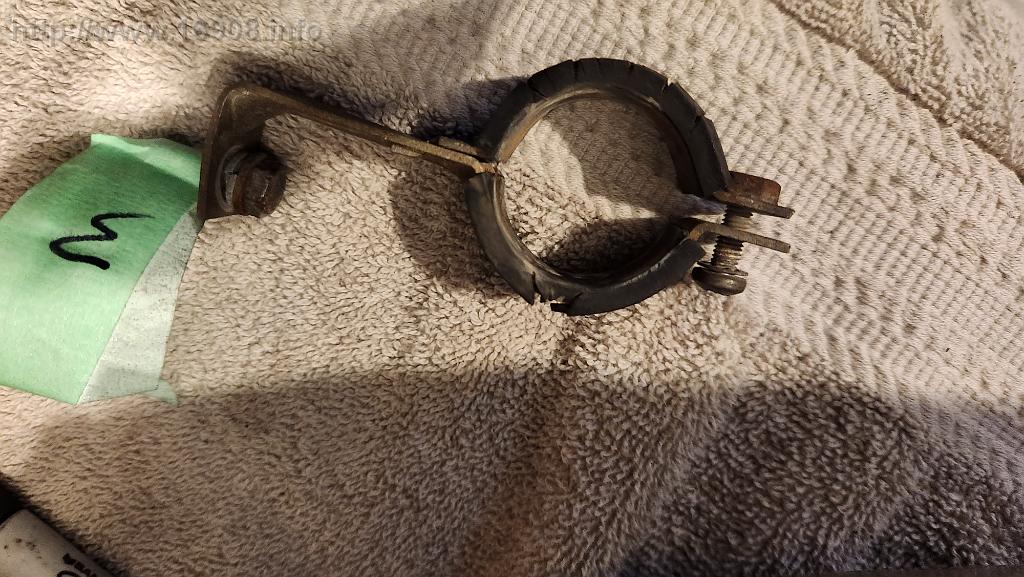
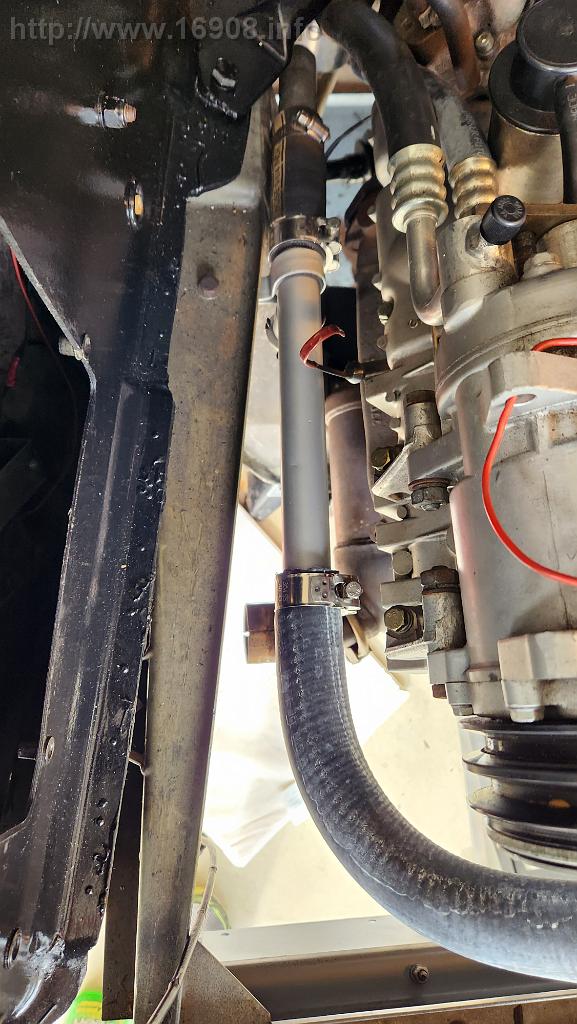
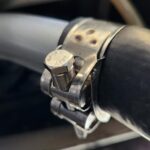
Here’s the cushioned (shiny!) stainless hose clamps, which I used to secure the heater hose in the VOD. They also exactly matched the clamp for the frequency valve:


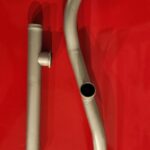
April 2nd: The coolant pipes had corrosion and undercoating on them. I wire brushed them, used scotchbrite, cleaned and painted them with rustoleum high temperature engine primer and paint. I hope this stuff works well.


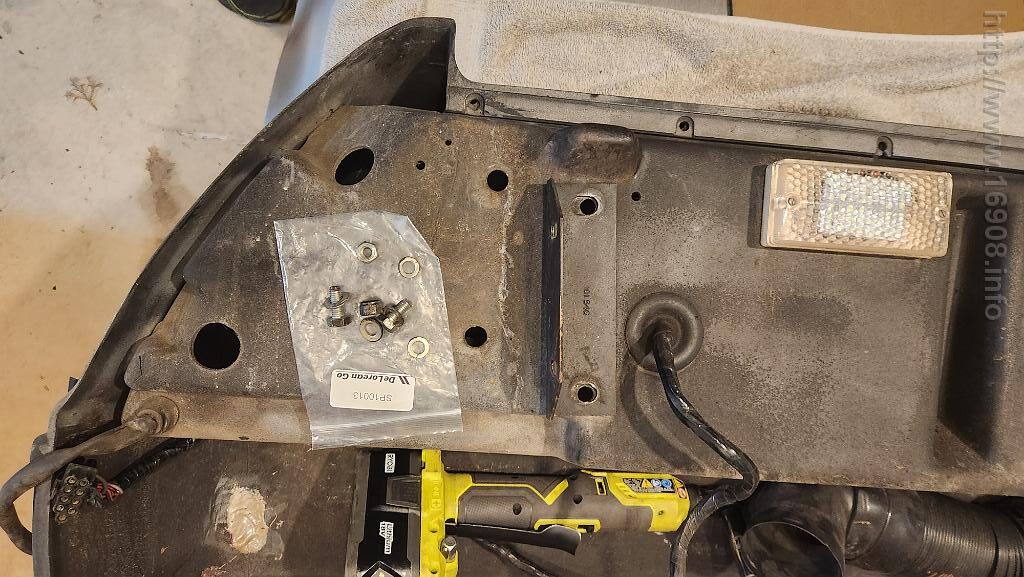
-Y pipe installed with new O rings, bolts with antisieze and torqued to spec
-AC compressor mounted
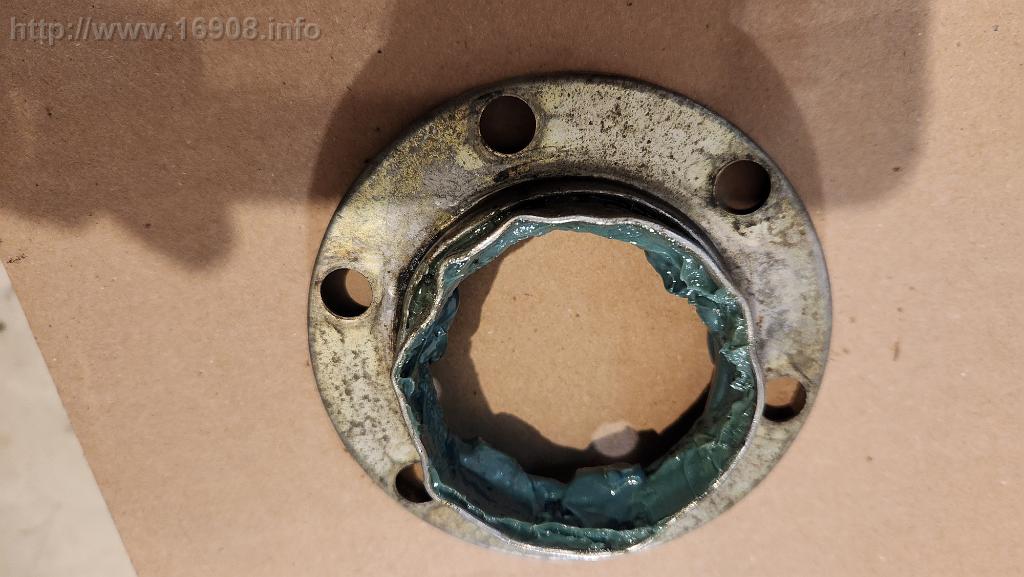
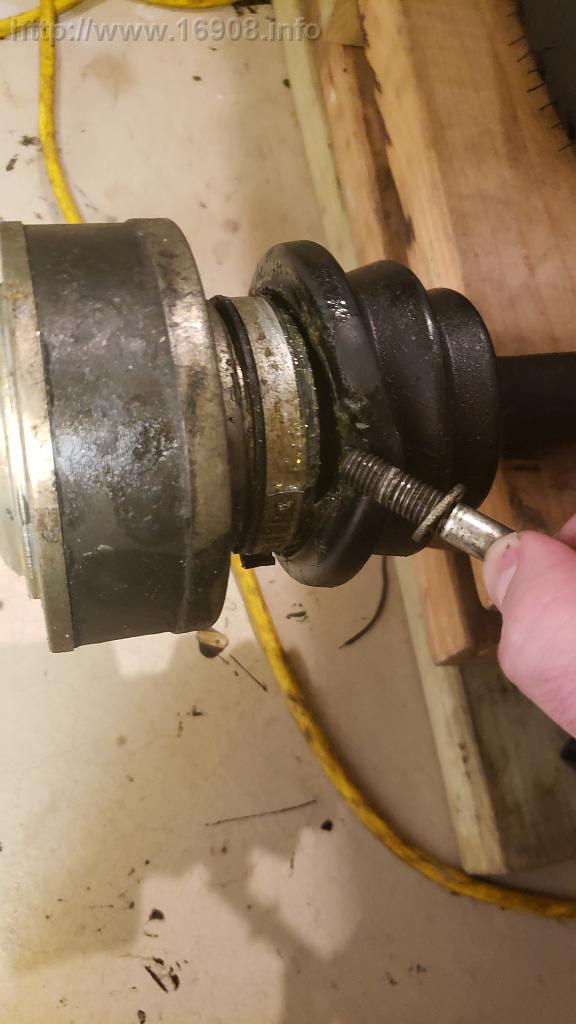
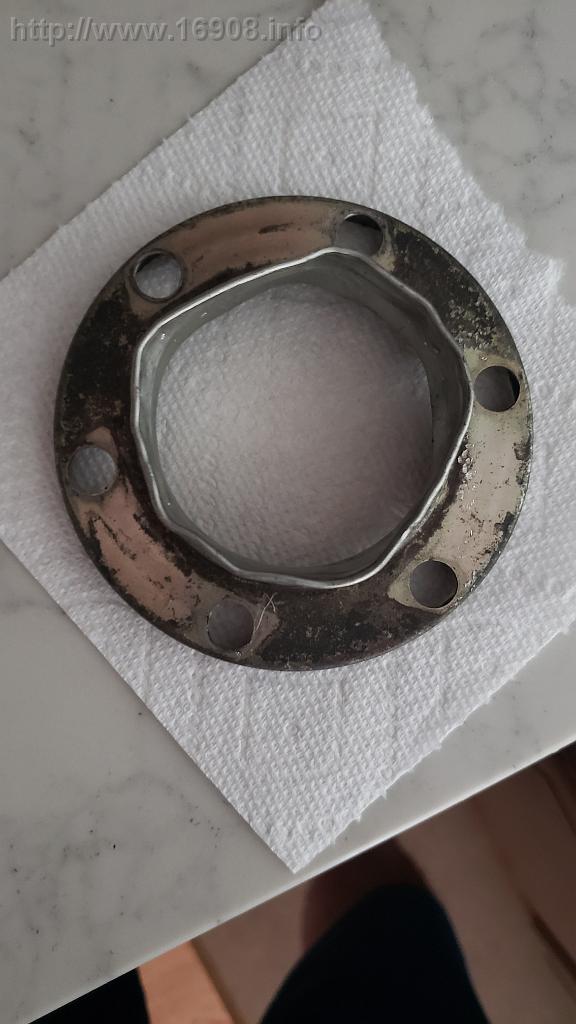
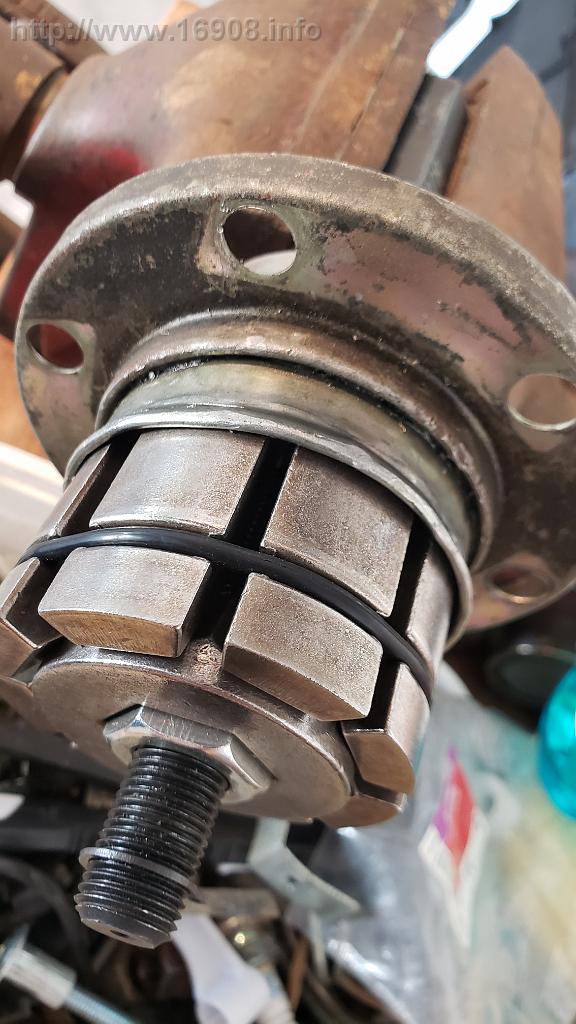
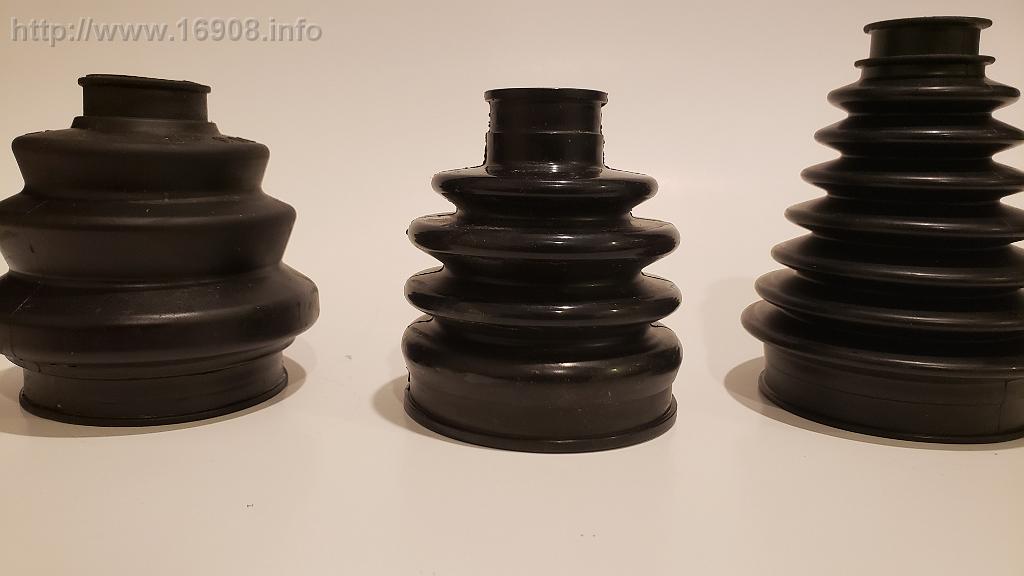
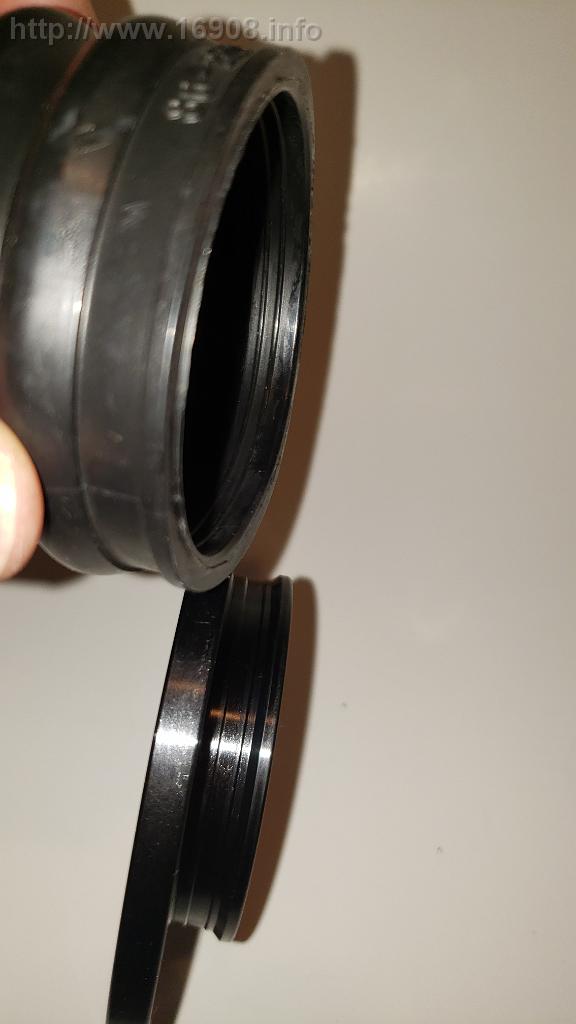
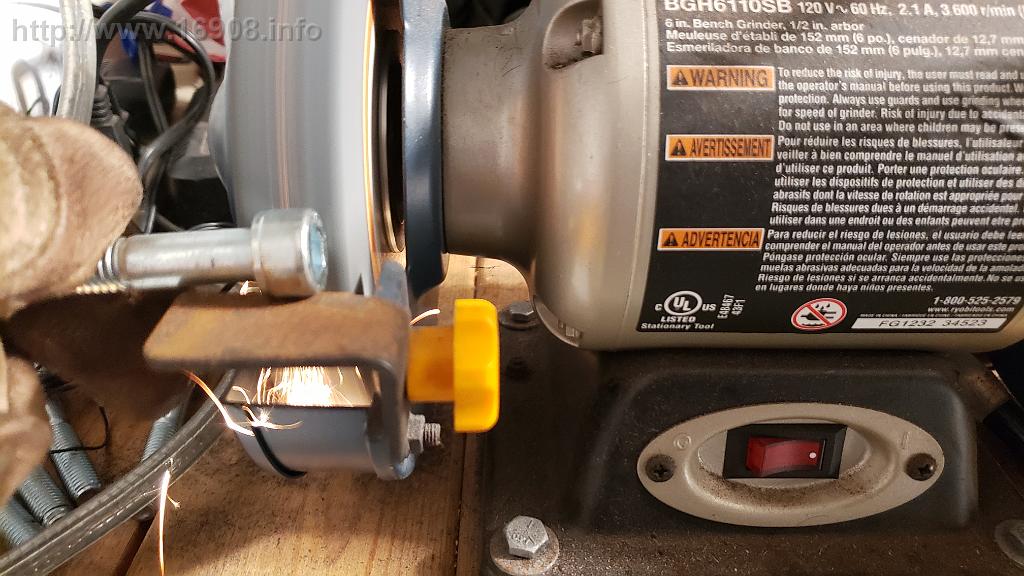
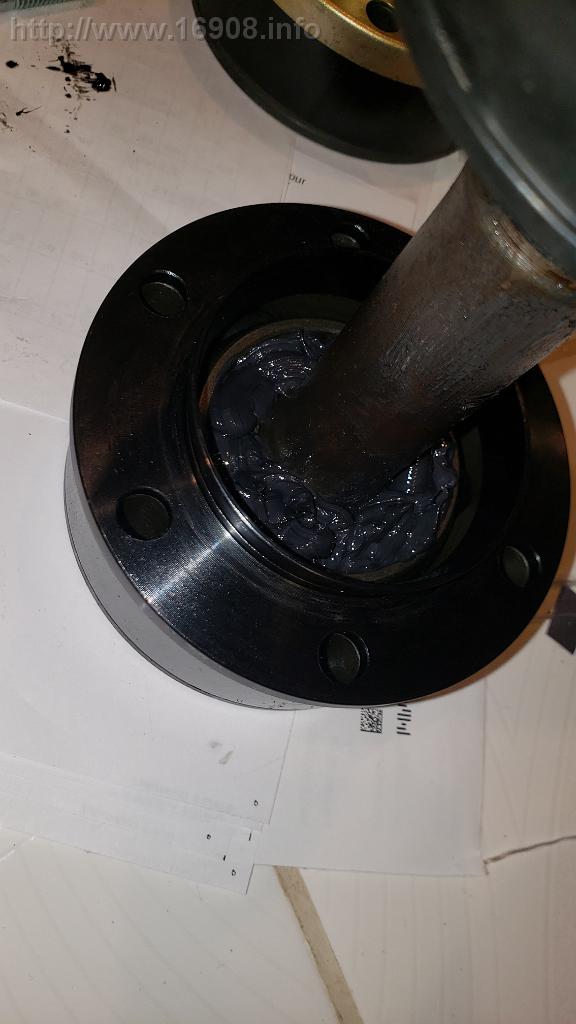
April 15th: Axles Rebuild #4! This time, I only needed to rebuild one axle. After noticing another tear in an axle boot, I bought a new axle flange from a Porsche parts supplier. For years, I had been fooling myself by reusing the damaged flanges left behind by a previous owner. These mangled flanges don’t hold the boots securely and can even cut into them. I also replaced the last two original hex-head bolts with more reliable socket-head bolts.


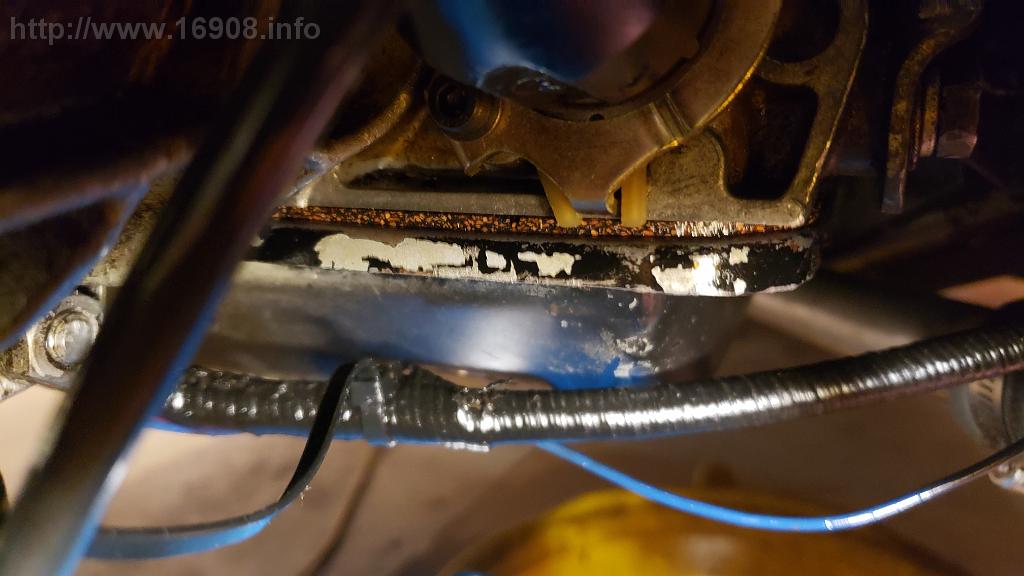
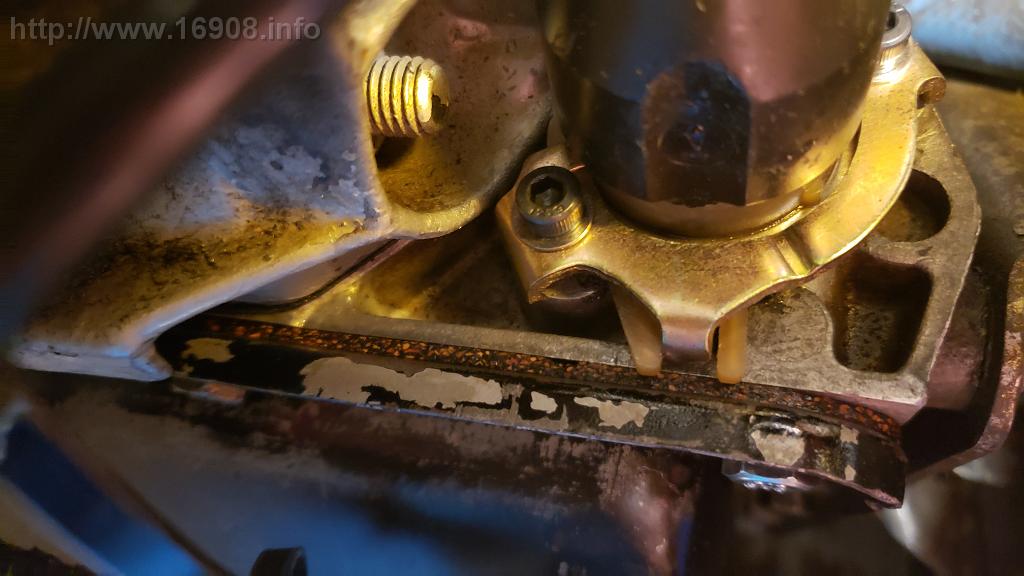
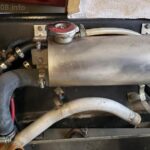
The cooling system is just about done. I painted the brackets, enamel coated the pipes, new otterstat seal, new t- bar clamps, new hoses, and cleaned off a lot of corrosion:


The stainless T-Bar clamps, along with the enamel coated coolant pipes look great!
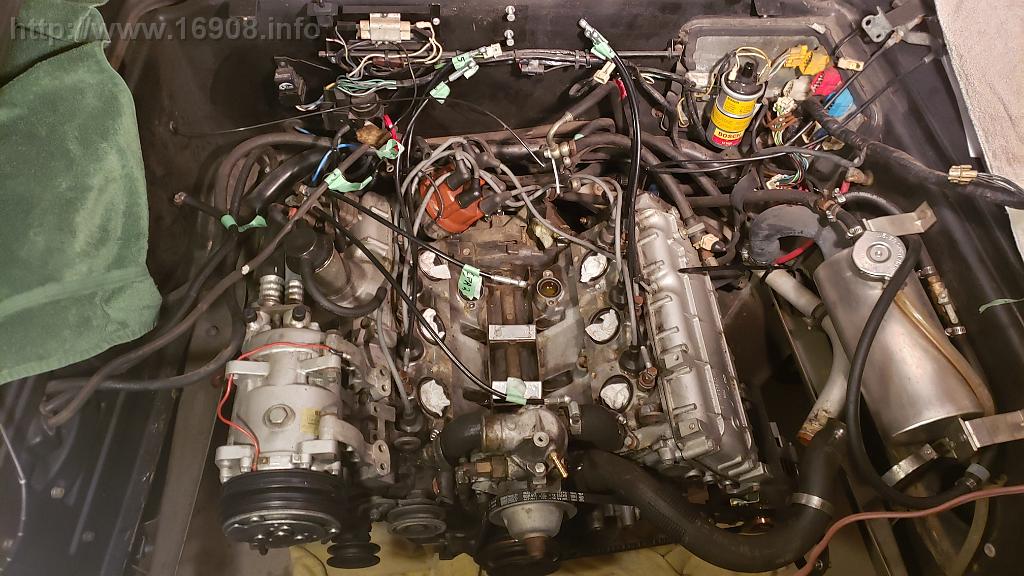
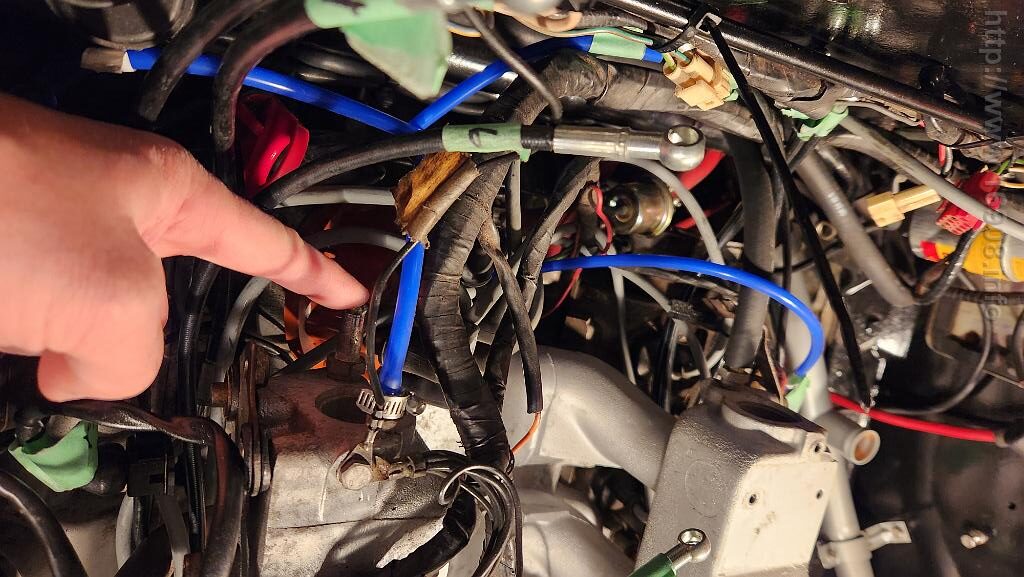
I painted many parts gloss black, even the bolts and washers. I also have new blue silicone vacuum hoses!


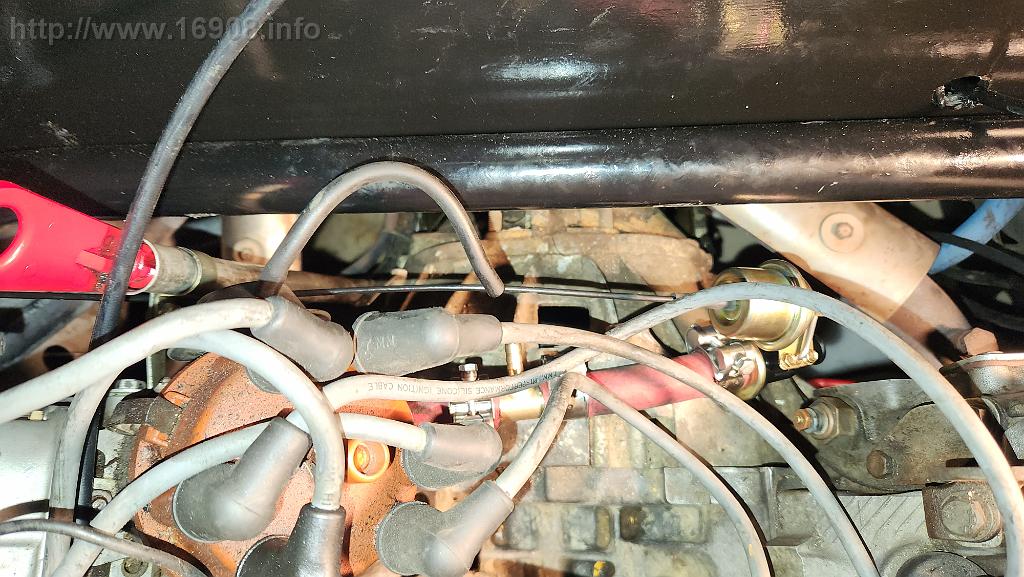
I removed the distributor cap and cleaned the contacts with emery cloth. I opted not to replace it:
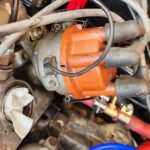


I cleaned all the spark plug wires. I chose not to replace them at this point:

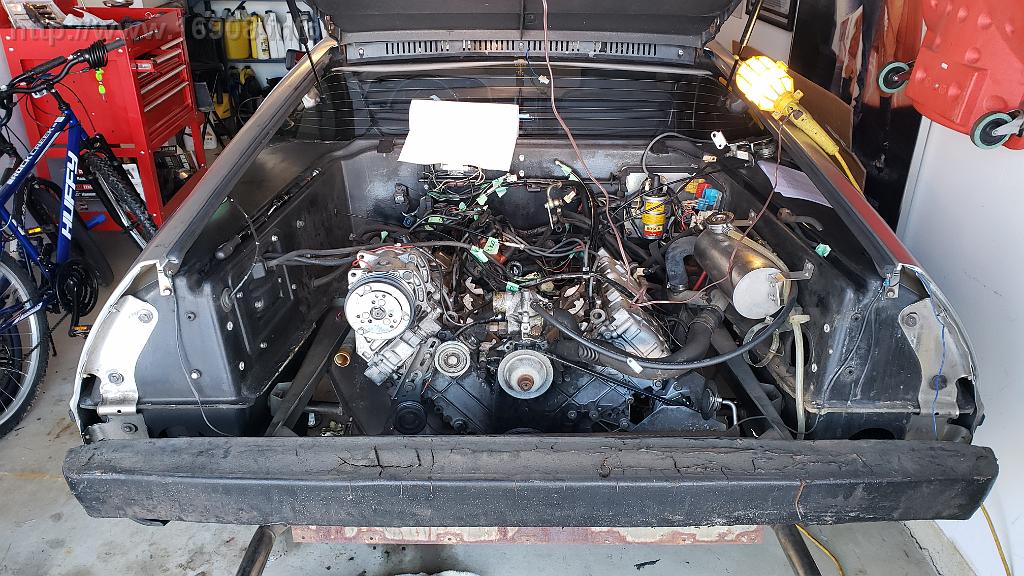
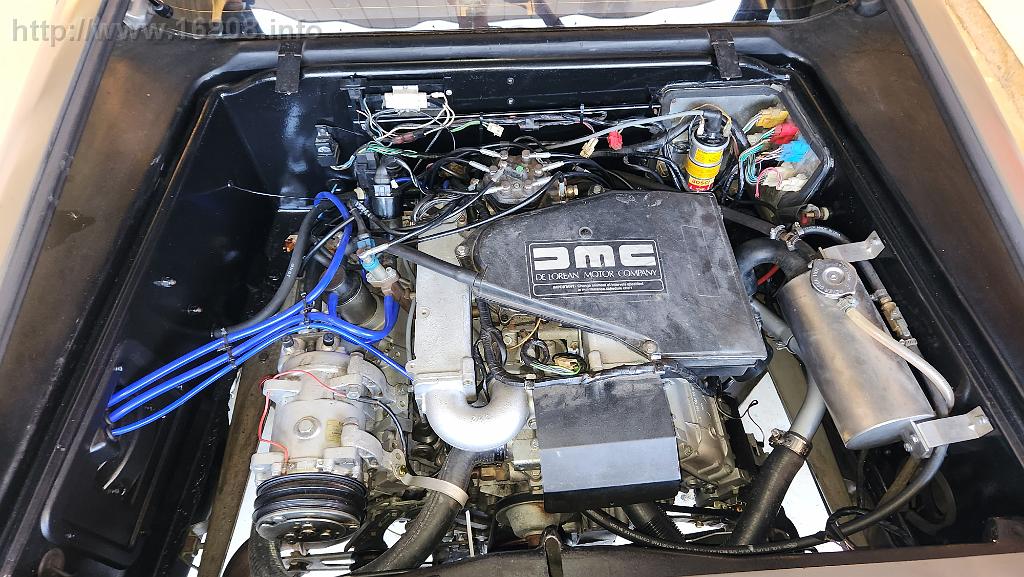
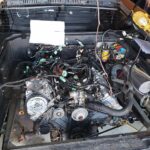
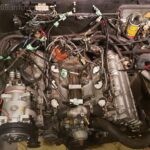
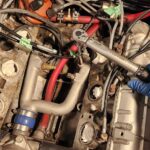
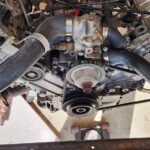
Current view:
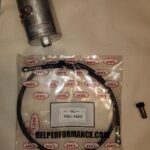
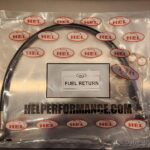
April 17th: New fuel feed and return hoses arrived from Delorean Midwest. I had to dismount the fuel filter to connect the new hoses. Now it’s reinstalled, hopefully for another 40 years.


Next up: wiring harness, intake manifold, and fuel distributor. Maybe I can have the engine running in the next 7 days?
April 23rd: Current state. My goal for tomorrow is to finish the engine bay and start the car.

April 24th: I took a vacation day, worked all day, overcame a few setbacks, but I still couldn’t get it done. The “pipe of agony” lived up to its name, I should have never called it the “pipe of ease.” I also lost an allen wrench somewhere, and it’s really bugging me.

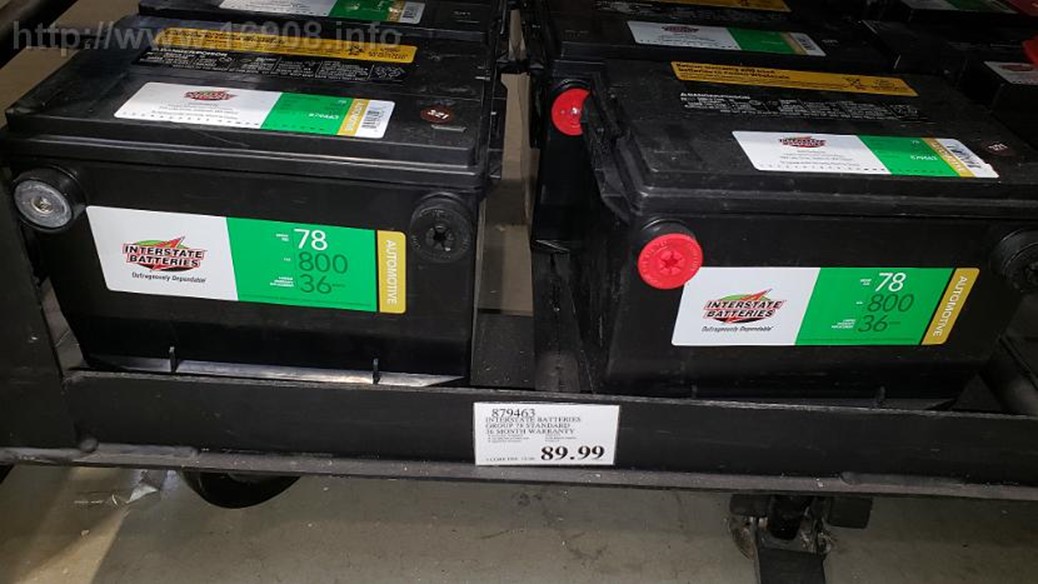
Just before I quit today, I installed the battery, lit up the dash, and bumped the starter. I need to torque down the fuel hoses, fill the fluids, and check all the electrical connections again.
Almost done.
April 27th:
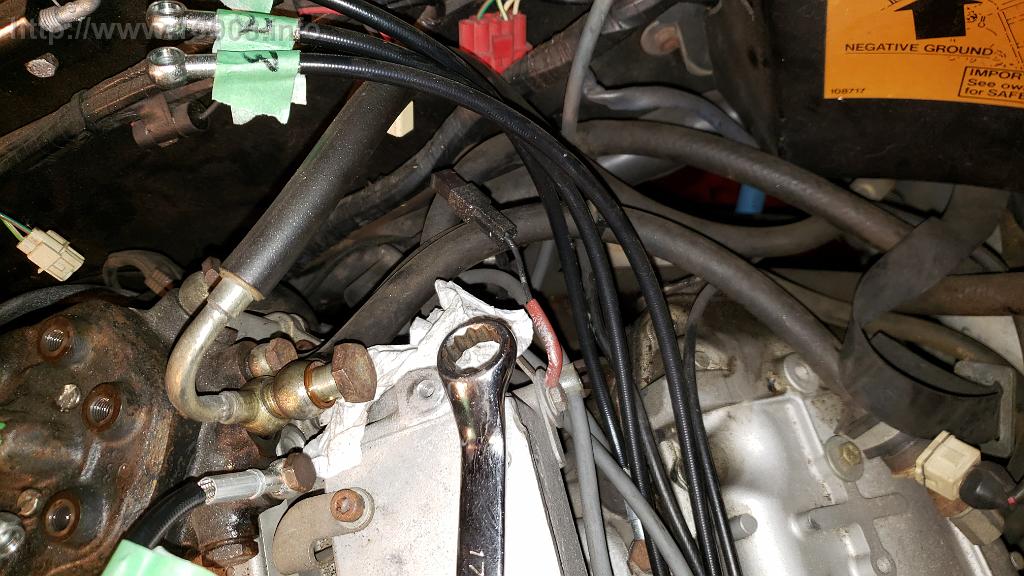
I jumped the RPM relay to prime the fuel lines. Sure enough, there’s a leak, possibly between the right-angle fitting and fuel filter. I used the required teflon tape on the connection….
So close to being done.


April 30th: I disconnected the fuel feed hose at the fuel distributor and was able to continue to spin the filter onto the fitting. In total, I’ve spun it about 400 degrees. I jumped the RPM relay to confirm gas is flowing – it is! The fuel pump does its job well. Within a few seconds, I had about two cups of gas in a container.
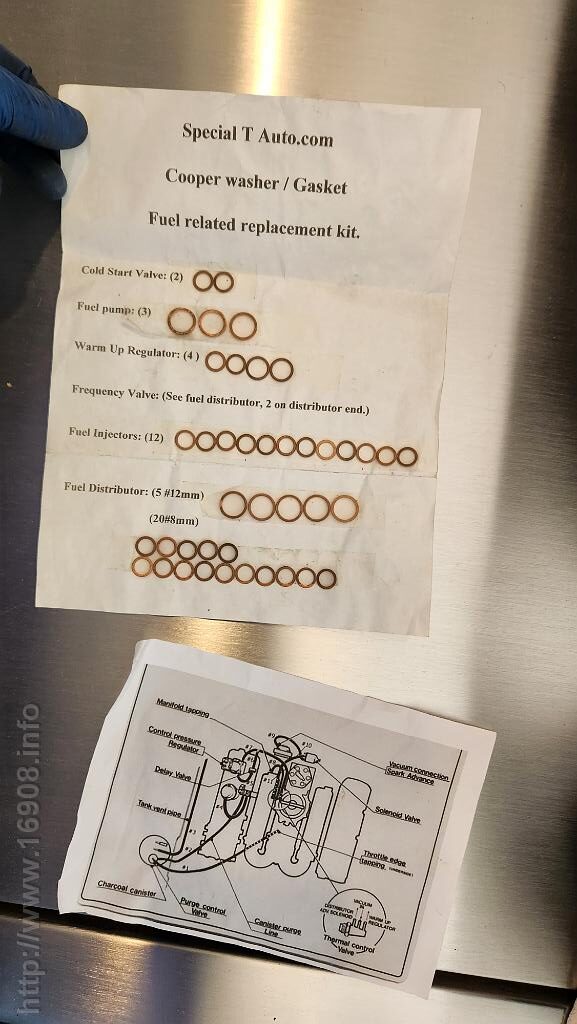
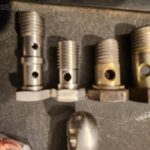
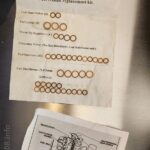
I needed some copper washers, and had a set I bought many years ago. The tape on the washers deteriorated, and left residue on the washers. I had to carefully clean them without bending them:
After reattaching the fuel hose (with new washers), I primed the line once more. It’s still leaking, albeit much slower now. I’m also not sure from which end of the fitting it’s leaking.
I tried starting the car, and…. it cranks but does not start. Engines need air, fuel, compression, and spark. I’ll check for spark another day when I have a helper.
May 3rd:
-Tachometer jumps when cranking
-less than 3 volts at the coil – not enough
-less than 9 volts at the ballast resistor
-less than 9 bolts at the ignition post on the starter
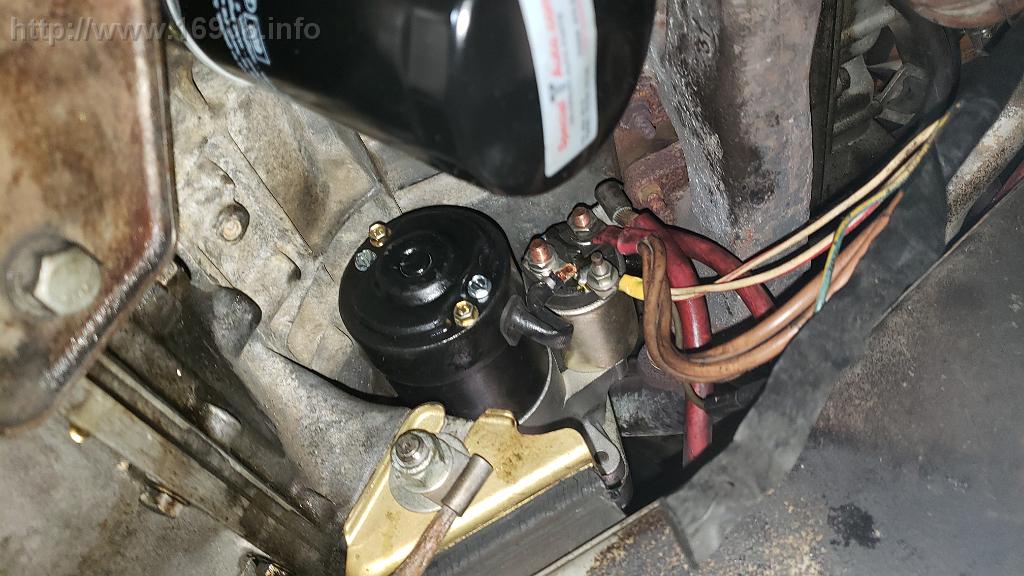
I’m going to charge the battery again and clean the starter connections.
May 6th: I cleaned all the starter connections, and the car still only gets around 8 volts before the ballast resistor. I’m going to study the ignition circuit again. I also found another fuel leak.
May 7th: Checked some basic things:
-coil reads .7 ohms of resistance: correct
-coil works with a crude circuit made from a battery, spark plug, and some wires.
-ICU wire connection is secure.
The ignition circuit is very confusing.
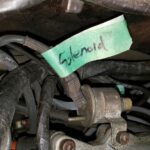
May 10th:
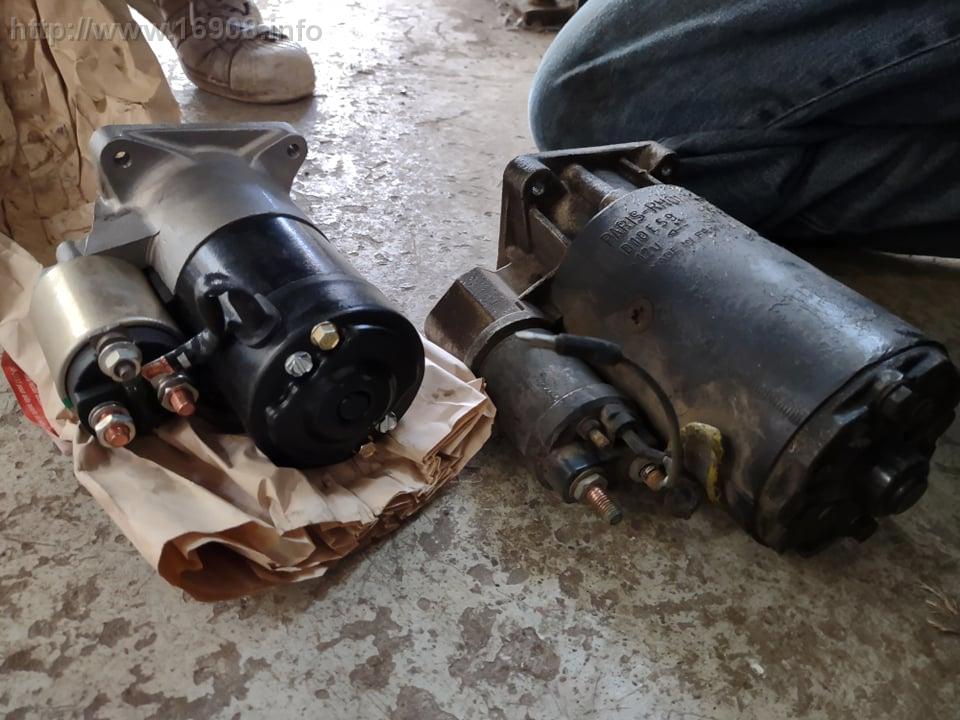
After spending several days studying the ignition circuit—testing voltages, resistances, and current flow—I hit a roadblock. The test light wasn’t pulsing between the coil’s negative terminal and the positive jump post during startup, as it should. This pointed to a potential issue with either the ignition ECU or the distributor. I located the ignition ECU, disconnected and reconnected it, but the car still wouldn’t start.
I then reached out to some amazing friends and local DeLorean owners for help. Their car is nearly identical to mine—not just in appearance, but in configuration. In fact, both cars were built within days of each other and are only 10 VIN numbers apart!
I started tracing wires, which brought me back to the connection to the distributor on the driver’s side of the firewall. After comparing the same connection on my friend’s car, mine felt loose, and I finally saw the female terminals had become dislodged in the plastic connector!

After fixing the connection and trying to start the car – THE ENGINE ROARED TO LIFE!
I also fixed one fuel leak. I’ve got several things to do, but I now have hope I’ll be driving the car in a few weeks.
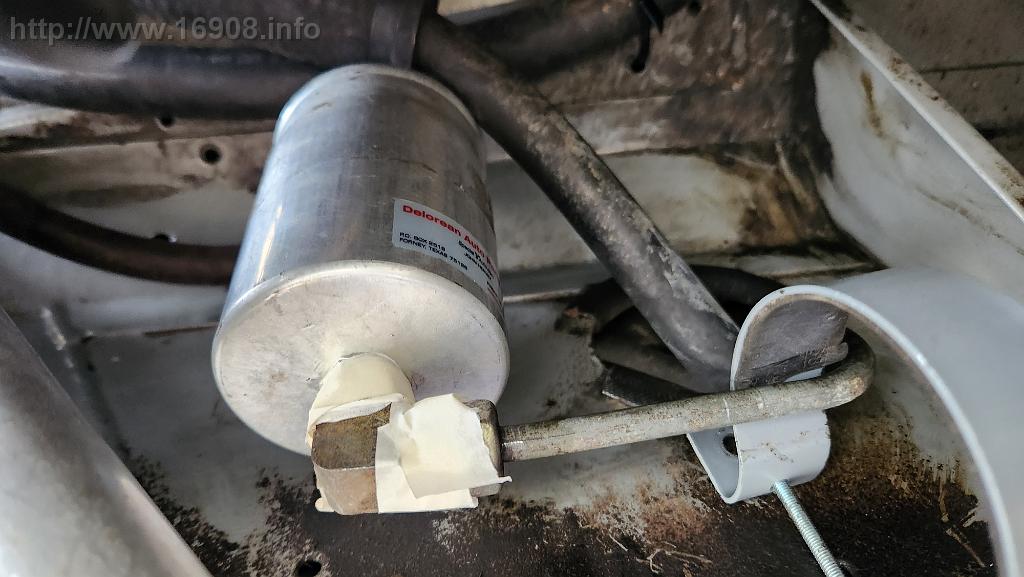
May 14th: I’m still dealing with leaks around the fuel filter fitting. To pinpoint the source, I wrapped tissue and tape around each end of the fittings and briefly jumped the RPM relay to pressurize the system and see which side was damp. I confirmed the leak is between the filter and the brass fitting. I tried tightening the filter onto the fitting, but that twisted the feed hose on top. I ended up disconnecting the hose and screwed the filter onto the brass fitting as far as possible. Now, I’m struggling to reattach the hose using new washers.
May 15th: After lots of research in the DMCTalk forums, and Facebook Delorean groups, I found the fuel filter to brass elbow connection is very difficult to seal. The previous filter had exposed threads on the brass fitting, but I now know all fuel filters are not created equal. If the stock fitting wasn’t going to work, I was going to buy the DeloreanGo version which doesn’t have tapered threads and utilizes a copper sealing washer. I was able to spin the filter all the way down to the brass fitting, finally sealing the connection!
I also fixed a coolant leak and started the car again.
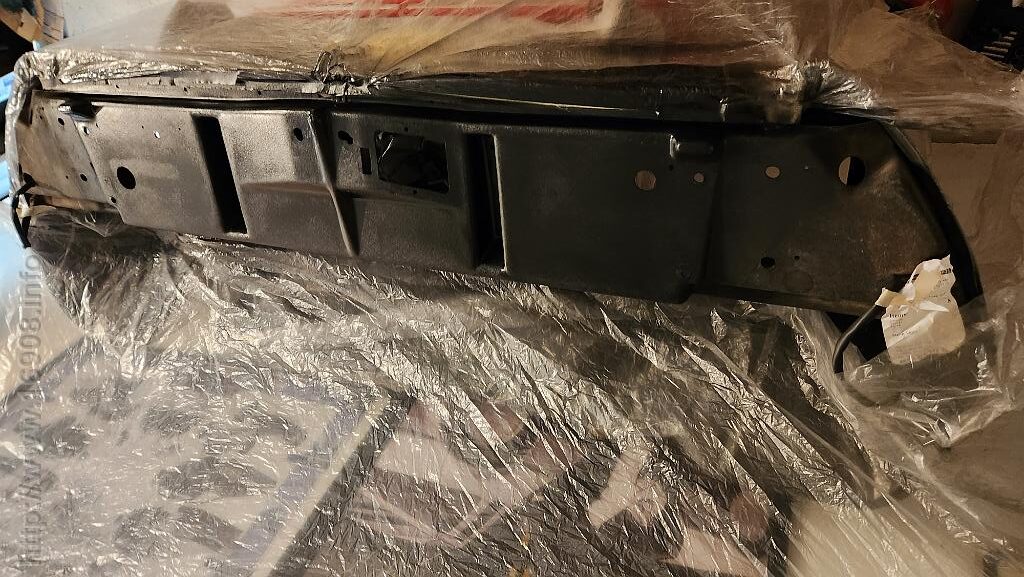
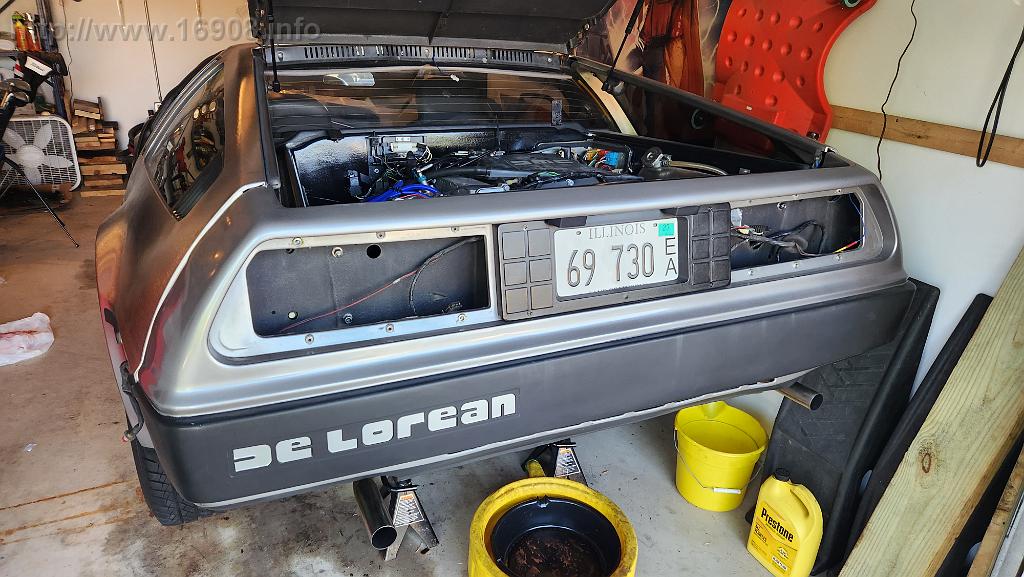
May 21st: I painted the back of the fascia with SEM Trim Gloss, painted the brackets and bolts with Rustoleum Gloss Black, and started mounting the fascia:


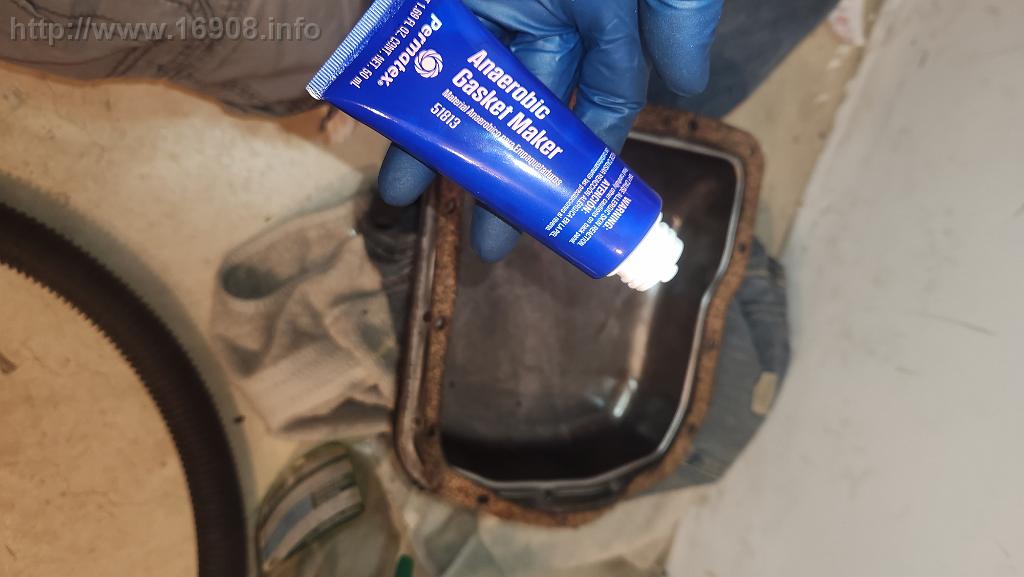
May 25th: I poured in a gallon of automatic transmission fluid, only to have it start quickly leaking out around the poorly sealed pan. I drained the fluid again….


May 26th: I decided to reuse the old transmission pan gasket, and Permatex anerobic sealant around the gasket. I torqued the bolts to spec, and hoped this would be the last time I would seal the transmission pan!

May 27th: I realized I had applied the anaerobic sealant incorrectly, so it never cured. I removed the pan again and began cleaning off the sealant. Even if it had cured properly, it likely wouldn’t have bonded well to the used, oily gasket surface.
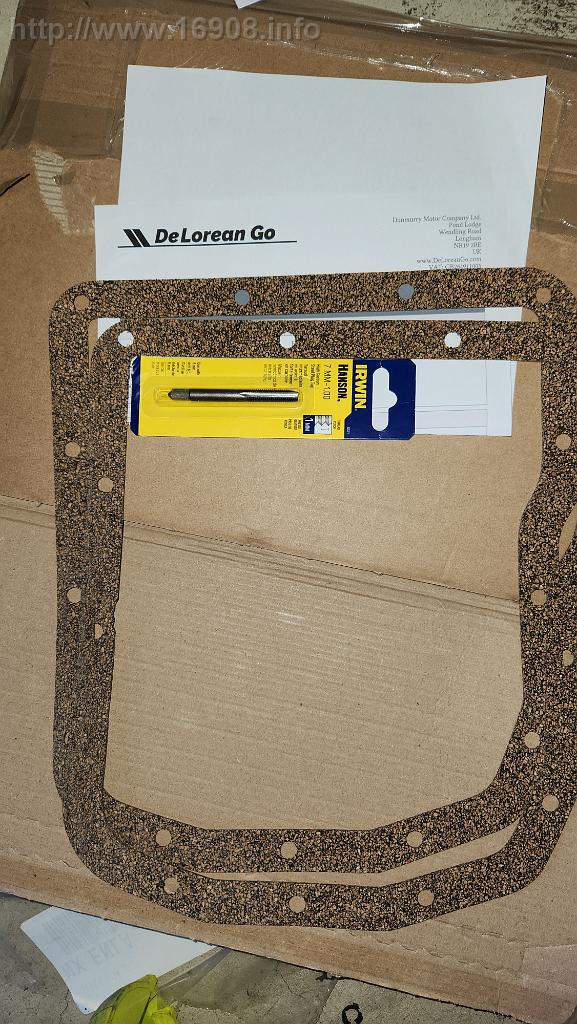
May 28th: I ordered two new transmission pan gaskets from DeloreanGo. They’re nitrile-bonded cork gaskets—a modern, more flexible version of the original cork type that seals very well. I bought a spare due to my previous sealing troubles and the high shipping cost from Europe. This is the second time I’ve purchased this gasket.
May 29th: I bought an M7 tap to clean out the transmission’s bolt holes, checked the bolt depths, and replaced a few M7 bolts. One bolt hole had been drilled and tapped for a larger bolt by a previous owner, and another hole was completely stripped. I worked around the stripped hole by inserting the bolt from the outside and securing it with an M7 nut on the pan side:

I cleaned the pan once again, and painted it gloss black. The paint will help, right?
June 1st: The new gaskets arrive from Europe. I cleaned off the mating surfaces, used a thin layer of Permatex ultra black on both sides of the gasket, and slathered the bolts with the same Permatex while bolting the pan back to the transmission.

June 3rd:
I refilled the transmission fluid once again, and this time it’s holding steady! I checked for leaks, ensured all wiring was safely away from the exhaust, and placed my fire extinguishers inside the car. After lowering the car onto wheel dollies, I moved it away from the garage wall and finally set it down on the ground. Then, for the first time in seven months, I started the car, backed it out of the garage, and took it for a short drive up and down the street, shifting into 3rd gear.
During the drive, I noticed another coolant leak near the alternator. I quickly stopped the leak from dripping onto the alternator and later repositioned and tightened a hose clamp to fix the issue.
June 7th: I drove the car around 4 miles today, without any issues. I filled up the gas tank to dilute the old gas.

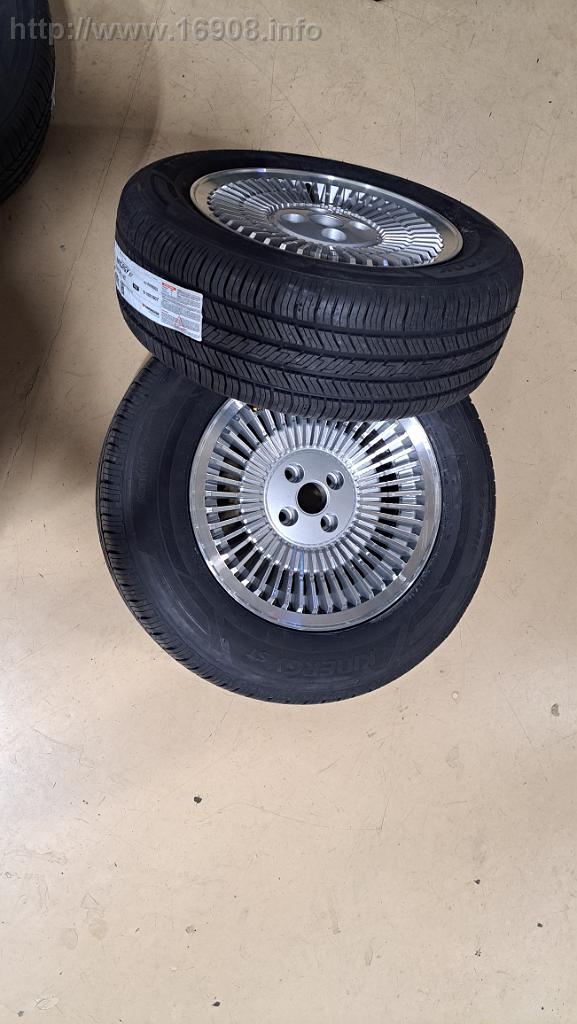
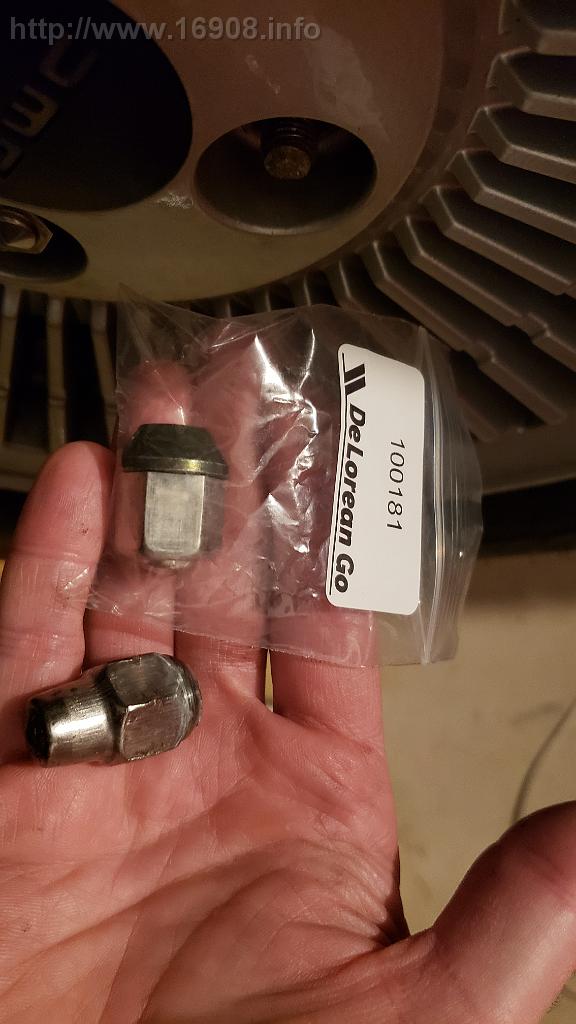
…and here’s a lug nut that needed to be replaced, since it never matched. I bought this with another item, which I never documented:

Wrapping Up
I was not able to keep track of all the bolts, which probably totaled around $5 to $10.
I still have a few tasks left in the engine compartment. Reinstalling the engine compartment light and repainting the engine cover will be treated as separate projects. I need to reinstall the air intake hose, its bracket, and the coil compartment cover. I’d also like to paint the air cleaner. Additionally, I want to find a better alternative to zip ties for securing the vacuum hoses. Finally, the engine compartment needs a thorough cleaning and detailing.


That’s it. This project quickly got out of hand because I didn’t investigate the bolt stuck in the Valley of Death sooner. I made plenty of mistakes along the way, but I managed to keep the project moving and get back on track. While the engine was out, I also tackled several other necessary repairs that would have been much harder otherwise. I received great help throughout the process and learned a lot. Although I didn’t keep exact track of the hours, I estimate I spent over 200 on the project. Despite being the biggest and most expensive project I’ve taken on with the car, I ended up spending far less than I initially expected.
Costs:
|
Purchase Date
|
Vendor |
Quantity
|
Cost
|
Shipping |
Tax
|
Total
|
| Irwin Hanson High Carbon Steel Metric Plug Tap 7 – 1.00 mm |
5/29/2023
|
Ace Hardware |
1
|
$6.99
|
$0.00
|
$0.52
|
$7.51
|
| Automatic Transmission Pan Gasket / Auto Box Seal |
5/28/2023
|
DeloreanGo.com |
2
|
$18.99
|
$37.99
|
$0.00
|
$75.97
|
| CV bolt |
4/3/2023
|
Ace Hardware |
2
|
$3.40
|
$0.00
|
$0.61
|
$8.20
|
| bolt |
4/3/2023
|
1
|
$0.79
|
| Stainless Bolts, misc bolts |
3/23/2023
|
Ace Hardware |
|
$20.22
|
$0.00
|
$1.62
|
$21.84
|
| Brass Tee for heater hose |
3/19/2023
|
88 Miles |
1
|
$25.00
|
$0.00
|
$0.00
|
$25.00
|
| 1 Foot Gates Heater Hose 28431 |
2/28/2023
|
O’Reilyy Auto Parts |
8.00
|
$1.99
|
$0.00
|
$1.27
|
$17.19
|
| Permatex Ultra Black |
3/13/2023
|
Autozone |
1
|
$10.79
|
$0.00
|
$0.86
|
$11.65
|
| Aluminum Flat Stock – 3Ft 1/8″ x 1″ |
1/20/2023
|
Menards |
1
|
$7.98
|
$0.00
|
$0.68
|
$8.66
|
| Porsche 930 Chromoly Single Axle Boot Flange For 86-2227 or 86-9320 CV Axle Boots 1/2″ Flange Lip |
4/2/2023
|
Kartek.com |
1
|
$35.99
|
$16.64
|
|
$66.71
|
| EMPI 86-2227 Porsche 930 Small Rubber CV Axle Boot For KTK8693020 Or KTK930SDBF Double Boot Flanges |
4/2/2023
|
Kartek.com |
1
|
$7.99
|
|
| Thread Locker Gel |
4/10/2023
|
Advance Auto Parts |
1
|
$17.99
|
$0.00
|
$1.44
|
$19.43
|
| Distilled Water |
4/27/2023
|
Meijer |
1
|
$13.29
|
|
$1.17
|
$19.24
|
| Prestone Antifreeze |
1
|
$1.19
|
|
| Otterstat Seal |
4/12/2023
|
Delorean Midwest |
1
|
$1.23
|
$0.00
|
$2.01
|
$27.93
|
| LH Waterpump hose |
1
|
$24.69
|
|
| seals |
3/13/2023
|
Delorean Midwest |
2
|
$1.00
|
|
$15.14
|
$2.00
|
| Braided Stainless Main fuel line |
1
|
$94.56
|
|
$94.56
|
| Braided Stainless return fuel line |
1
|
$74.21
|
|
$74.21
|
| Water pump hose upper |
2
|
$2.37
|
|
$4.74
|
| Hot Water Valve |
1
|
$19.88
|
|
$19.88
|
| axle boot |
3/10/2023
|
Delorean Midwest |
4
|
$14.95
|
|
$15.14
|
$59.80
|
| intake seal |
6
|
$1.56
|
|
$9.36
|
| m8 copper washer |
4
|
$0.69
|
|
$2.76
|
| m12 copper washer |
5
|
$0.59
|
|
$2.95
|
| Intake maniford w pipe gasket |
1
|
$1.42
|
|
$1.42
|
| Rustoleum Gloss Black |
|
Home Depot |
1
|
$4.99
|
|
$0.37
|
$5.36
|
| Rustoleum Smoke Gray |
|
Home Depot |
1
|
$4.99
|
|
$0.37
|
$5.36
|
| SEM Trim Gloss 39063 |
4/1/2023
|
Amazon.com |
1
|
$21.91
|
$0.00
|
$1.70
|
$23.61
|
| Engine Enamel Primer |
|
Meijer |
1
|
$7.29
|
|
$0.55
|
$7.84
|
| Engine Enamel Paint |
|
Meijer |
1
|
$7.29
|
|
$0.55
|
$7.84
|
| Transmission Fluid |
2/23/2023
|
Walmart |
2
|
$17.98
|
$0.00
|
$2.79
|
$38.75
|
| Cushioned Stainless Hose Clamps 1″ (12 pack) |
3/20/2023
|
Amazon.com |
1
|
$10.99
|
$0.00
|
$3.09
|
$42.06
|
| Peromi 4-pack 40-43mm T-Bolt hose clamps stainless |
2
|
$14.99
|
| Peromi 4-pack 20-22mm T-Bolt hose clamps stainless |
3/21/2023
|
Amazon.com |
2
|
$13.09
|
$0.00
|
$1.96
|
$27.35
|
| Drywall Screws |
2/12/2023
|
Home Depot |
1
|
$4.98
|
$0.00
|
$0.40
|
$5.38
|
| 2X4 – 92 5/8″ Prime Whitewood Stud |
2/9/2023
|
Home Depot |
2
|
$3.34
|
$0.00
|
$0.48
|
$7.16
|
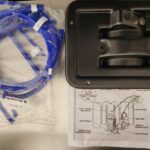
| Coolant System Pressure Tester – Loan A Tool |
11/25/2022
|
Advance Auto Parts |
1
|
$264.99
|
$0.00
|
$21.20
|
$0.00
|
| Wheel Lug Nut |
4/29/2022
|
DeloreanGo.com |
1
|
$4.38
|
$14.99
|
$0.00
|
$64.36
|
| Silicone Vacuum Hose Kit (Blue) |
1
|
$45.99
|
| Copper Sealing Washers Fuel System Kit |
4/13/2008
|
SpecialTAuto.com |
1
|
$12.95
|
? |
$0.00
|
$12.95
|
|
|
|
|
|
|
|
$829.02
|