New Front Wheel Bearings

At DCS 2014 in Dayton, OH, my front right wheel bearing started making groaning noises at high speeds.

I had to rent a puller set and spindle nut socket set from Advance Auto Parts (fully refundable).
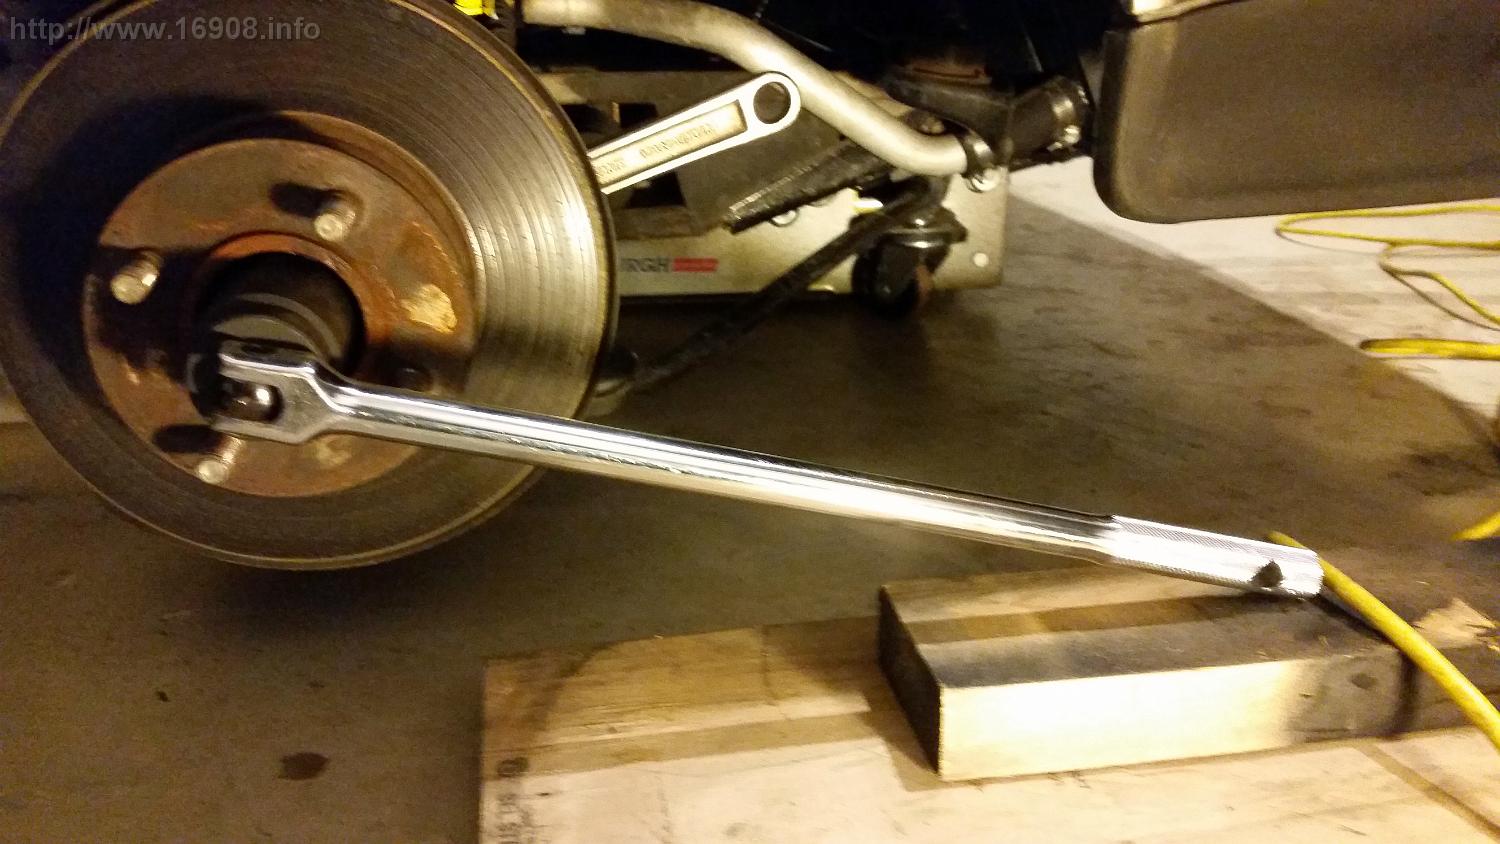
Getting the spindle nuts off was easy. I used a breaker bar, and simply lowered the car near the floor, with the weight of the car pressing on the breaker bar:
20150111_132128
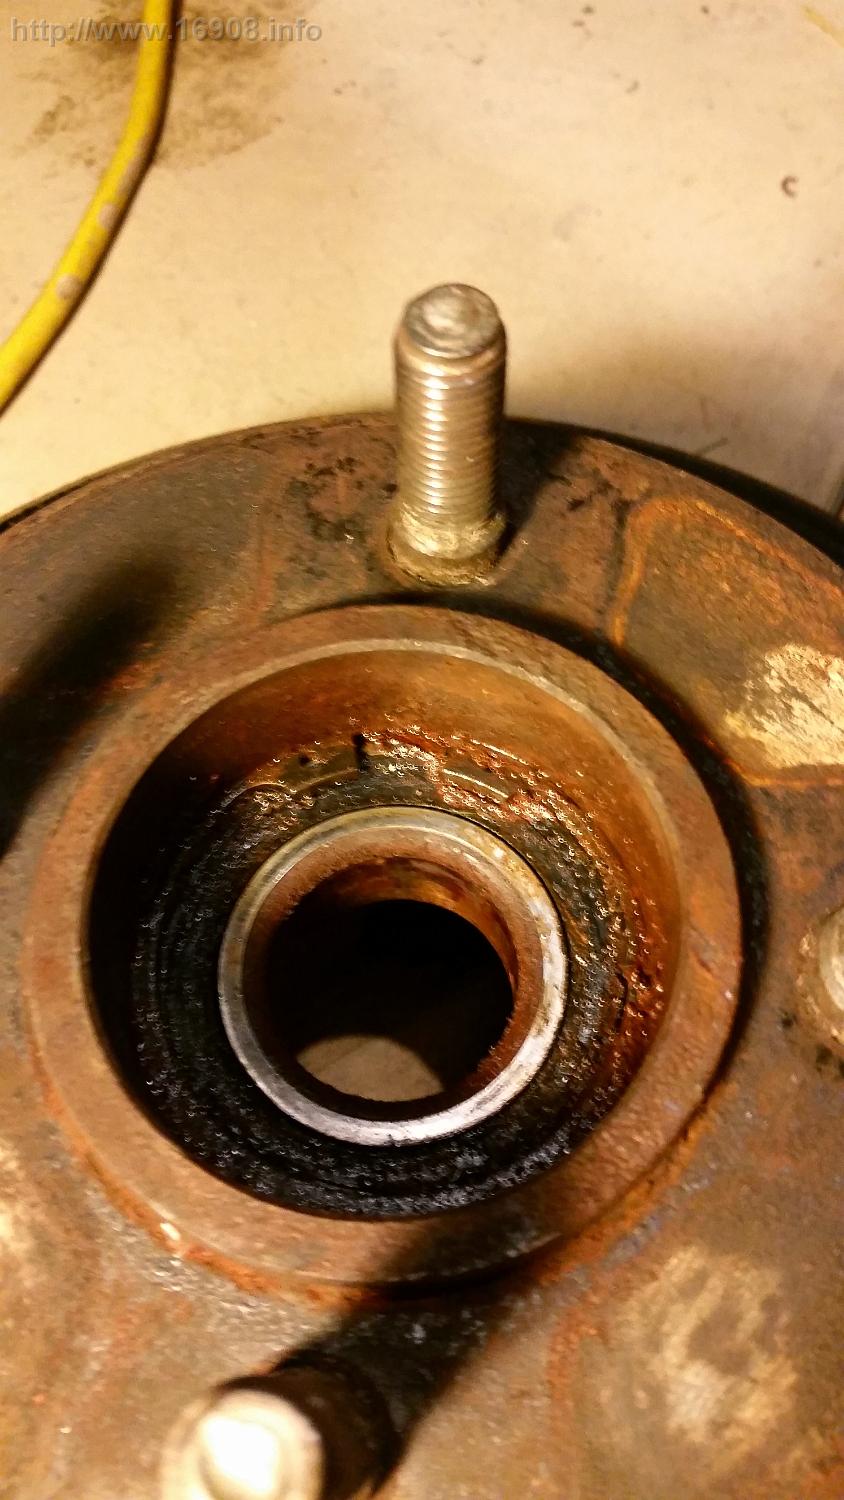
Next, I use a pick tool to remove D Washer:
20150111_133504 20150111_133625
Then used a puller to pull off the bearing, hub and rotor:
20150122_204849
The bearings came apart during removal, which is normal:
20150111_141645 20150111_14164920150122_204908
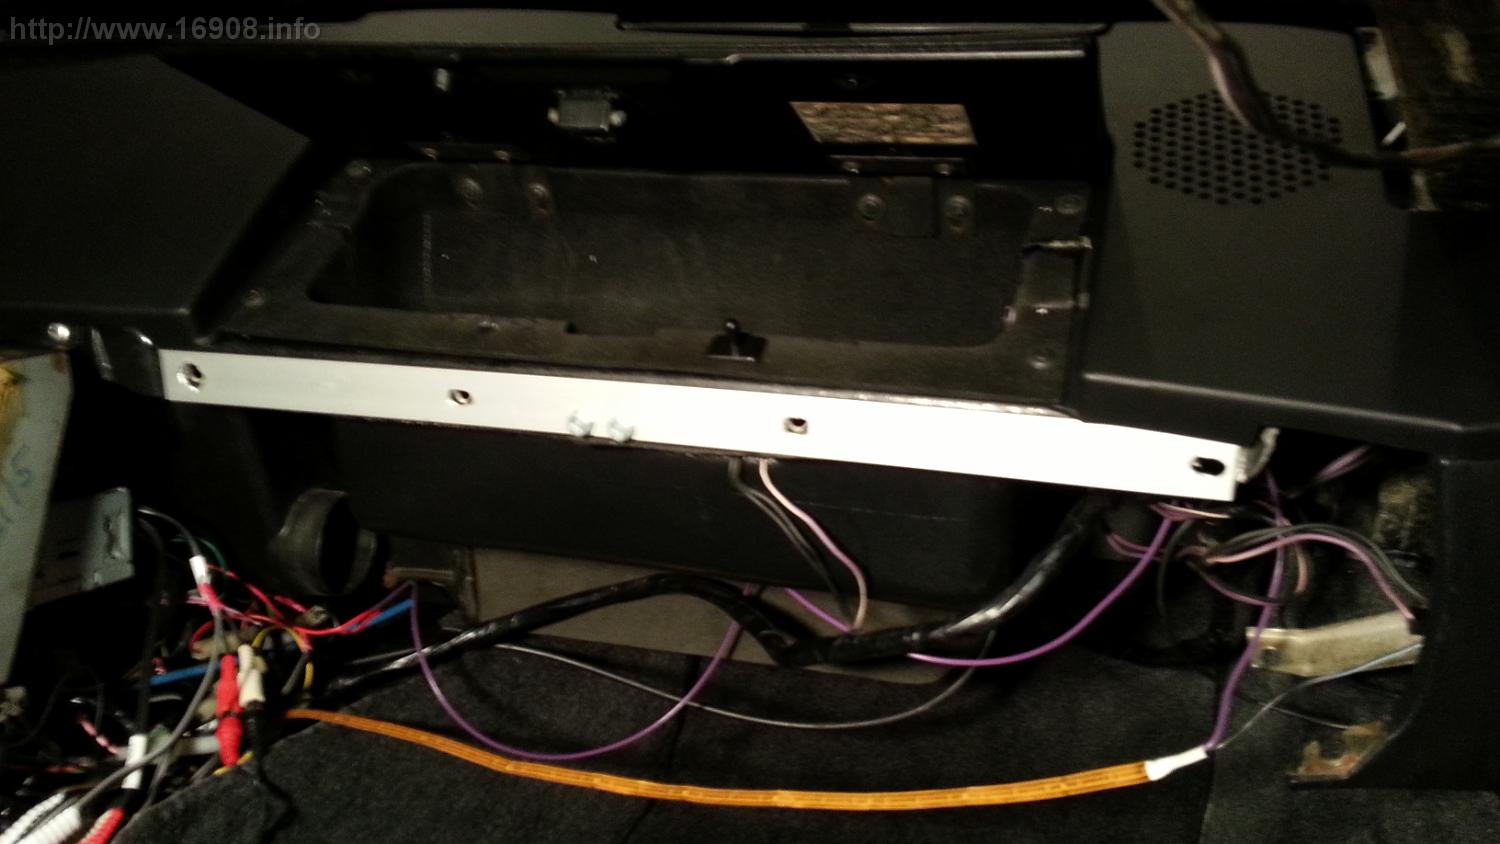
Then, unbolt the rotor from the hubs, and separate them. Sorry, no pictures.

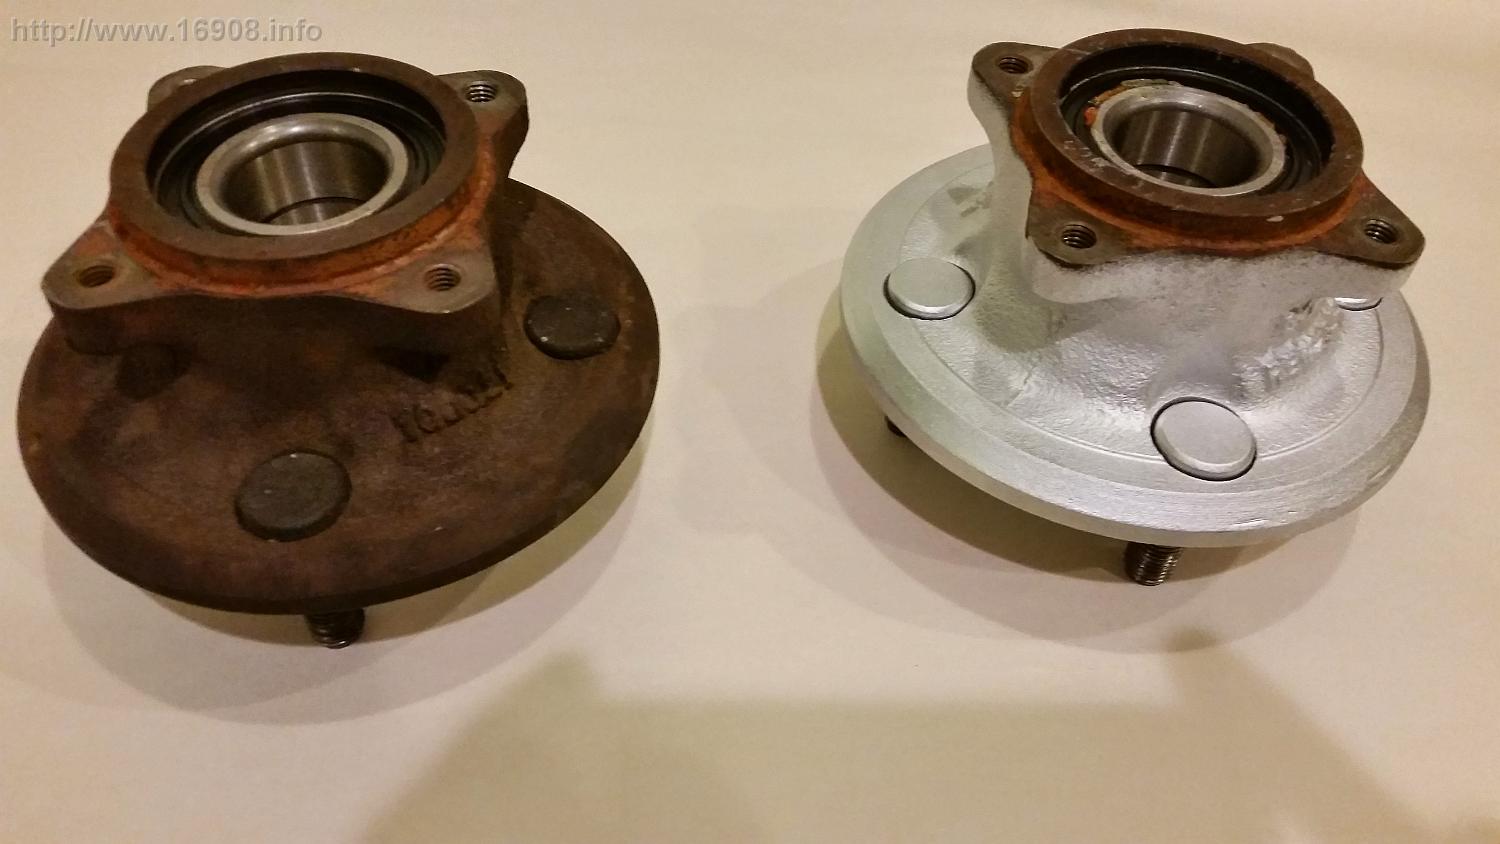
Removing the old bearings and pressing the new bearings into the hubs was going to be a challenge. Instead of having my new bearings shipped, I visited the DMC Midwest shop with the hubs. I purchased the new bearings, and they were able to press them into my hubs.

DMC Midwest suggested I should have blasted and painted the hubs while the bearings were out. Well I didn’t have time for that, so instead I taped them up, and painted them with the new bearings in place:
20150211_203246DSC_0704

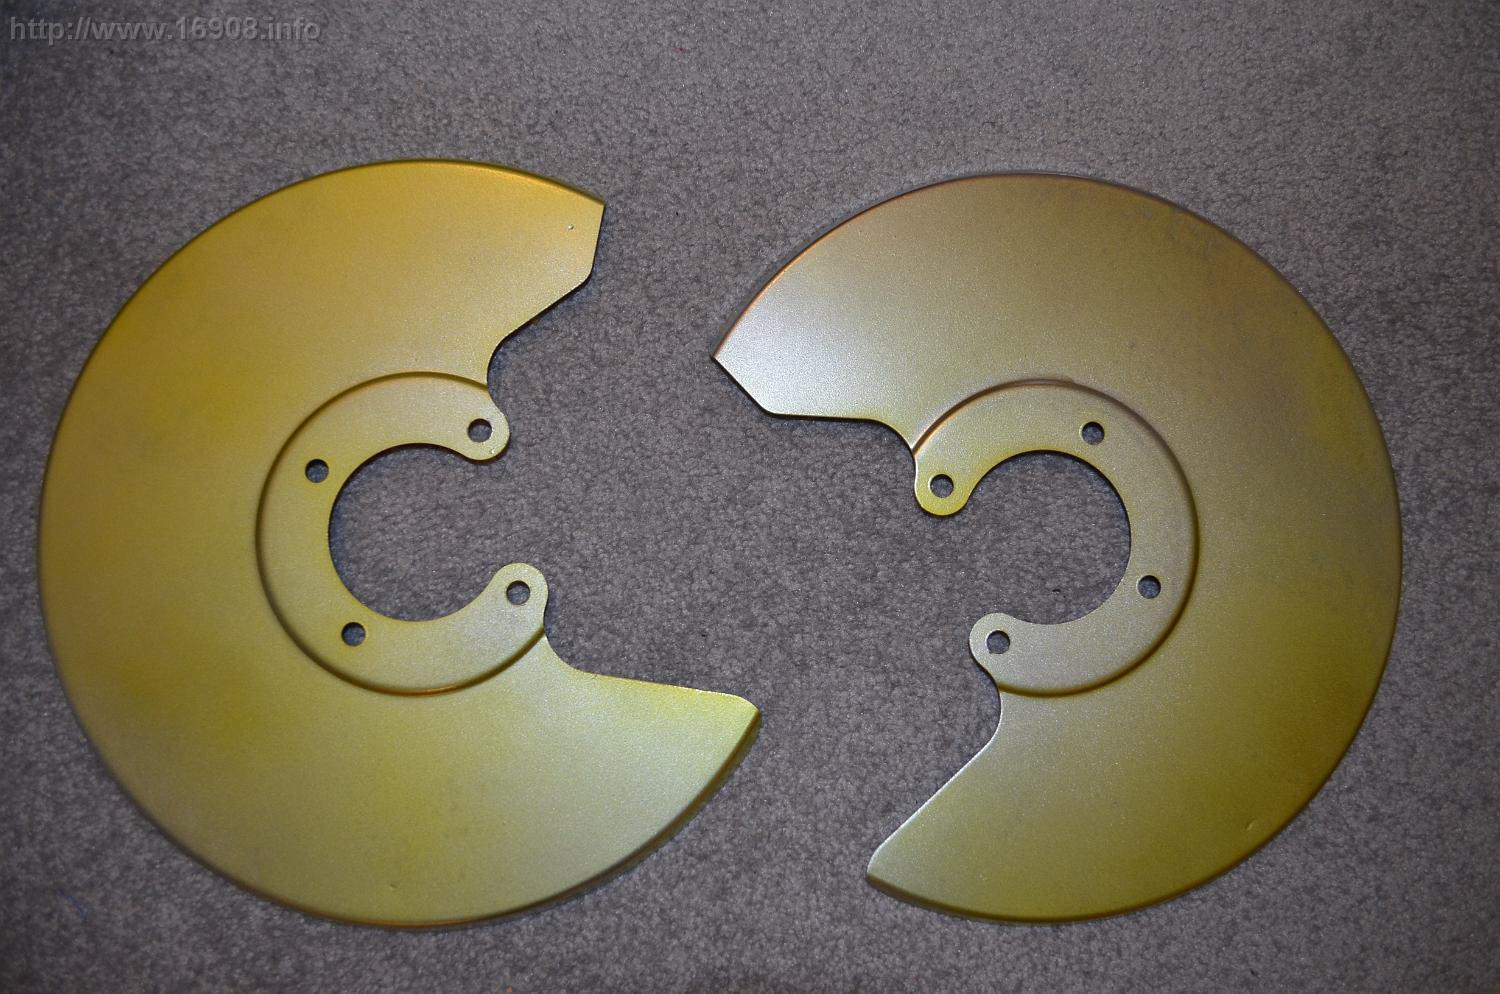
I also wire brushed off the undercoating from the brake dust shields, and painted them with rustoleum metallic paint, then a coat of Krylon Metals Gold paint:
DSC_0705 DSC_0706
Doing this job in the winter time helps. My car is left in a cold garage, while I left the rotor and hub in my warm house. Installation is easier with the cold spindle slightly contracted. Mounted, spindle nut installed, and torqued:
DSC_0707 DSC_0708

I’ve driven a few hundred miles on them in 2015, and the groaning noises are gone.

Costs:

Item Vendor

Quantity

Unit Cost

Cost

Wheel Bearing DMC Midwest

2

$ 19.94

$ 39.88

Press in Wheel Bearings DMC Midwest

1


Withheld 

Bulldog Adhesion Promoter

On Hand

Rustoleum Primer

On Hand

Rustoleum Metallic Paint

On Hand

Krylon Metals (Gold) Paint

On Hand

Shermer, Illinois Photo Shoot

If you’re a fan of 1980s John Hughes films like Sixteen Candles, Weird Science, and The Breakfast Club, you might know they are all set in the fictitious town of Shermer, IL.

Most of the filming for these movies was done in the northern Chicago suburbs. I had always wanted to see some of these locations, and shoot some “then and now” pictures. On the morning of Sunday, September 28th, 2014, I packed up the Delorean with my camera, tripod, and set my GPS for Shermer… or rather Des Plaines, IL. I’m just now getting a chance to post the picures.

My first stop was the former Maine North High School. The school opened in 1970, but was closed only a few years later, and later repurposed as an Illinois State Police Headquarters. The empty school was a prime candidate for filming every scene in The Breakfast Club, and a few scenes in Ferris Bueller’s Day Off.
Shermer1
Here’s Molly Ringwald’s Character arriving for detention:
Shermer2
Here’s how it looks today.
Shermer3_2 Shermer3
Here’s Judd Nelson’s character arriving for detention:
Shermer4
And here’s me, trying my best to re-create the same picture:
Shermer5

Now I’ll skip ahead to the end of the movie when everyone leaves. This picture is great because you can just barely see all the main characters, and John Hughes playing the dad of Brian (Anthony Michael Hall):
Shermer60
Here’s my version (just a cropped version from an earlier pic):
Shermer71
Here’s Emilio and Ally:
Shermer80
And the same setting in 2014:
Shermer90
Molly and Judd:
Shermer100Shermer110
Same area as before, just a different angle:
Shermer120
Here’s a cool shot from the entrance, and you can see the red house behind Judd Nelson when he arrives:
Shermer125

That’s really all I could shoot here. I wasn’t going to try and get inside the building. A few months later, a friend sent me a link to this New York Times article, where the author, and John Hughes’s son go into the building:
http://www.nytimes.com/2014/12/21/travel/the-teen-streets-of-john-hughess-chicago.html

Next, I wanted to see the High School where Ferris Bueller picks up his girlfriend in the Ferrari. This is Glenbrook North High School in Northbrook, IL, which is also where John Hughes himself went to High School:
Shermer130
Sloan getting picked up:
Shermer140
Ferris Waiting:
Shermer150
The Delorean and I aren’t nearly as exciting, but here we are. It took a long time to position the car in the same parking lines:
Shermer160
I tried to line this picture up perfectly:
Shermer170
…but I just couldn’t do it with the lens I brought. It actually worked better with my cell phone:
Shermer180
Ferris, Sloan, and Cameron driving away:
Shermer190
The Delorean:
Shermer200

Well, that’s everything I shot in the limited time I had. I hope to travel out there again in the future, reshoot some pictures that didn’t turn out as well, and possibly visit some new locations. Thanks for viewing!
Shermer250


Painted License Plate Bezel

My bezel was flat and dull looking:
DSC_0243
Painting with SEM Trim Black Gloss:
20140518_215146
Painted:
DSC_0242
I also painted the screws with some Rustoleum Black Spray paint.
20140522_193749

Costs:

Item Vendor

Quantity

Unit Cost

Cost

Shipping

Tax

Total

SMM-39063 SEM Paint, Trim, Gloss Black, Aerosol, 12 oz. Summit Racing

1

$11.97

$11.97

On Hand

$0.00

$11.97

Rustoleum Black Spray Paint On Hand

1

On Hand

On Hand

Auto Shifter Plate

I purchased this new in 2012, and only just now installed it. Not only is it aesthetically pleasing, it helps keep everything in place. My plastic shifter plate was warped after many years in the sun, and this metal plate reinforces the plastic, keeping it flat.

Before:

IMAG0583

After:

DSC_0271

I think it works well with the new steering wheel:

DSC_0269

 Costs:

Item Vendor

Quantity

Unit Cost

Cost

Shipping

Tax

Total

Auto Trans Plate DMOCO.com

1

$ 59.95 $ 59.95 $ 7.50 $ – $ 67.45
Trim Screws with finish washers Ace Hardware

2

$ 0.57 $ 1.23 $ – $ 0.09 $ 1.23

Total:

$ 68.68

Re-sealed, Painted Spare Tire

I previously replaced the rubber on my spare tire: https://16908.info/?p=1136

The tire wasn’t holding air, and the tire was loose at the bead. I brought it back to Discount Tire, and they re-sealed it with bead sealer. They even did it for free!

DSC_0272

I then cleaned the rim with Simple Green, roughed it up with some steel wool, vacuumed it, and cleaned it with rubbing alcohol:

DSC_0274

Then I prepped it with two light coats of Bulldog Adhesion Promoter, and painted it with Rustoleum High Performance Wheel Paint:

DSC_0275

Finally, tire gloss:
DSC_0276

I checked the tire pressure. 60psi. Ready to go, but hopefully it stays in the trunk.
DSC_0285 DSC_0287

Costs:
Re-Seal Tire @ Discount Tire: Free!
Simple Green: On Hand
Steel Wool: On Hand
Rubbing alcohol: On Hand
Bulldog Adhesion Promoter: On Hand
Tire Gloss: On Hand
Rustoleum High Performance Wheel Paint: $6.00?

Stereo Upgrade

I’ve always thought my stereo sounded way to thin, and needed an upgrade. There was practically no bass in the system at all. The previous owner installed a pretty basic head unit and speakers:

20131228_182454  DSC_0242
DSC_0240 DSC_0241 (2)

While my side panels were off, I decided to replace the speakers:
DSC_0221DSC_0222

These speakers got good reviews with the other Delorean owners, and fit the rear location, albeit with better hose clamps and some persuasion:
DSC_0224DSC_0223

I also took the time to upgrade the front dash speakers. I’m glad I did since the speakers the previous owner installed were very low quality. I found some Pioneer speakers that fit the location perfectly:
DSC_0230

After some searching, I decided to upgrade the head unit as well. The new one features Bluetooth hands-free calling and audio streaming, wired external microphone, voice recognition, Pandora, USB direct control for iPod/iPhone, Android Media access, a remote control, and more.
20140425_185241 

DSC_0212 

It’s been said the stock wiring might not handle a modern stereo’s electrical needs. I took the time to run a new 12 Gauge yellow wire from the positive post behind the rear wall. A fuse holder is spliced into the wiring. Sorry, I didn’t get any pictures of that.

My upgraded negative battery cable features a smaller wire that was currently being unused. I found a new use for it: dedicated ground for my stereo.
20140425_145755

Upgrading the wiring meant I got to remove all the glass fuses behind the dash:

DSC_0241

While my A pillar trim is removed, I ran the cable for the microphone up the A pillar:
 DSC_0242 (2)

The result: The new features of the head unit are great!
DSC_0247
I still think the sound quality isn’t great. It needs more bass. I’m going to have to investigate a subwoofer.

Costs:

Item Vendor

Quantity

Unit Cost

Cost

Shipping

Tax

Total

Infinity 529I 165W (Peak) 5-1/4 -Inch Two-Way Speakers (Pair) Amazon.com

1

$73.49

$73.49

$0.00

$0.00

$73.49

Pioneer TS-A878 3 1/2 Inch 2-Way Speakers Amazon.com

1

$33.27

$33.27

$0.00

$0.00

$33.27

Pioneer Bluetooth USB SIRI Mixtrax MVHX360BT Amazon.com

1

$85.00

$85.00

$0.00

$0.00

$85.00

Hose Clamps Ace Hardware

2

?

?

$0.00

?

$5.37

Black Primary Wire O’Reily Auto Parts

1

$6.99

$6.99

$0.00

$0.58

$7.57

Yellow Primary Wire Advance Auto Parts

1

$6.99

$6.99

$0.00

$0.58

$7.57

Fuse Holder Advance Auto Parts

1

$3.29

$3.29

$0.00

$0.27

$3.56

heat shrink tubing (assorted box) Advance Auto Parts

1

$10.99

$10.99

$0.00

$0.91

$11.90

Butt connections Advance Auto Parts

1

$2.99

$2.99

$0.00

$0.25

$3.24

Ring Terminals Advance Auto Parts

1

$3.49

$3.49

$0.00

$0.29

$3.78

Assorted disconnect terminals On Hand


Split Cable Wrap On Hand


Total

$234.74


New Pull Straps

My pull straps had seen better days. They didn’t even match – one is leather, the other is vinyl: DSC_0226

Vendors were out of stock for many months. I finally found someone that had them made, albeit the “early style” with the ring:
DSC_0173

I took the time to replace some rusty screws and speed nuts. I also needed new bolts to hold them to the door:
DSC_0195

I cut them apart, and squeezed them into my “late style” trim:
DSC_0196

Done:
DSC_0227

Costs:

Item Vendor

Quantity

Unit Cost

Cost

Shipping

Tax

Total

Black Pull straps DMCTalk Member

1

$69.99

$69.99

$0.00

$0.00

$69.99

Metric bolts to hold straps Ace Hardware

4

$0.39

$1.56

$0.00

$0.12

$1.68

Screws Ace Hardware

4

?

?

?

$0.00

$2.28

Speed Nuts Ace Hardware

4

?

?

?

0

Total

$73.95

New Power Outlets

My cigarette lighter was broken, and the power outlet’s green plastic was cracked. I found an excellent replacement on ebay for $5.29 shipped: http://www.ebay.com/itm/360678268535
attachment DSC_0209

I knew that even if it didn’t fit, for that price I would make it fit. But yes, it fits perfectly. It’s a little more modern looking, and it’s blue! I measured the lighter drawing under 7.5 amps, and the lamp under 0.8 amps. I don’t know what the stock lighter draws since mine is broke. The only drawbacks I found were the light requires a separate ground, and it’s a little dim. I didn’t check, but I think the bulb is incandescent. I cut my wiring harness and added another female disconnect connector for the lamp’s ground.
DSC_0215
The power outlet I bought through ebay comes in other colors, even green.

I also wanted to add some power outlets behind the dash for electronics:
10242
Fuse 17 is rated at 20 amps. My cell phone and dash cam combined draw less that 1 amp, and my ’83 also doesn’t have a clock on Fuse 17. Adding two more outlets wasn’t a problem. Since Fuse 17 is live all the time, I decided on another mod:


After some fast shipping with DMC-MW, I cut the wiring harness and put a switch in the middle of the circuit. So now all my power outlets are controlled by the switch. This allows me to stop and start my dash cam whenever I want without touching the cam or the power connector.

My A Pillar trim is off the car right now, so I’ll be running the power for the dash cam behind the trim, then above the headliner.

Costs:

Item  

Quantity

Unit Cost

Cost

Shipping

Tax

Total

Blue Auto Power Outlet/Lighter ebay

1

5.29

5.29

5.29

Double Power Outlet O’Reily Auto Parts

1

6.69

6.69

0.45

7.14

Purple Primary Wire 14 Gauge 1 Foot O’Reily Auto Parts

4

0.31

1.24

0.08

1.32

On/Off Switch, Console (Pair) DMC Midwest

1

69.95

69.95

12.99

5.42

88.36

Electrical Disconnects On Hand


Heat Shrink Tubing On Hand

Total

$ 102.11

New Custom Mirror Switch

I liked the look of the new Mirror Switch available from DMC-Houston, however the price was a little high for an unneeded upgrade. I know it’s made from a mirror switch used in a Saturn, so decided to try and make my own. I went to a salvage yard, and found one. Next I made a plastic plate to hold the switch:
DSC_0331     DSC_0350

I found the wiring connector online at britishwiring.com. I also found wiring diagrams online to help me figure out all the connections.
DSC_0530

I didn’t like how the DMC-Houston switch looked upside-down:
DSC_0527
I could see the polarity of the mirror motors was opposite of what the switch was. Up was down, Right was left, and so on. The options I had were:

  1. Do what DMC-Houston did: flip the switch upside–down, and swap the right and left mirror wires
  2. Reverse the wiring in my cars wiring harness.

I choose option 2. I pried the wire connections out of the mirror connectors, and reversed them. If the cars next owner ever tries to install an original switch, they’re going to hate what I did!
DSC_0528
Original mirror switches have been going for a good price on ebay, so I decided to sell mine.
DSC_0510 auction

Since I bought my car in 2007, my passenger mirror hasn’t had up and down functionality. I was happy to find out during testing that it was a dirty/bad connection.

I actually finished the switch in mid-2013, however I wasn’t able to finally install it until now due to my door panels being removed. Here it is, finally installed:
DSC_0220DSC_0219

From the pictures, it looks like the interior is still kind of dusty. Time for a complete detailing.

Costs:
(It’s not too often I make money!)

Item Vendor Cost
Mirror Switch Sale Ebay

$ 105.00

Ebay fees Ebay

$ (14.50)

Paypal fee Paypal

$ (3.50)

Shipping FedEx

$ (12.96)

9-Way 3mm Pin & Socket Connector BritishWiring.com

$ (16.50)

Saturn Mirror Switch Salvage Yard

$ (6.00)

Black Plastic On Hand

$ –

SEM Black Landau Color Coat On Hand

$ –

Profit

$ 51.54

New Dash, Dash Mat Mod

My previous owner had the dash recovered in the wrong vinyl, and the look was beginning to bother me. The dash has a “puffy” look when it’s recovered, and my defroster vents look like they’re being swallowed. Also, the edges didn’t fit together perfectly. I finally decided to buy a new reproduction dash.

20131229_103420 20131229_10344420131229_103341DSC_0001DSC_0003 (2)DSC_0007

The defroster vents also developed a bow from the slightly oversized dash. I wanted them straight and flush up against the new dash, which meant I had to bend them back into shape. The screws used to hold them in ran up right against the windshield. Removing the screws was a delicate process. I had to put some fabric over the windshield to protect it from screws and my screwdriver. If you ever attempt this, stuff some rags in the vents so you don’t drop screws down them. Removing the defroster vents also allowed me to clean the vents, and vacuum some crud from beneath them. I also went the extra length of painting the new vent screws black. 

 DSC_0054
I used a heat gun to warm the defroster vents, and straighten them. The new, painted short screws made the vents easy to reinstall.

The mounting holes for the passenger knee pad were broken. There’s already a steel reinforcing plate right below the glove box lid. I removed it, and added a longer one I made from aluminum.
20140310_204340 20140310_215554

I never found a method I liked to attach my dash mat to the dash. I didn’t want to damage the dash with glue or adhesive. I got an idea to use magnets. The reproduction dash is hollow underneath. I salvaged some magnets from some old mechanical hard drives, and epoxied them under the dash.

DSC_0003DSC_0002

Once I installed the dash, I protected it with wax paper, and put magnets on top of the dash. I carefully spread some epoxy on top of the magnets, and laid down the dash mat. After the epoxy cured, I removed the dash mat with its magnets.20140329_204643 20140330_082249

I had some felt sewn (Thanks Mom!) over the magnets, so dash won’t be scratches by the magnets. The stitching is visible on top of the dash mat, but I don’t mind. I use the mat to keep the cabin cool during drives, and to protect the dash from sun damage. Otherwise I remove it when displaying the car at shows. The dash mat now snaps right into place when you lay it out.
20140403_210302 DSC_0157

Here’s a tip: When installing the dash, adding a washer and threading on a nut under the dash can be tricky with little room for your fingers. Use a strong magnet on top of the dash right over the stud (remember to also protect the dash from magnet scratches). The washer will jump up in place, and stay put while you struggle to get the nuts on.
DSC_0055 DSC_0057
DSC_0058 DSC_0155

My 1983 Delorean was originally intended to be a 1982 model, and originally had a VIN plate riveted to the dash. However it was re-VIN’d as an ’83, the riveted VIN plate was removed, and a glued VIN plate was installed. The glued VIN plate was transferred to the recovered dash, and eventually fell off a few years back. I cleaned the paint off with steel wool and acetone. After a quick paint job with SEM trim black, it’s secured back in place with some 3M molding tape. I’ve happy to finally have this small detail done.
DSC_0148 DSC_0152


Costs:

Item Vendor

Quantity

Unit Cost

Cost

Tax

Shipping

Total

Dash Pad Black DMC Midwest

1

$ 299.00

$ 299.00

$ 23.17

$ –

$ 322.17

Screws for defroster vents Ace Hardware

6

$ 0.11

$ 0.66

$ 0.01

$ –

$ 0.67

1″ X 3′ Aluminum Stock Menards

1

$ 9.99

$ 9.99

$ 0.85

$ –

$ 10.84

$ 333.68